Office 365 Exchange Server Settings Explained: Setup, Security, and Best Practices
This guide explains how to configure Office 365 Exchange Online, from connecting mailboxes and setting up DNS to applying security policies for safe collaboration. Learn how to integrate Outlook, Teams, and mobile apps, manage mail flow, and ensure compliance using Microsoft Defender and Purview.
Introduction
Microsoft Exchange Online is the cloud-based version of Microsoft Exchange that is part of the Microsoft 365 ecosystem. It provides organizations and users with a centralized platform for managing email, calendars, contacts, and tasks across devices. With Exchange Online, there is no need to maintain on-premises servers — Microsoft handles all the infrastructure, updates, and storage, being a reliable solution for companies.
Proper configuration of Office 365 Exchange server settings is important for achieving smooth synchronization across devices so that users can access their mailboxes from anywhere. When Exchange Online is set up correctly, Outlook, Teams, and mobile mail apps all work seamlessly together — messages sync instantly and calendar invitations are updated in real time.
The importance of correct Outlook Exchange server settings goes far beyond convenience. A properly configured mail system contributes directly to data protection. Misconfigured settings can lead to delivery failures, authentication issues, and even vulnerabilities that expose sensitive information.
This guide provides an explanation of how to correctly configure Microsoft Exchange settings for Microsoft 365. You will learn how to connect your Outlook desktop client, mobile devices, and tools like Teams to Exchange Online. By following these instructions, you can enjoy uninterrupted access to your email, shared calendars, and contacts, while administrators can rest assured that all communication remains secure.
Understanding Exchange Online and Its Role in Microsoft 365
Exchange Online is a core component of the Microsoft 365 ecosystem, designed to provide secure email communication in the cloud. It replaces traditional on-premises mail servers and simplifies administration while offering enterprise-grade security.
What is the Exchange server for Office 365?
Microsoft Exchange is the backbone of corporate email communication within the Office 365 (Microsoft 365) ecosystem. It is designed for handling email messages, calendars, contacts, and tasks for both individual users and entire organizations. In its cloud-based form, known as Exchange Online, it functions as part of Microsoft 365, offering a powerful, scalable, and secure platform without the need to maintain local servers or complex IT infrastructure.
Exchange Online — the cloud version of Exchange Server
Exchange Online is the hosted version of the traditional on-premises Exchange Server. It delivers all the familiar features—such as email, calendar scheduling, and contact management—but eliminates the need for server maintenance or local data backups. All infrastructure management, server uptime, and data protection are handled by Microsoft in secure data centers.
Integration within the Microsoft 365 ecosystem
Exchange Online is deeply integrated with the rest of Microsoft 365. It works hand in hand with Outlook (for desktop, web, and mobile), Microsoft Teams, and SharePoint, forming a single workspace. Through one Microsoft 365 account, users can quickly switch between their email, calendar, tasks, and contact lists on any device. For businesses, administrators can manage all mailboxes and settings via the Microsoft 365 Admin Center, making company-wide configuration simple.
Key Functions of Exchange Online
- Mail: Corporate email services with advanced security, large storage, spam filtering, and malware protection.
- Calendar: Smart scheduling tools that allow users to plan meetings and shared events in a couple of clicks. Teams and departments can use public or shared calendars for better coordination.
- Contacts: A unified address book synchronized across Outlook, Teams, and mobile devices.
- Tasks: Built-in task management features for users and teams, with integration into Outlook and other Microsoft apps to manage workloads.
Advantages of the Cloud Version over Local Servers
- Simplified Administration: IT administrators no longer need to maintain physical servers or perform manual updates — Microsoft takes care of all of this.
- High Availability: Microsoft provides a 99.9% uptime SLA, so that users can always access their mailboxes and calendars with no downtime.
- Deep Integration: Exchange Online connects seamlessly with Microsoft 365 services like Outlook, Teams, and SharePoint, offering a single collaboration environment.
- Scalability: Adding new users or scaling up capacity can be done instantly, without additional hardware investments.
- Security: The platform includes built-in encryption, multi-factor authentication, anti-spam protection, and compliance with data protection standards.
Main Steps to Configure Office 365 Exchange
Before discussing the setup process, it’s important to mention that configuring Exchange Online is about setting up a fully integrated communication platform, not just setting up a mailbox. Proper configuration allows Outlook, Teams, and mobile devices to sync smoothly. It also makes sure that security policies are in place, and collaboration features work perfectly.
How to configure the Exchange server in Office 365?
Exchange Online is managed centrally through the Microsoft 365 Admin Center, which makes it easy to use for both small businesses and large enterprises. The admin panel is available at https://admin.cloud.microsoft/. To configure the Exchange server, you need to have an administrator role.
Typical configuration steps include:
- Mailbox creation: Set up user accounts and assign Exchange Online mailboxes to each employee. To create or delete a mailbox, use the Microsoft 365 Admin Center at https://admin.cloud.microsoft/. To create and manage settings for shared mailboxes, go to https://admin.exchange.microsoft.com/#/mailboxes
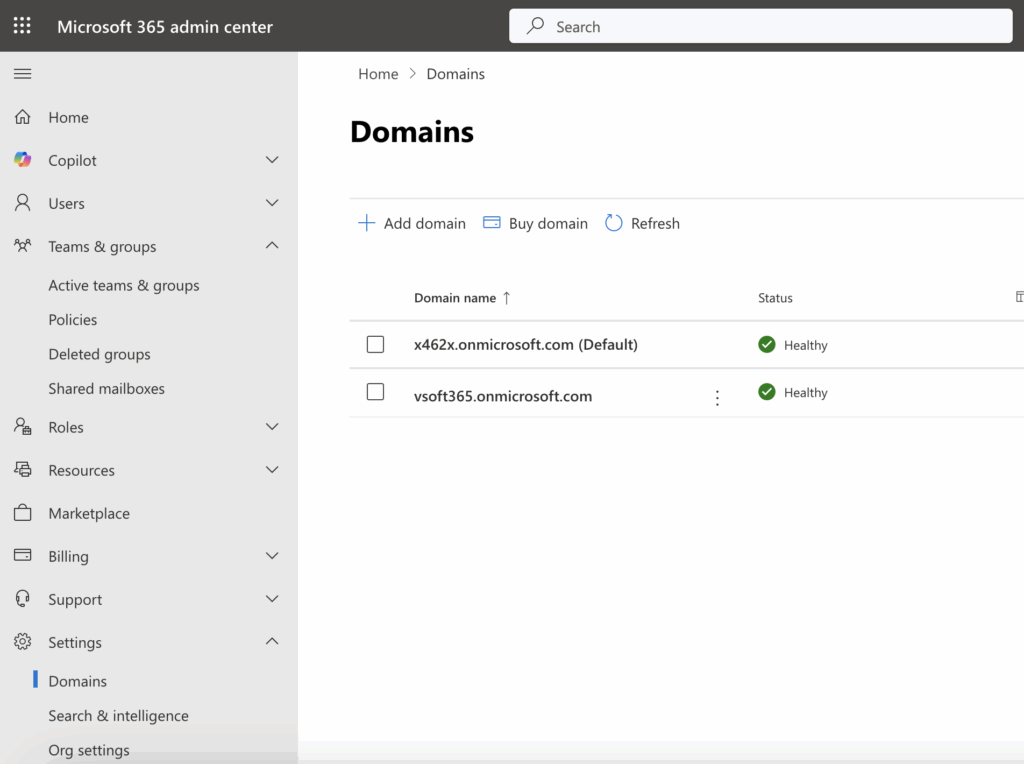
- Domain addition: Link your organization’s domain to Microsoft 365 for branded email addresses. To do this, find “Domains” under the Settings menu on the left. Click “+ Add domain” and follow the configuration instructions. In the setup process, Microsoft also provides a helpful video that explains how to configure DNS records, including MX, CNAME, and TXT records, which are essential for proper mail routing and authentication. This video guides you step-by-step to ensure your domain is set up correctly for Microsoft 365 services.
- Security policy configuration: Apply anti-spam filters, enable encryption, and implement multi-factor authentication for secure access.
- Anti-spam filters and email protection:
Manage these settings in the Microsoft Defender portal at https://security.microsoft.com under Email & Collaboration > Policies & Rules > Threat policies > Anti-spam policies. Here, you can create or modify policies that filter inbound and outbound email to protect against spam and phishing. - Encryption and data loss prevention (DLP):
Configure encryption and DLP policies in the Microsoft Purview compliance portal at https://web.purview.azure.com/ under Solutions > Information protection and Data loss prevention. These help control how sensitive content is encrypted and shared.
- Multi-factor authentication (MFA):
Enable and manage MFA in the Azure Active Directory portal at https://aad.portal.azure.com under Users > Multi-Factor Authentication settings. This adds an extra layer of security for user sign-ins. - Preset security policies:
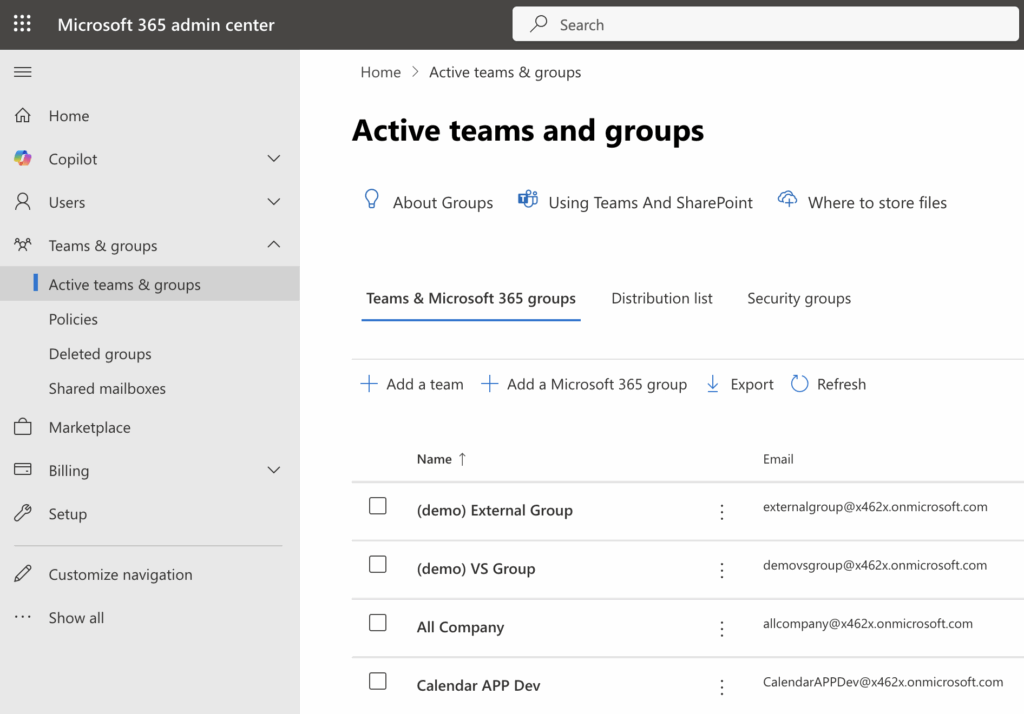
Microsoft also offers preset security policies in Microsoft Defender to quickly apply recommended security controls across your organization. - Group management: Create shared mailboxes, distribution lists, and Microsoft 365 groups for team communication. To find configurations for Teams and shared mailboxes, click on “Teams & groups” in the Microsoft 365 Admin Center, where you will find all these options.
Microsoft supports this process with built-in setup wizards, documentation, and recommended Office 365 Exchange server settings, so that companies without IT staff can complete the configuration quickly.
Creating and Configuring Mailboxes
In Exchange Online, adding new users and creating their mailboxes is done directly through the Microsoft 365 Admin Center. When an administrator adds a new user, the system automatically creates a corresponding mailbox in Exchange Online, linking it with the organization’s domain and authentication system.
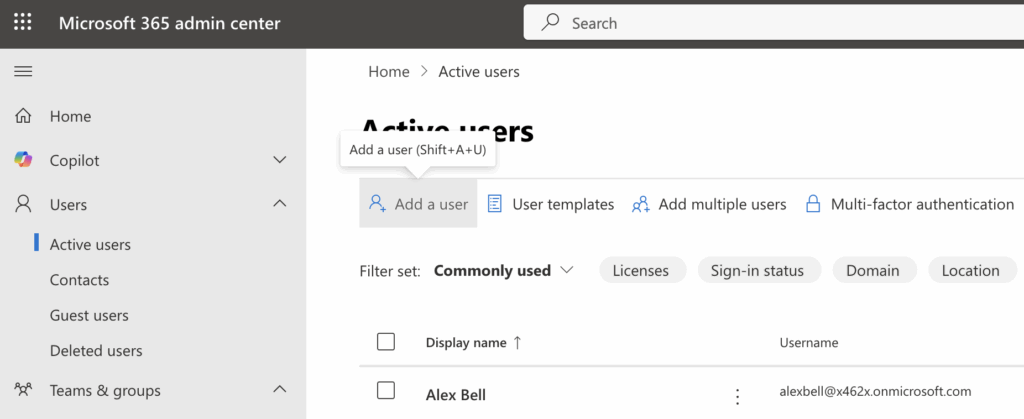
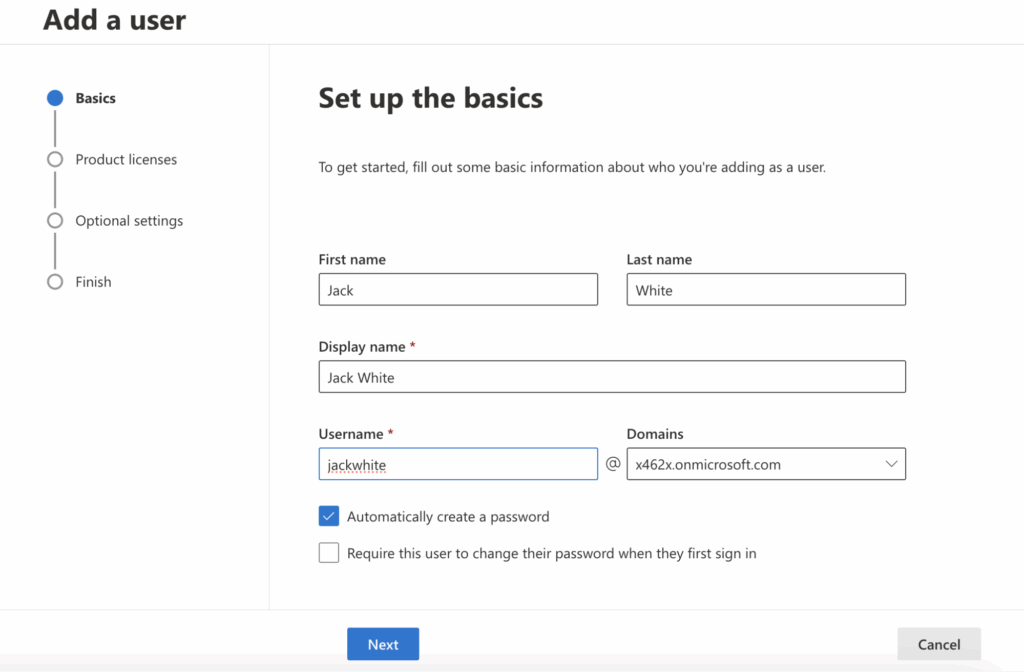
The process is simple and includes entering the following key settings:
- Create the user by specifying their first and last name, display name, and username (which becomes their email address).
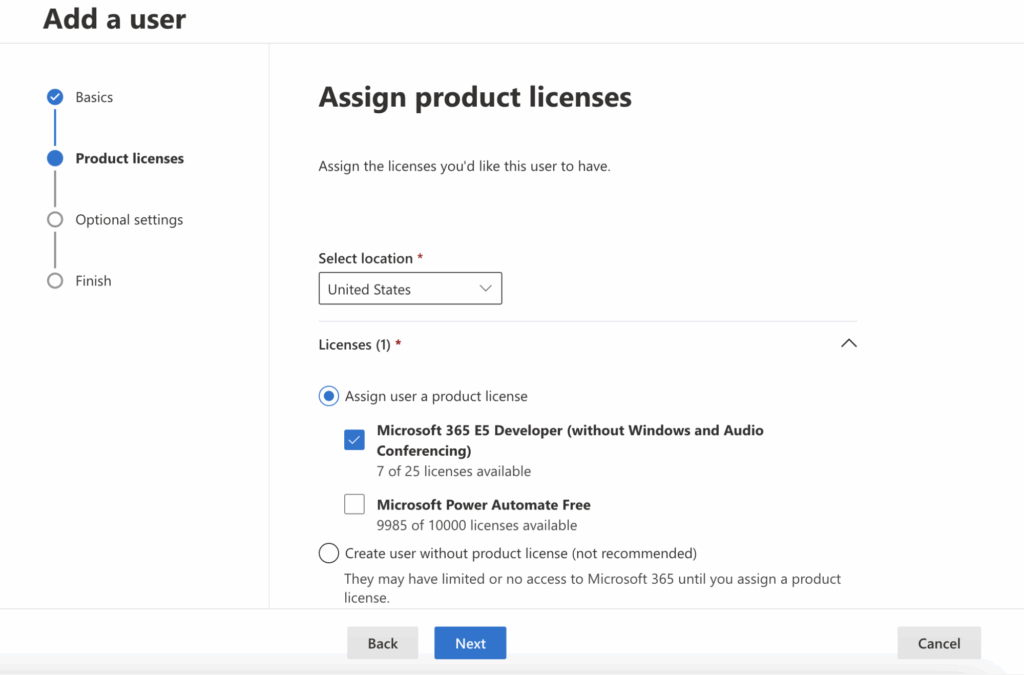
- Assign a Microsoft 365 license to the user to enable access to apps like Exchange Online, Teams, etc.
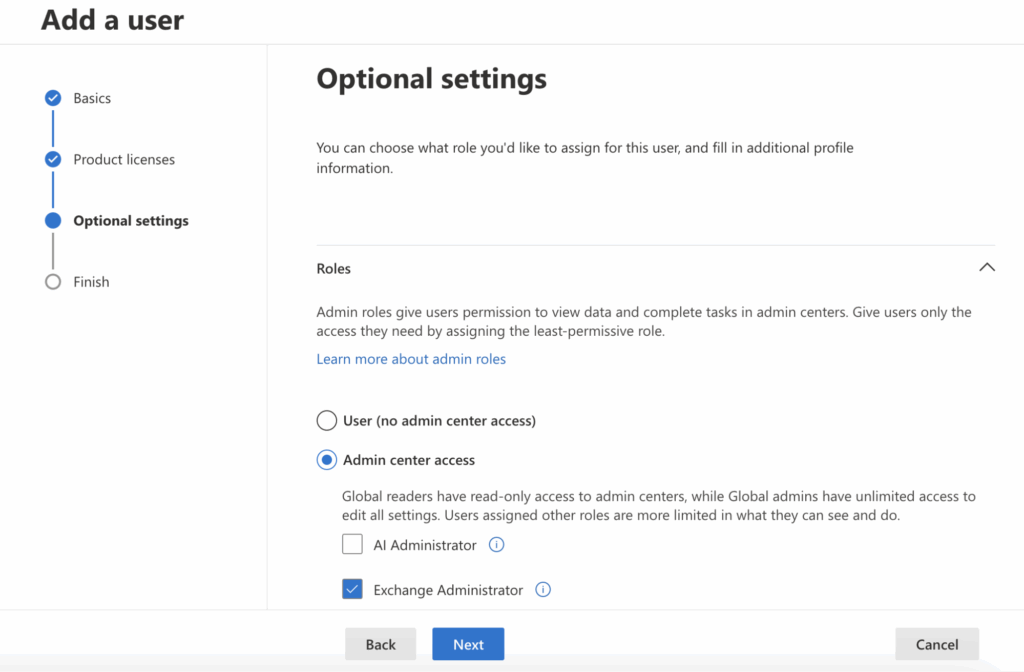
- Optionally, assign administrative roles if the user needs special permissions beyond a regular user.
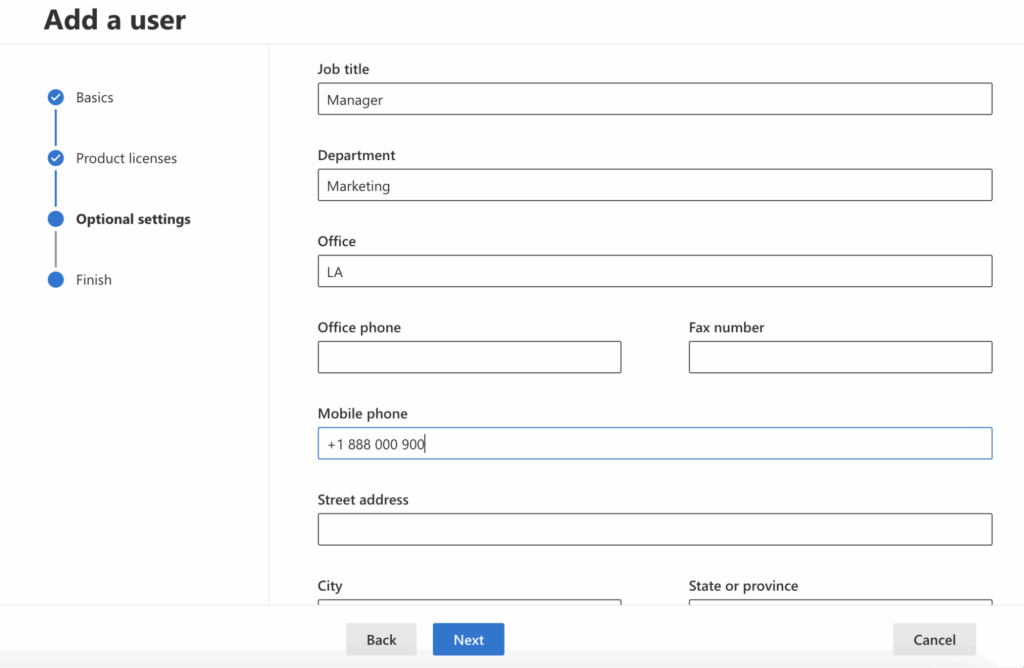
- Optionally, fill in profile information such as job title or department.
Once the mailbox is created, the user can immediately sign in through Outlook on the web or desktop, and all settings will automatically synchronize across connected devices.
Some core user settings like retention policy, mailbox size/quotas, and access permissions can be managed separately in the Exchange Admin Center or Microsoft Purview Compliance portal rather than during user creation. You can find these settings here:
- Retention policy: Managed via the Microsoft Purview Compliance portal at https://web.purview.azure.com/ under Solutions > Data lifecycle management > Retention policies. Here, you can create and assign retention policies to mailboxes.
- Mailbox size and quotas: Managed in the Exchange Admin Center (EAC) at https://admin.cloud.microsoft/exchange#/mailboxes. Go to Recipients > Mailboxes, select a user mailbox, and modify quota settings under mailbox features.
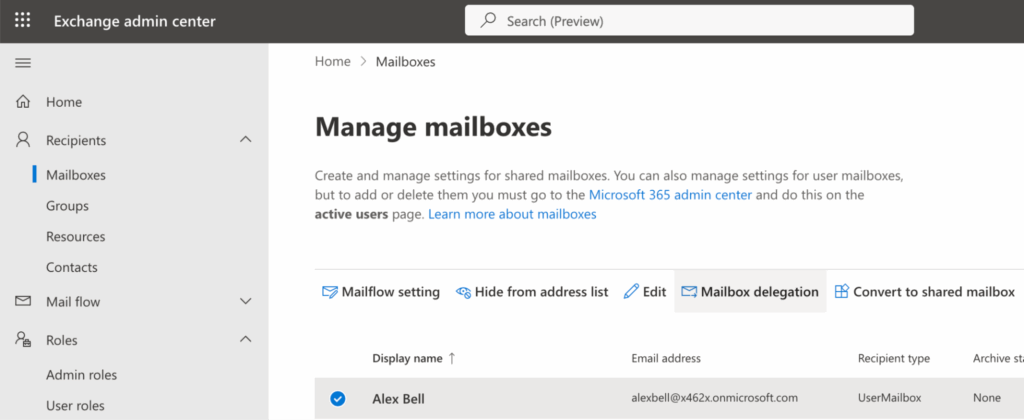
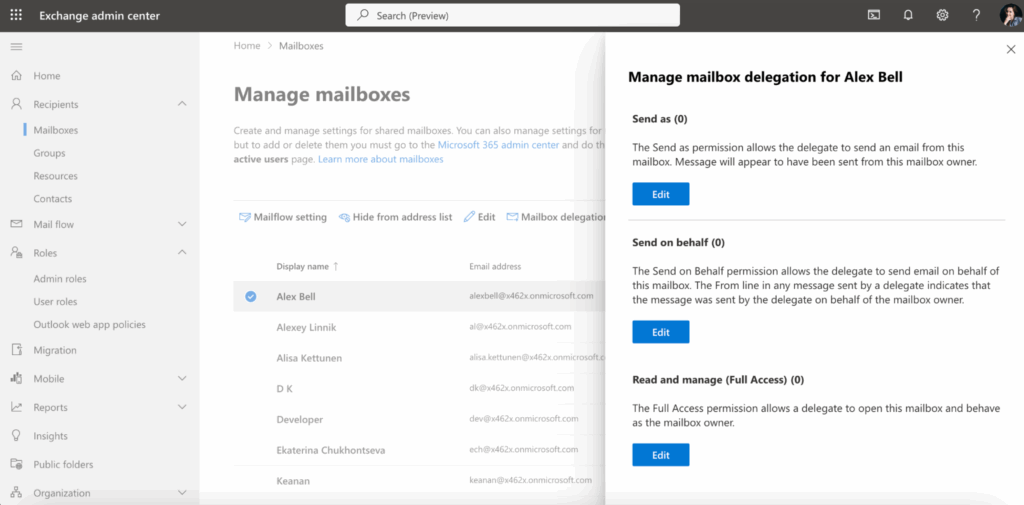
- Access permissions: Also configured in the Exchange Admin Center under Recipients > Mailboxes. Select a mailbox, then use the Mailbox Delegation tab to assign permissions like Full Access, Send As, or Send on Behalf to other users.
Adding and Verifying a Domain
Companies typically use their own corporate domains (for example, @company.com) for professional email addresses. To use these domains with Microsoft 365, they need to be added and verified in the Microsoft 365 Admin Center.

The typical process is as follows:
- The administrator goes to the Microsoft 365 Admin Center and enters the domain name they want to add.
- Microsoft then asks the administrator to add a TXT record to the domain’s DNS settings to verify ownership of the domain.
- Once Microsoft validates this DNS record, the domain becomes available for use in email addresses and other Microsoft 365 services.
If your domain is hosted by a popular provider like GoDaddy, the domain verification and DNS setup process in Microsoft 365 can be mostly automatic. After entering your domain name in the Microsoft 365 Admin Center, you may be prompted to sign in to your GoDaddy (or other supported registrar) account. Microsoft will then automatically create the required DNS records (TXT, MX, CNAME, etc.) on your behalf, simplifying the verification and setup process significantly.
It is important to note that until this step is completed, email will only work on the default shared domain provided by Microsoft, which ends with onmicrosoft.com. Without adding and verifying your own domain, your company cannot use branded email addresses.
👉Read about Server settings you’ll need from your email provider >>>
DNS Records Configuration
To ensure proper email functionality, it is essential to correctly configure the DNS records for your domain. These records direct mail flow and provide important protections against spam and phishing.
The key DNS records include:
- MX (Mail Exchange): Specifies the mail server responsible for receiving incoming email for your domain.
- CNAME (Canonical Name), such as autodiscover: Used for automatic configuration of email clients like Outlook, simplifying user setup.
- SPF (Sender Policy Framework): A TXT record that defines which mail servers are authorized to send email on behalf of your domain, helping to prevent spoofing.
- DKIM (DomainKeys Identified Mail): Adds a digital signature to outgoing emails, confirming their authenticity and integrity.
- DMARC (Domain-based Message Authentication, Reporting & Conformance): A policy that tells receiving mail servers how to handle suspicious messages that fail SPF or DKIM checks, enhancing domain protection.
Proper setup of these DNS records is critical for email delivery and effective protection against spam.
👉Read more about how to create DNS records in Microsoft’s documentation >>>
Security Policy and Spam Protection Configuration
The settings for Exchange Online Protection (EOP) such as anti-spam and antivirus features are now managed in the Microsoft Defender portal at https://security.microsoft.com, not in the classic Exchange Admin Center.
In the Microsoft Defender portal, navigate to Email & Collaboration > Policies & rules to configure anti-spam filters, malware protection, Safe Links, Safe Attachments, phishing policies, and more. This portal integrates all advanced email protection features and provides a unified management interface for Microsoft Defender for Office 365.
Microsoft Defender for Office 365 offers advanced protection including:
- Phishing protection to block deceptive emails.
- Safe Links and Safe Attachments to scan links and attachments before they are opened.
- Monitoring of suspicious activity for early threat detection.
Proper security policies help minimize the risk of cyberattacks through email.
Group and Distribution List Setup
In Microsoft 365, you can create shared distribution groups for departments or projects to simplify communication.

The differences between the group types in the “Teams & Groups” tab are:
| Group type | Purpose | Features | Use Case Example |
| Team | Collaboration in Microsoft Teams | Includes Teams channels, chat, meetings, file sharing, and is always backed by a 365 Group | For project or departmental collaboration |
| Microsoft 365 Group | Shared resources without Teams channels | Shared mailbox, calendar, SharePoint site, Planner, OneNote; no Teams chat/channels | For email, file, and calendar sharing |
| Distribution List | Email distribution only | Sends email to all members; no collaboration tools or shared resources | Sending announcements or bulk emails |
| Security Group | Access and permission management | Assigns access to resources like SharePoint, files, or applications | Managing who accesses what within the organization |
For example, emails sent to an address like hr@company.com are automatically delivered to all HR employees in the Microsoft 365 group. This way, all members stay informed without the need to add multiple recipients to each email.
Regarding access rights and management:
- You can create both public groups (accessible to everyone) and private groups (restricted to selected users).
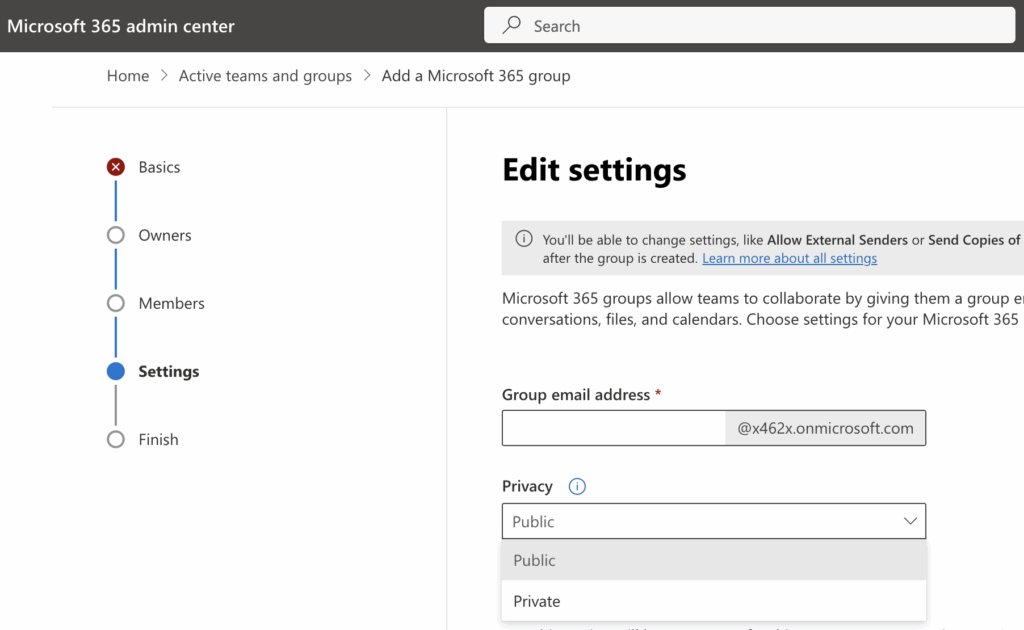
- Group owners can be assigned who manage the membership list and control access permissions.

Properly configuring these groups helps reduce the administrative burden and improves corporate communication.
Access and Client Configuration
This section covers topics related to accessing Exchange Online and configuring client applications. It explains how to connect Outlook on desktop, web, and mobile devices, set up mobile synchronization through Exchange ActiveSync, manage calendars and shared calendars for team collaboration, and synchronize contacts seamlessly across devices and clients.
Connecting Outlook to Exchange Online
Outlook is the primary client for Exchange Online and connects using the MAPI over HTTP protocol, which provides secure communication with the service.
There are three main ways to connect Outlook to Exchange Online:
- Outlook Desktop (Windows/Mac): The user enters their corporate email address, and Outlook automatically retrieves all settings using Autodiscover.
- Outlook Web Access (OWA): Accessible via any browser at outlook.office.com with Microsoft 365 credentials.
- Outlook Mobile (iOS/Android): The Microsoft Outlook app from the App Store or Google Play. Enter your email and password, and configuration completes automatically.
When DNS is configured correctly (especially the Autodiscover CNAME record), all these clients can connect automatically without any manual server settings.
👉Read Microsoft’s materials on Exchange account server settings >>>
How to Find Exchange Server Settings in Outlook?
Typically, users don’t need to manually locate server settings—Outlook detects them automatically. If you need settings for manual configuration, you can find them here:
- Outlook Desktop: Go to File → Account Information → Account Settings → Server Settings.
- Outlook Web Access: Go to Settings (gear icon) → Sync Email.
- Microsoft 365 Admin Center: Administrators can view all current server details (SMTP, IMAP, POP, MAPI).
👉Read official Microsoft’s support materials POP, IMAP, and SMTP settings for Outlook.com >>>
Standard Office 365 Exchange Server Parameters
- IMAP: outlook.office365.com, port 993, SSL
- SMTP: smtp.office365.com, port 587, TLS
- POP3: outlook.office365.com, port 995, SSL
Note: IMAP and POP usage is limited for security and functionality reasons. Connecting Outlook via Exchange (MAPI over HTTP) is strongly preferred for best performance and feature support.
Mobile Device Setup Using Exchange ActiveSync
Exchange ActiveSync is a protocol that synchronizes email, calendars, and contacts with mobile devices.
To set up an Exchange ActiveSync account on a mobile device:
- Open the device settings and choose “Add Account.”
- Enter your corporate email address and password.
- The device will automatically configure the server settings using Autodiscover. Manual server entry (typically outlook.office365.com) is only required if automatic setup fails.

This process is designed to be quick, often requiring only the email and password.
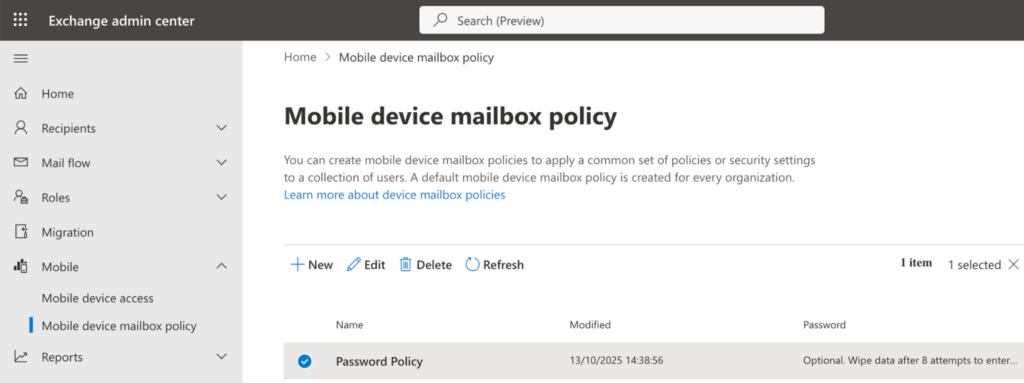
Exchange ActiveSync also enables administrators to enforce security policies on mobile devices, such as requiring a PIN or password, and allowing remote wipe of data if the device is lost.
Additionally, Exchange admins can manage which devices are allowed to connect, and create mobile device mailbox policies.
Working with Calendars
Exchange Online allows users to create both personal and shared calendars for organizing meetings and events and. Shared calendars can be linked to a group or department, such as a marketing team, for collective calendar management.
Access to shared calendars is highly flexible—permissions can be set so users may only view, edit, or create events according to their needs. This granularity lets administrators and team owners maintain security while allowing collaboration.
👉Read our Guide to Setting Up a Shared Calendar in Microsoft Office 365 >>>
Collaborative scheduling features include:
- Viewing colleagues’ availability with free/busy information, which simplifies finding suitable meeting times.
- Sending meeting invitations with automatic notifications and updates for all participants.
- Creating recurring events for regular team activities or appointments.

All calendar data is synchronized across every Outlook platform: Outlook Desktop, Outlook Web, and Outlook Mobile, so that users have up-to-date information and can access their private and team calendars on any device.
Synchronizing Contacts Between Outlook and Exchange
Exchange Online stores all contacts on the server, making them automatically available across every connected Outlook client—Desktop, Mobile, and Web. Users can save both personal contacts and shared organizational contacts.
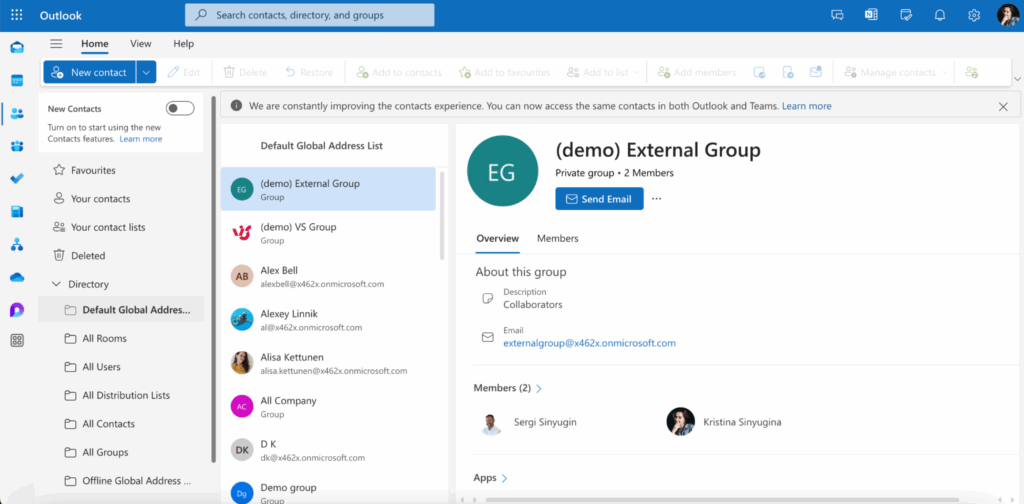
A major feature is the Global Address List (GAL), which includes all company employees, groups, and contacts. Administrators are responsible for managing user access and keeping GAL data up to date.
To access GAL, go to https://outlook.office.com/, click the People icon in the navigation, then select Directory > Default Global Address List.
Synchronization operates in both directions: any changes made in Outlook Desktop or Outlook Mobile instantly update on the Exchange server and become visible on all clients.
Exchange Online also supports advanced contact sync scenarios, including real-time updates, secure cloud storage, and support for Microsoft Entra ID (Azure Active Directory) authentication for top-notch security.
Security and Policy Management
This chapter covers essential tools and practices to protect your Exchange Online environment and ensure compliance. It includes setting up multi-factor authentication (MFA) for stronger login security. You will learn about Conditional Access policies that restrict access based on conditions like device type or location. The chapter explains protecting mailboxes from phishing and malware with Microsoft Defender. It covers managing email archiving and retention policies to meet legal requirements. You will also find information on delegating access permissions with fine-grained role control. These features help balance security and compliance in your organization.
Multi-Factor Authentication (MFA) Setup
Multi-factor authentication (MFA) adds an extra layer of security when signing into Exchange Online and Microsoft 365 accounts. It requires users to confirm their identity using a second factor beyond just the password, significantly reducing the risk of unauthorized access.
Common MFA methods include:
- Receiving an SMS code on a mobile phone.
- Using the Microsoft Authenticator app to generate verification codes or receive push notifications.
- Hardware tokens that generate one-time codes.
Enabling MFA greatly enhances account security, even if the password is compromised.
Administrators can enable MFA selectively for individual users or enforce it organization-wide through the Microsoft 365 admin center.
In the Microsoft 365 admin center, MFA settings can be found and managed in the Microsoft Entra admin center (formerly Azure AD admin center). To locate and configure MFA:
- Sign in to the Microsoft Entra admin center at https://entra.microsoft.com
- Navigate to Entra ID > Users > All users. Here you can select users and click on options related to Multi-factor authentication to enable or configure MFA on a per-user basis.
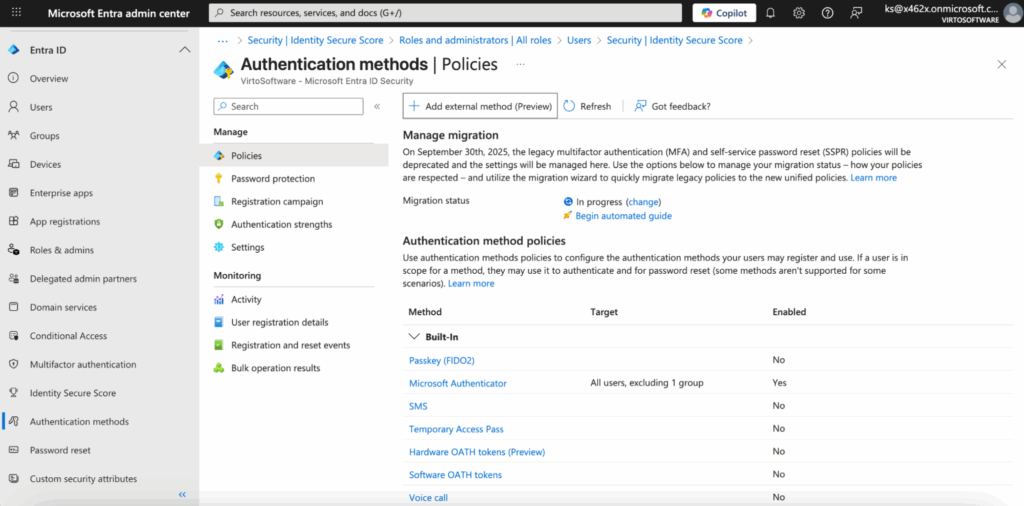
- For organization-wide policies, go to Entra ID > Authentication methods > Policies to set conditional access and MFA enforcement rules.
Conditional Access — Access Restrictions Based on Conditions
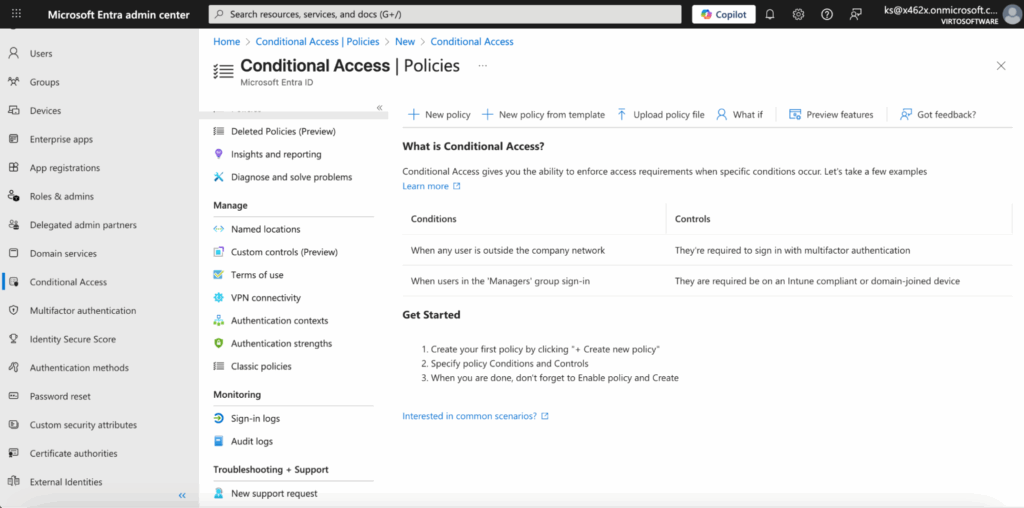
Conditional Access is a tool in Microsoft Entra ID (formerly Azure AD) that allows restricting access to Exchange Online based on specific conditions.
For example, policies can be set to:
- Allow email access only from corporate-managed devices.
- Restrict access to Outlook Web to certain geographic locations, such as only from specific countries.
- Require MFA when signing in from outside the company network.
Conditional Access helps maintain a balance between security and user convenience. It enforces security while allowing employees to work flexibly and productively under safe conditions.
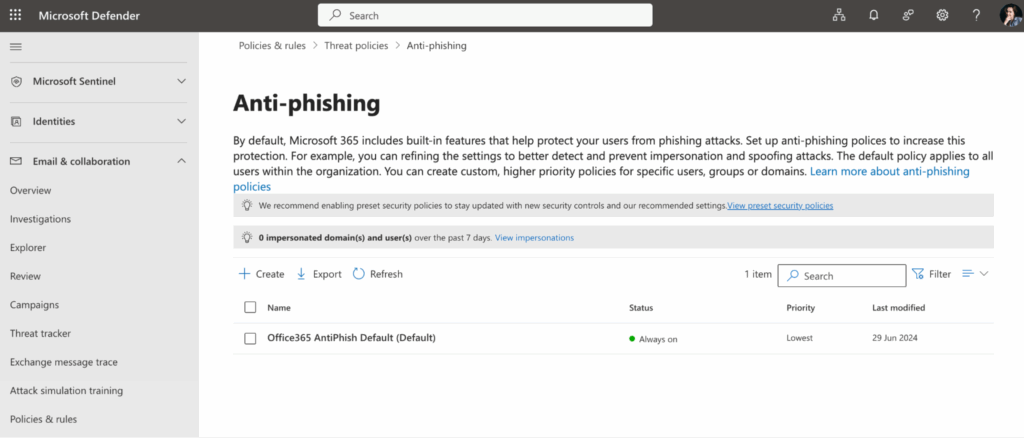
Protection Against Phishing and Malicious Attachments
Microsoft Defender for Office 365 provides tools to protect Exchange Online mailboxes from threats.
Key features include:
- Safe Links: scans links in emails before users open them.
- Safe Attachments: analyzes email attachments in a sandbox environment to detect malicious content.
- Anti-phishing policies: identify fake senders who mimic corporate domains.
Administrators have the flexibility to configure filters and manage allow/block lists of senders. Phishing protection is critical because many cyberattacks start with malicious emails.
Email Archiving and Retention Policies
Exchange Online supports flexible data retention management. Administrators can create retention policies to control how emails are stored and deleted. These settings are found in the Microsoft 365 compliance center:
- Go to https://compliance.microsoft.com
- Navigate to Solutions > Data lifecycle management > Retention policies.
Here you can create and assign retention policies, such as:
- Automatic deletion of emails after a specified period.
- Moving older emails to archive mailboxes for long-term storage.
- Retaining messages to comply with legal and regulatory requirements (compliance).
Special features like Litigation Hold preserve emails for investigations or audits. These are configured per mailbox in the Microsoft 365 admin center under Users > Active Users, select user and click on it, then go to the “Mail” tab and set Litigation Hold.
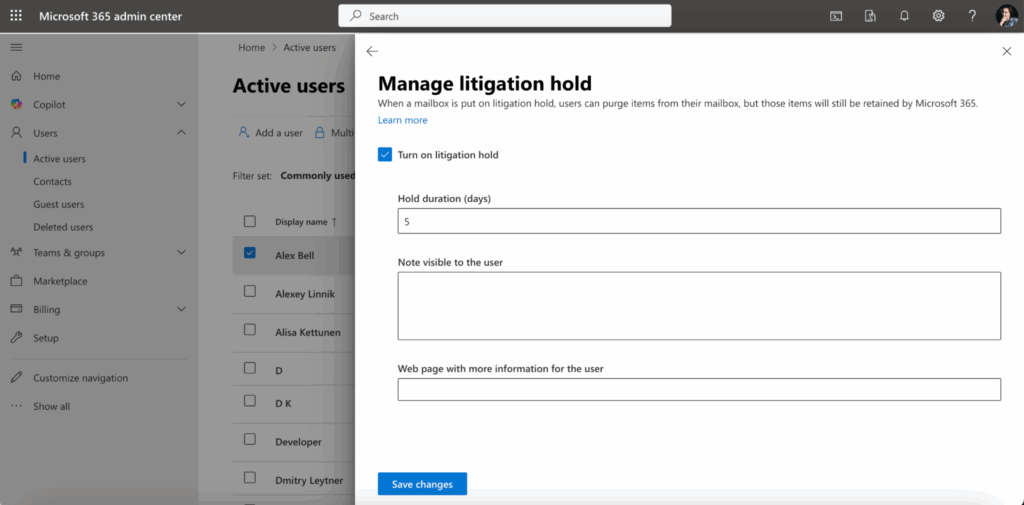
Changes may take up to 240 minutes to take effect. This process preserves the email content (including deleted and modified items) for legal or compliance purposes while allowing users to continue normal mailbox operations.
Delegating Rights and Configuring Access Levels
Exchange Online enables assigning roles and access permissions organization-wide or per user. These controls are managed in the Exchange admin center:
- Go to https://admin.exchange.microsoft.com
- Use Roles > Admin roles > Add role group to assign roles organization-wide.
- For mailbox delegation, go to Recipients > Mailboxes, select a user, and configure Mailbox delegation settings (Full Access, Send As, Send on Behalf).
Examples include:
- An assistant accessing a manager’s mailbox to read and send emails on their behalf.
- An administrator restricting access to specific features such as group creation.
- A Compliance Officer managing archives and audit logs without access to other configurations.
This roles and permissions system minimizes security risks and enforces the principle of least privilege access.
Practical Scenario: Setting Up Shared Mailboxes for Departments
A shared mailbox allows multiple employees to use one email address, such as
hr@company.com or support@company.com . This provides a unified communication point for external and internal requests. It helps reduce the load on personal mailboxes and automatically syncs the read/unread status of emails.
Benefits:
- A single point of contact for various team communications.
- Reduces clutter in personal mailboxes.
- Synchronizes mailbox status across all users accessing the shared mailbox.
Setup Process:
- Sign in to the Microsoft 365 admin center at https://admin.microsoft.com
- In the left menu, select Teams & groups > Shared mailboxes.
- Click Add a shared mailbox. Provide a name and email address for the mailbox.
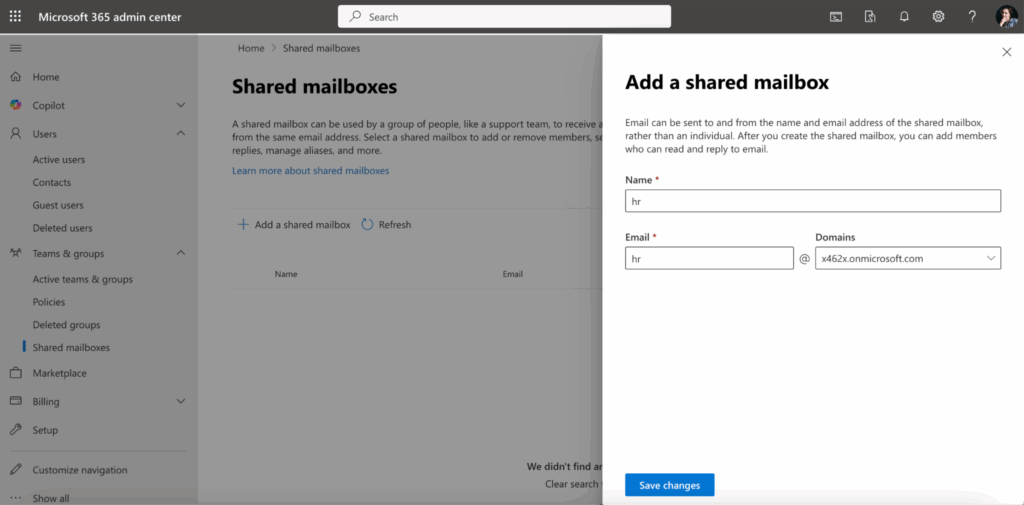
- After creation, add members who will access the mailbox.
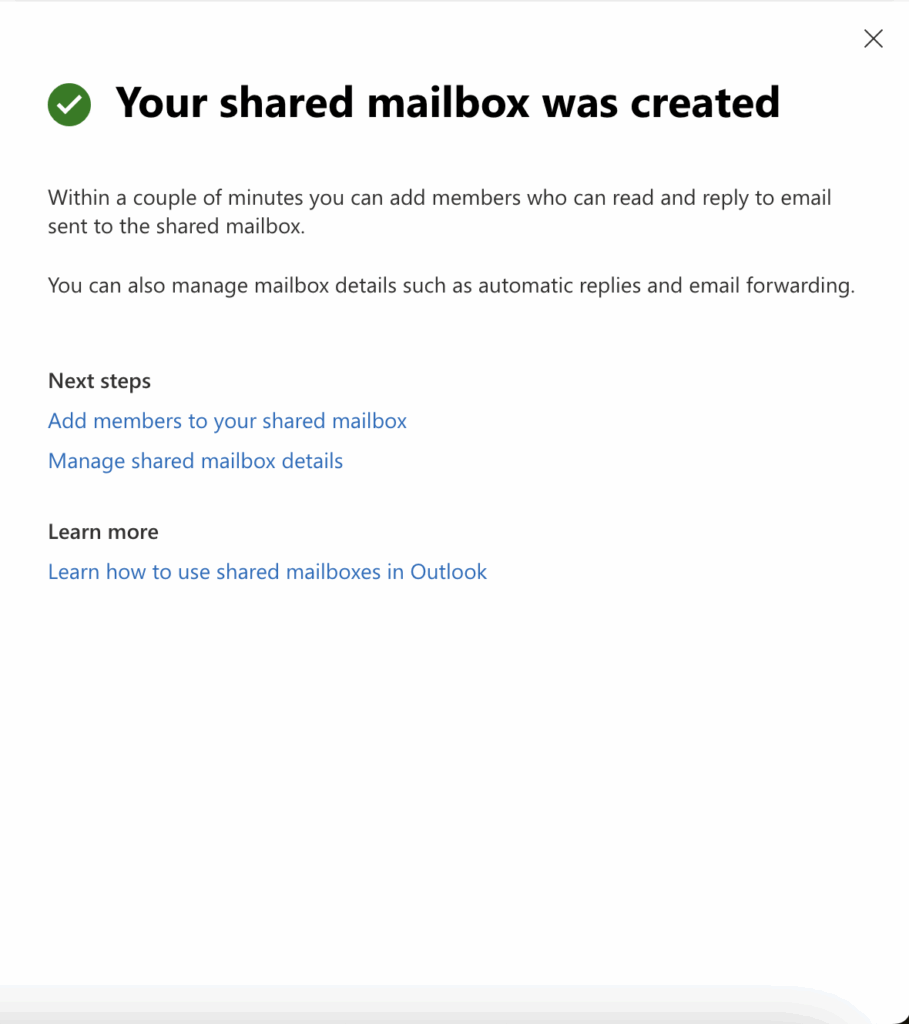
- Configure any email forwarding or rules as needed from the shared mailbox settings (open settings by clicking the mailbox name).
This setup is especially convenient for teams like support, HR, accounting, and other departments.
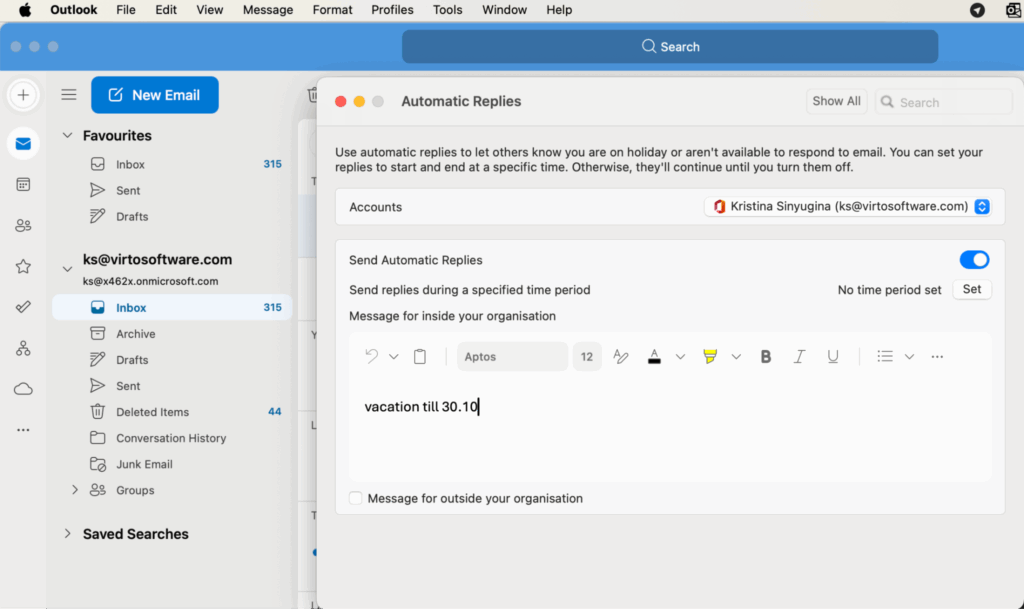
Automatic Replies (e.g., for vacations)
Exchange Online allows configuring automatic replies, commonly known as “Out of Office” replies.
Main scenarios include:
- Notifying contacts of an employee’s temporary absence.
- Redirecting contacts to another employee.
- Setting different replies for internal and external senders.
How to configure:
- Users can enable automatic replies via Outlook or Outlook Web (Outlook on the web).
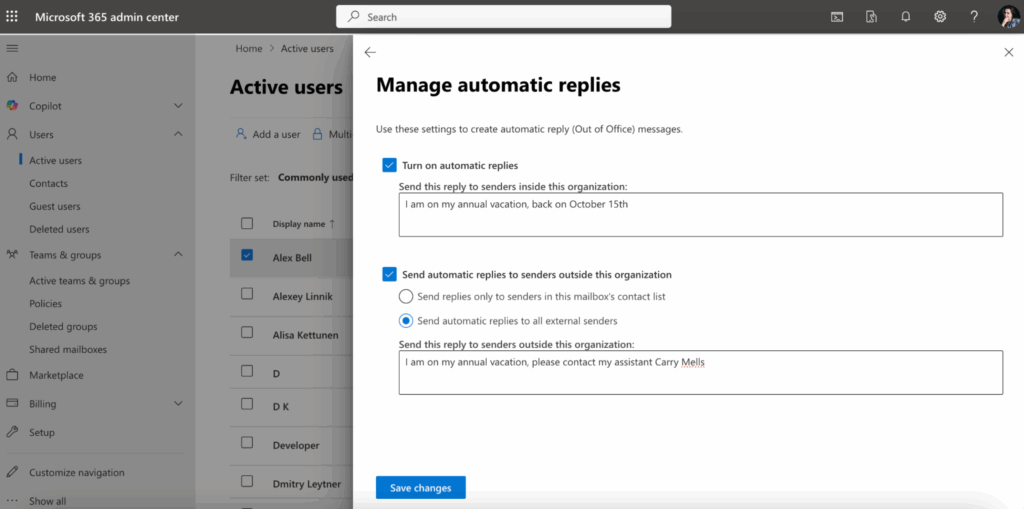
- Administrators can centrally manage auto-reply settings for the entire domain through the Microsoft 365 admin center.
Where to find these settings:
- For users:
In Outlook Desktop, go to Tools > Automatic Replies.
In Outlook Web, click the gear icon > View all Outlook settings > Mail > Automatic replies.
- For administrators:
Go to the Microsoft 365 admin center at https://admin.microsoft.com
Navigate to Users > Active users.
Select a user, and under the Mail tab find Automatic replies settings.
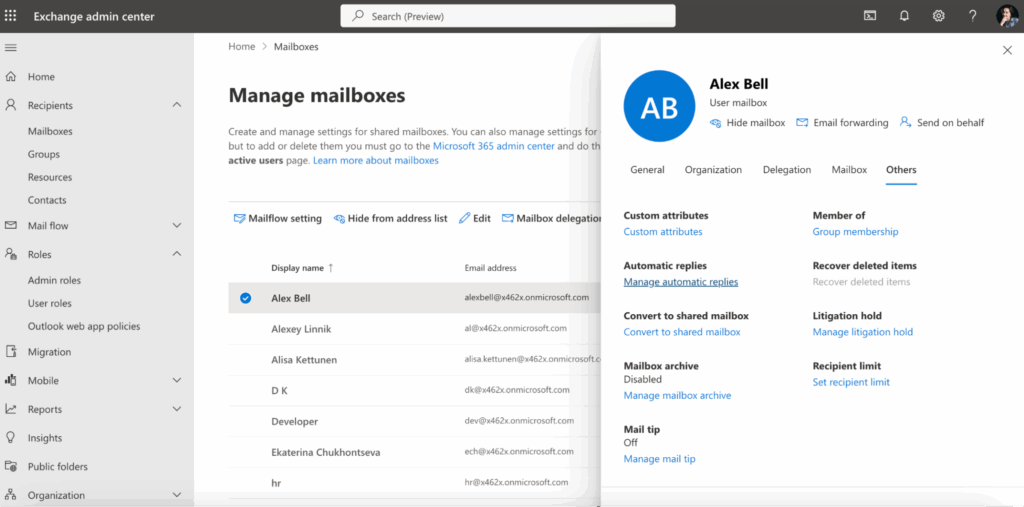
Additionally, Exchange Admin Center under Recipients > Mailboxes > select a mailbox > Manage automatic replies can also be used.
Automatic replies help maintain communication even when employees are unavailable.
Mail Routing Rules (Forwarding, Transport Rules)
Exchange Online allows creating mail routing rules, also called mail flow or transport rules, to control how emails are processed across the organization.
Common examples include:
- Automatically forwarding all emails from a specific address to another mailbox.
- Tagging or marking emails with attachments for easy identification.
- Blocking emails containing certain keywords in the subject or body.
- Routing emails through a third-party security gateway.
Differences between user and administrator setting:
- Users can set up simple email forwarding through Outlook for their own mailboxes.
- Administrators define transport rules at the organizational level via Exchange Admin Center, impacting mail flow for many users.
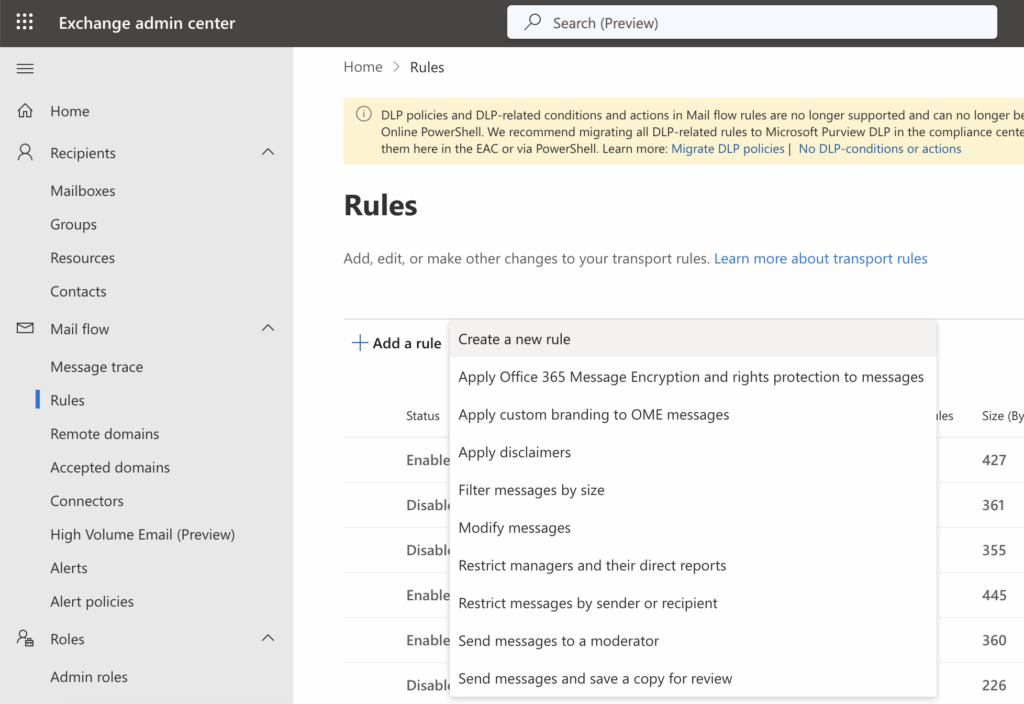
How to configure:
- Sign in to Exchange Admin Center at https://admin.exchange.microsoft.com
- Navigate to Mail flow > Rules to create, manage, and prioritize mail flow rules.
- Use the New rule button to start creating rules with conditions, exceptions, and actions tailored to security and compliance policies.
Transport rules help automate email handling and enforce corporate security policies.
Integration with Microsoft Teams and SharePoint for Team Collaboration
Exchange Online is tightly integrated with Microsoft Teams and SharePoint, creating a unified workspace for employees.
- Exchange calendars synchronize automatically with Teams calendars, so meetings and appointments appear in one interface.
- Office 365 groups combine mailboxes, Teams channels, and SharePoint document libraries for seamless teamwork.
- Creating a team in Microsoft Teams automatically creates a linked Exchange mailbox and calendar.
- Email attachments can be stored and collaboratively edited in SharePoint.
This integration allows employees to work not only with emails but also with calendars, tasks, and documents all within a single digital environment.
Best Configuration Practices
This chapter covers best practices for configuring and securing Exchange Online. It emphasizes proactive monitoring, data protection, compliance management, and backup planning to safeguard your organization’s email environment.
Regular Log Auditing and Activity Monitoring
Exchange Online records detailed audit logs capturing user and administrator activities. Important events to track include sign-ins, changes in access permissions, email forwarding, and mass data deletions. Administrators can configure alerts for suspicious actions, such as logins from unusual IP addresses. Regular examination of these logs helps promptly detect security threats and incidents.
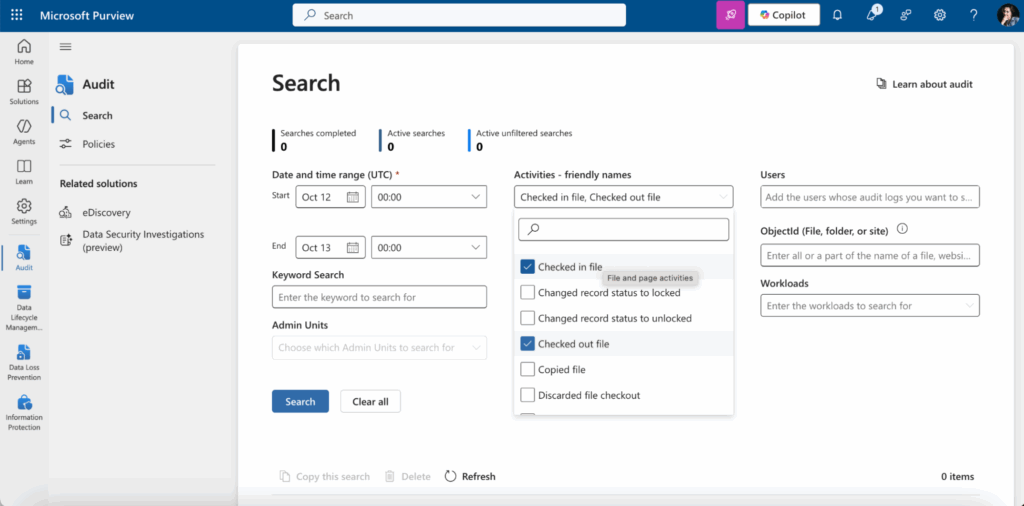
Where to find and configure audit logs
- Use the Microsoft 365 Purview https://purview.microsoft.com/
- Navigate to Solutions > Audit to search and review user and admin activities.
Minimizing Data Leak Risks (DLP)
Data Loss Prevention (DLP) policies built into Exchange Online prevent sensitive data leakage. Examples include blocking emails containing credit card numbers or personal information sent to external domains, notifying users before forwarding confidential documents, and automatically blocking attachments with restricted content. DLP policies help ensure compliance with regulations such as GDPR and HIPAA. These policies require regular updates reflecting business process changes.
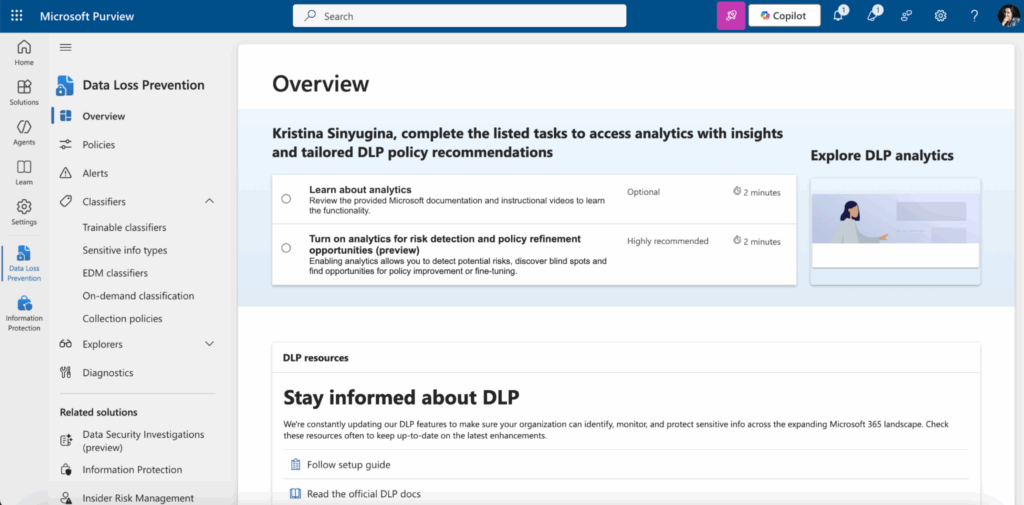
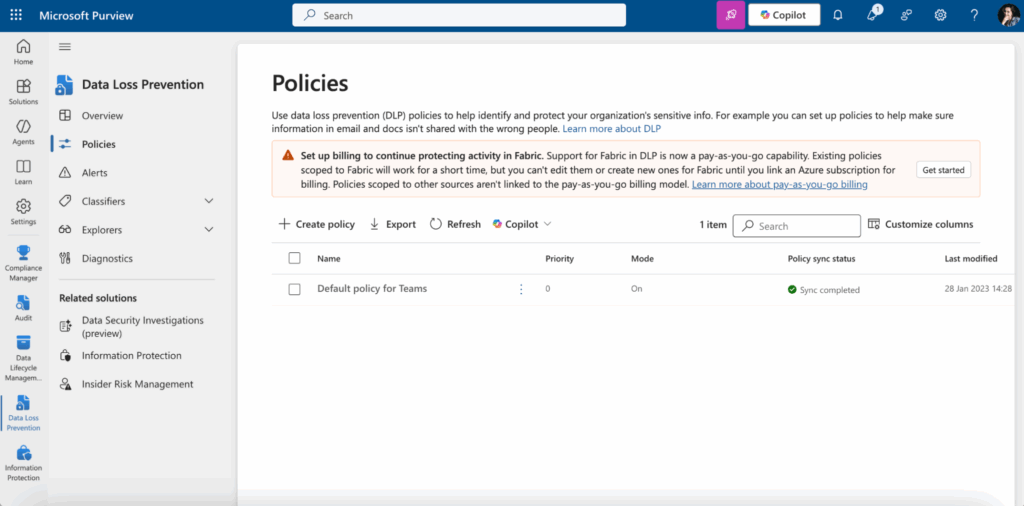
Where to configure DLP
- Access the Microsoft 365 Purview https://purview.microsoft.com.
- Go to Solutions > Data Loss Prevention.
- Create, manage, and assign DLP policies targeting different sensitive information types.
- Monitor policy matches and refine rules as needed to maintain effective protection.
Using the Security & Compliance Center
The Security & Compliance Center is the centralized Microsoft 365 portal for managing security and compliance across Exchange Online and other services. Key features include:
- Configuring retention and archive policies.
- Managing DLP rules.
- Monitoring threats and receiving alerts.
- Searching and exporting data for audits or legal investigations (eDiscovery).
Administrators use this center for security management, simplifying compliance and protecting the organization from data loss and regulatory penalties.
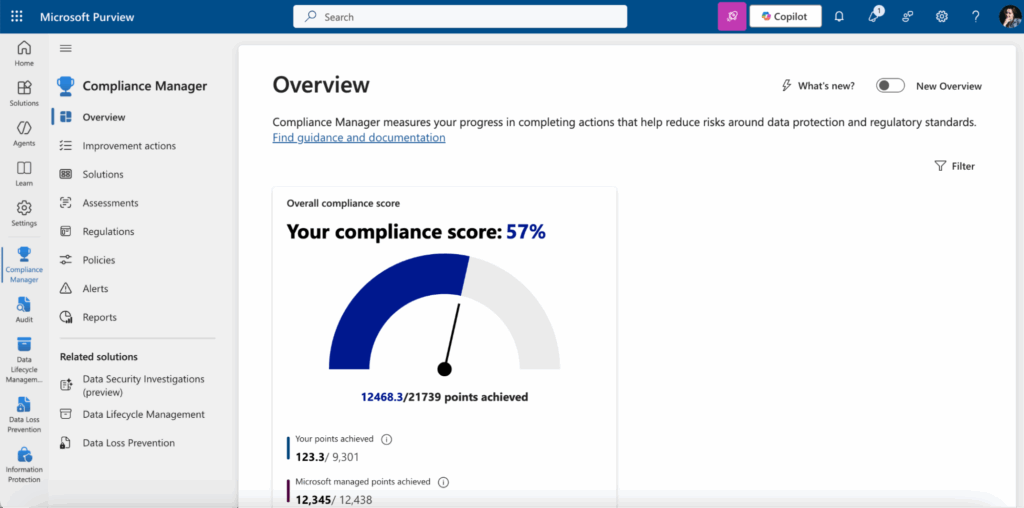
How to Access Compliance Manager
- Visit the Microsoft 365 Purview https://purview.microsoft.com to use the Compliance Manager.
- Use the dashboard to configure policies, review alerts, and perform compliance searches. Assign appropriate admin roles to enable secure and delegated management.
Preparing Backup Policies and Recovery Plans
Although Exchange Online stores data in Microsoft’s cloud, companies should maintain backup strategies to mitigate risks from accidental data loss or ransomware attacks. Options include:
- Using built-in archiving and retention policies.
- Integrating third-party backup solutions like Veeam or AvePoint.
- Regularly exporting critical data.
Pre-planned backup policies detail step-by-step recovery procedures in case of incidents. Testing these backups and recovery workflows regularly ensures readiness and minimizes downtime.
Backup Planning
- Document backup intervals, data scope, and retention.
- Use third-party tools compatible with Exchange Online.
- Schedule periodic restoration drills to verify backup integrity.
Backup and recovery plans are essential to maintain business continuity and protect data assets.
Advanced Capabilities with VirtoSoftware Applications
While Exchange Online in Office 365 covers basic email and calendar needs, many companies require more advanced scenarios for improved efficiency and usability.
VirtoSoftware products for Microsoft 365 and Microsoft Teams supplement Exchange Online capabilities perfectly:
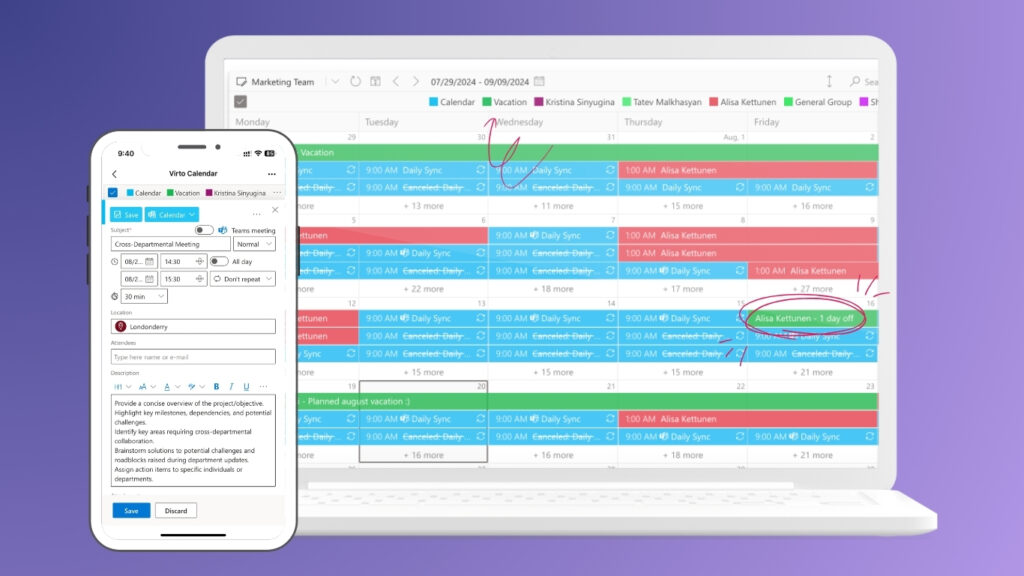
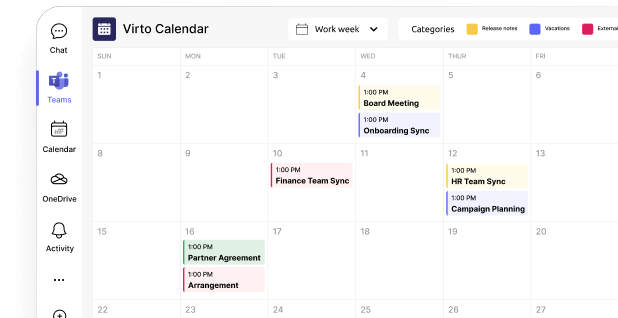
Virto Calendar App for Microsoft Teams & M365
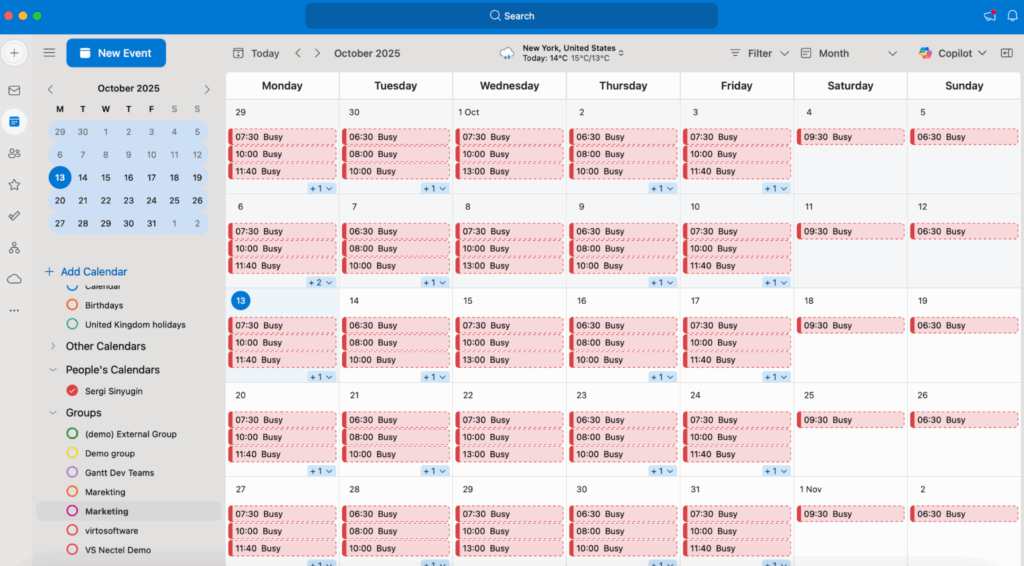
Virto Calendar App integrates multiple Exchange calendars into a single interface within Microsoft Teams and the Microsoft 365 ecosystem. It supports color-coded calendar overlays, making it easier to view and manage individual and group events simultaneously. Users can create, edit, and sync recurring meetings with ease. It also enables direct scheduling of Microsoft Teams meetings and supports joining Zoom or Google Meet calls from within the calendar.
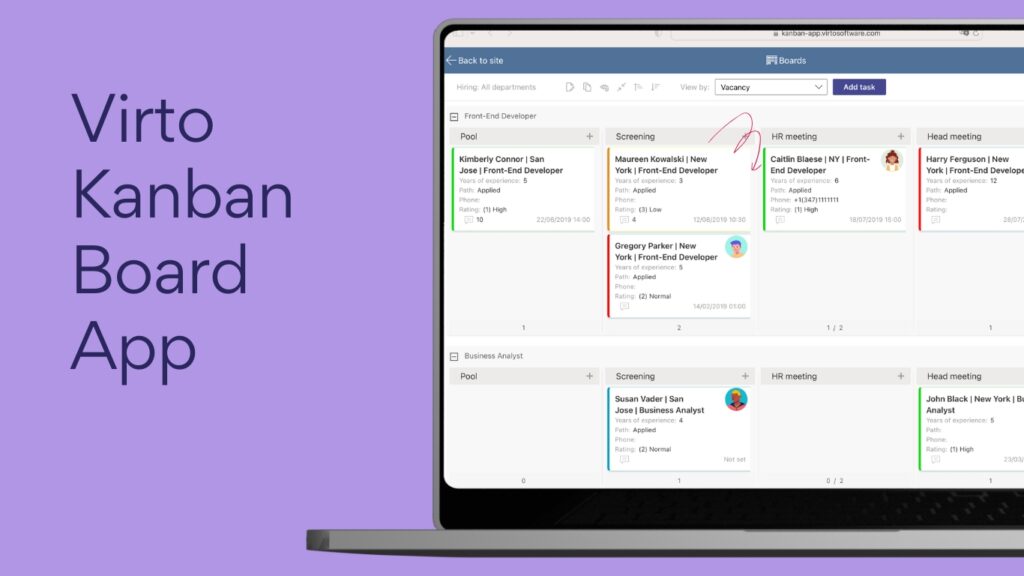
Virto Kanban Board App
Virto Kanban Board App transforms your Outlook or Exchange tasks into dynamic visual Kanban boards. This app offers customizable swimlanes, filters, and templates to organize tasks by status, priority, owner, or project. It integrates deeply with SharePoint and Microsoft Teams, allowing task management directly within Teams channels. Users benefit from drag-and-drop task updates, color-coded priority marking, and real-time progress analytics.
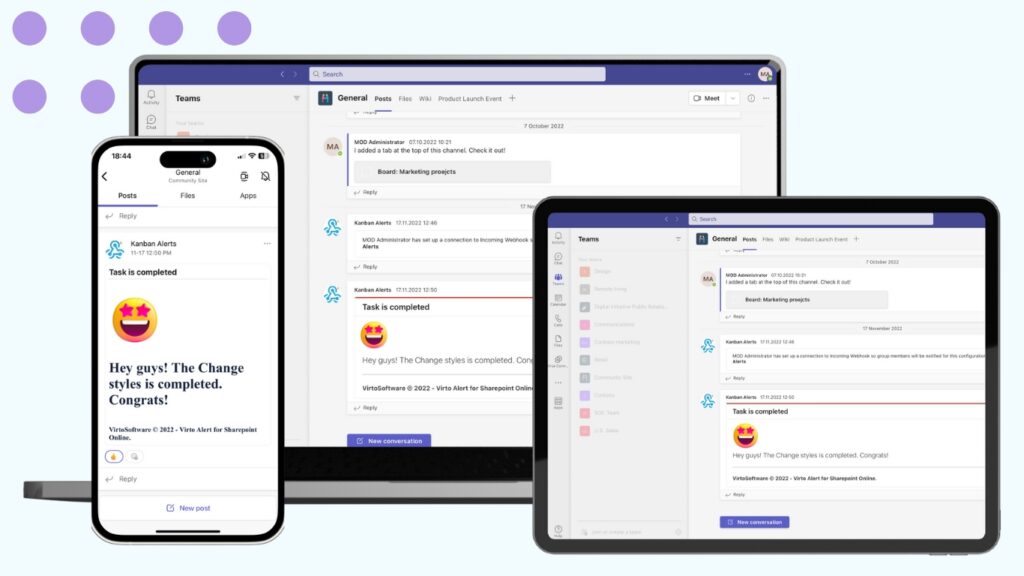
Virto Alerts & Reminder App
Virto Alerts & Reminder App expands on Exchange’s native notification capabilities. It allows users to configure flexible, personalized reminders related to emails, calendar events, and tasks. This helps ensure critical deadlines and activities are not missed. The app supports custom schedules and conditions for notifications.
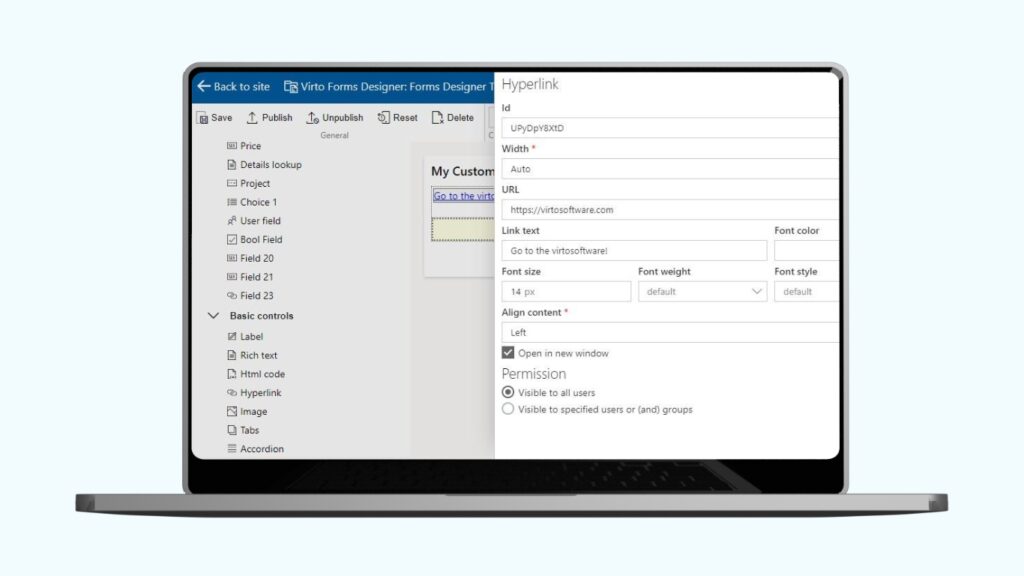
Virto Form Designer for SharePoint Online
Virto Form Designer integrates form sharing and data collection into corporate email and approval workflows. It allows users to design and exchange interactive forms linked to documents and processes managed via SharePoint. This furthers workflow automation and streamlines document approvals, enabling better data governance with Exchange Online.
Exchange Online remains the core platform for corporate email and calendars, while VirtoSoftware products make it more convenient, flexible, and tailored to real business scenarios. Together, these VirtoSoftware products turn Exchange Online basic email and calendar functions into a powerful ecosystem for workflow management.
Explore VirtoSoftware use cases
Conclusion
In conclusion, a properly configured Exchange Online is fundamental for user-friendly communication, calendars, and contacts within an organization. It supports daily operations and helps maintain compliance with data retention policies.
However, to truly unlock its full potential, companies should use additional tools like VirtoSoftware apps. These applications extend the capabilities of Exchange Online, making it more flexible and tailored to specific team needs. For instance, Virto Calendar App enables unified calendar management across SharePoint, Teams, and external sources, significantly streamlining scheduling.
The combination of Exchange Online and VirtoSoftware products creates a powerful ecosystem that improves productivity and simplifies administrative tasks. Strategic configuration and extension with apps are key to maximizing the value of your Microsoft 365 environment.