We would like to show you how to install the Virto Calendar Overlay directly from your Microsoft Teams and start using it as a separate tab in any Microsoft Teams channel. You will see how simple the installation process is. Just follow the steps described below in the article or watch the video and start using Virto Calendar Overlay right now!
Virto Calendar Overlay is designed to overlay Exchange Online calendars with other Microsoft 365 calendars as a single calendar. You can combine events from Outlook or display external iCal data sources and use your special color for all the chosen data sources.
You can install the Virto Calendar Overlay App directly from your Microsoft Teams application. Follow the steps described in the video or below in the article.

Step-by-step guide
Step 1
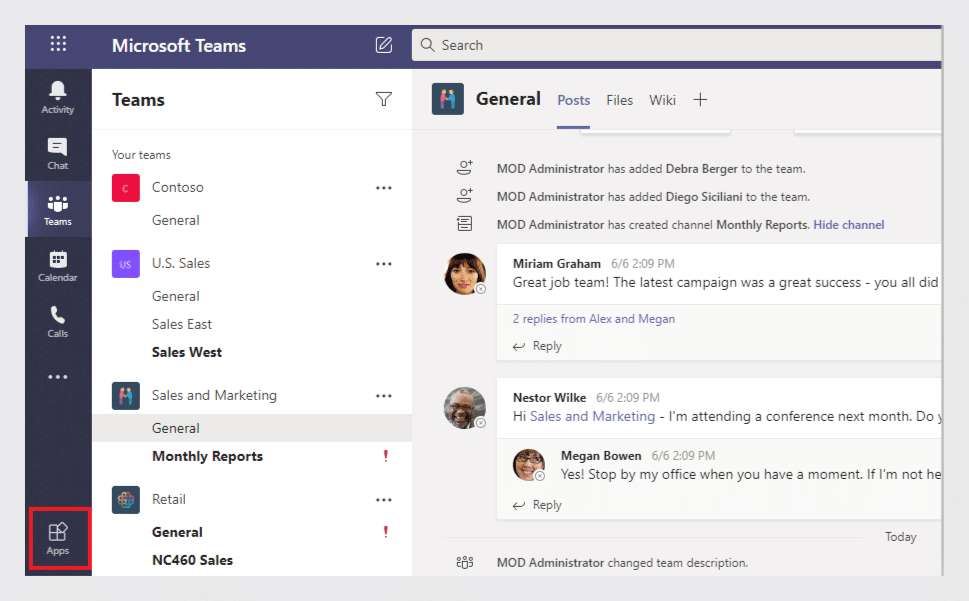
Open your Microsoft Teams and click “Apps” on the left panel.
Step 2
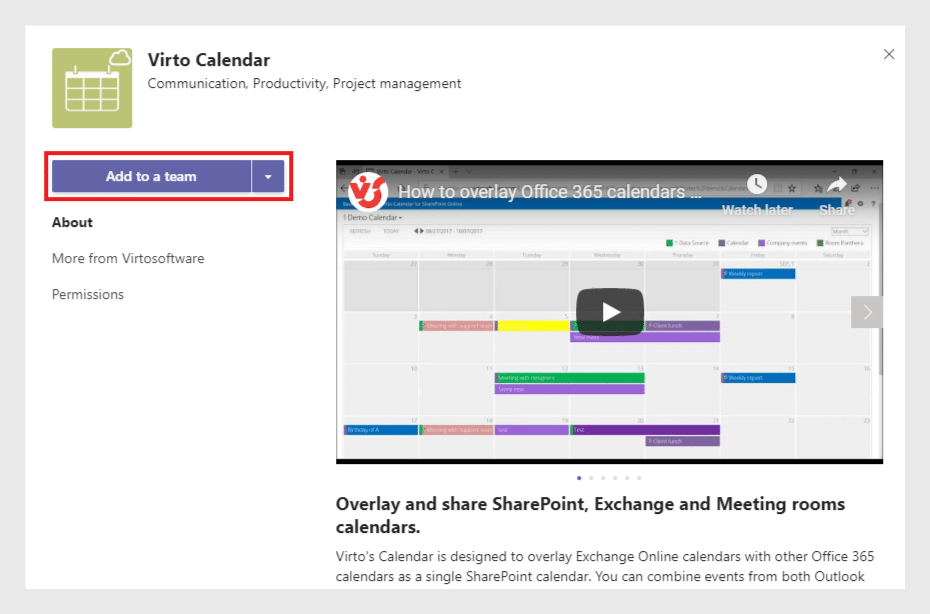
Start typing “virto” or “calendar” to find the Virto Calendar application.

Step 3
As the Virto Calendar overview appears, click “Add to a Team”.
Step 4
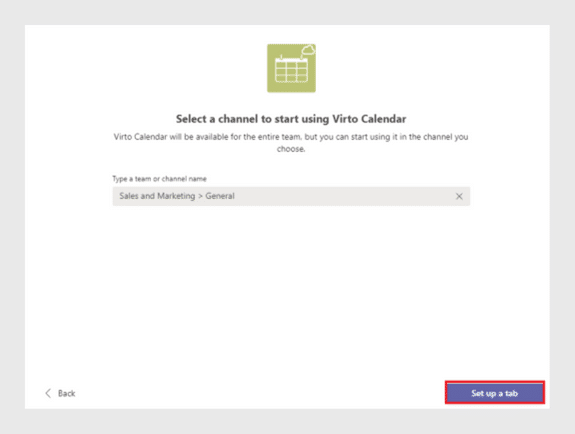
Select any of your Teams channels that you are going to add the Calendar for. Click “Set up a tab”.
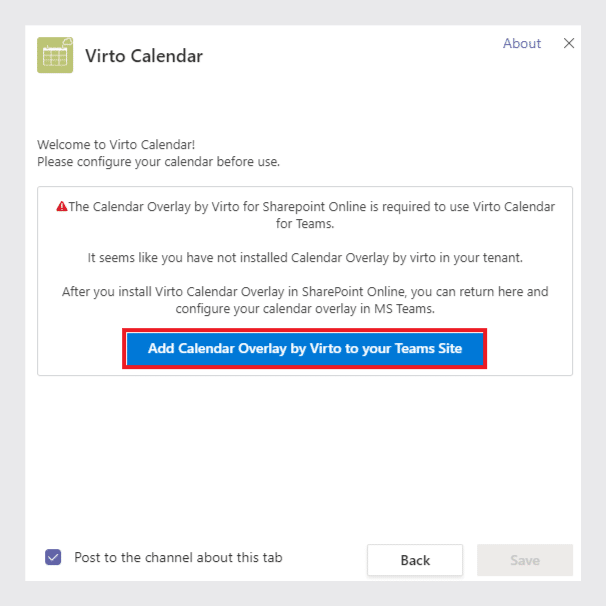
Step 5
Now click “Add Calendar Overlay by Virto to your Teams Site”.
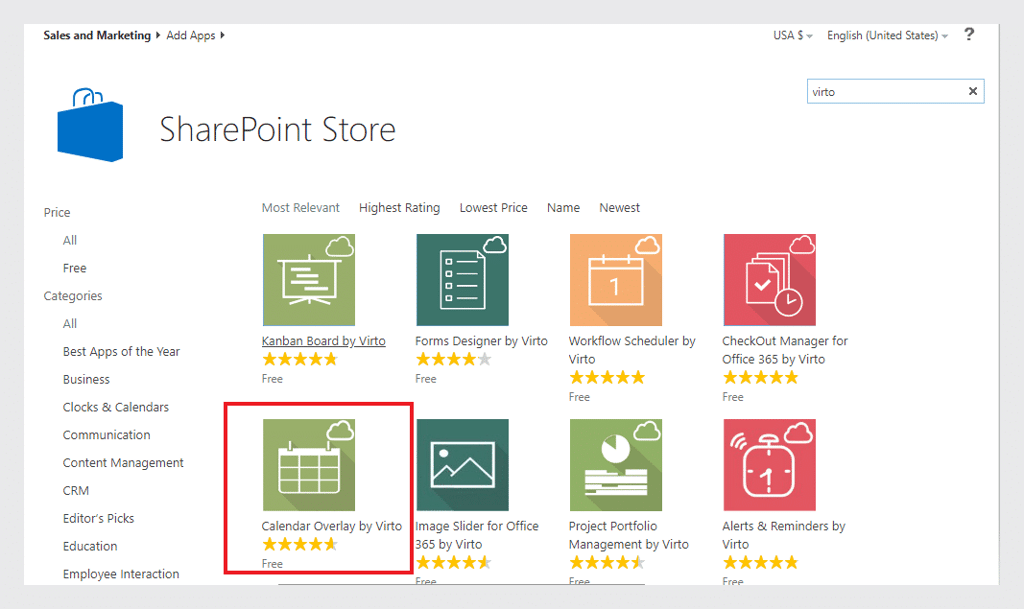
Step 6
Then select Virto Calendar Overlay in the SharePoint store.
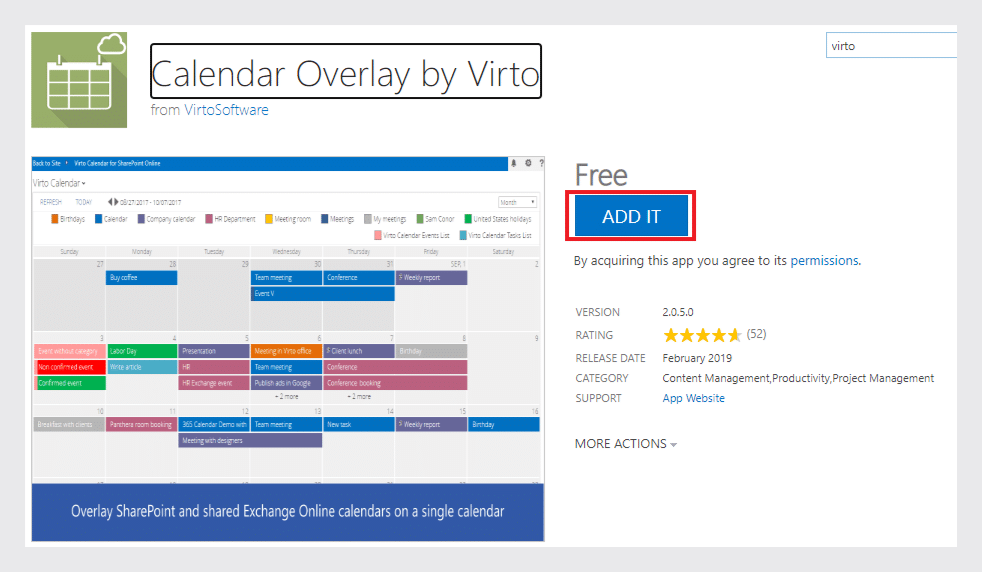
Step 7
Click “Add it” on the next step.
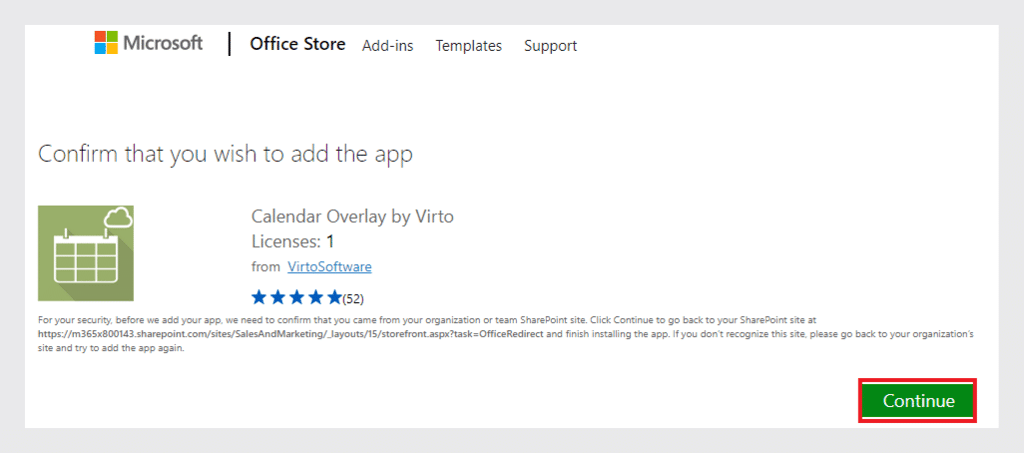
Step 8
Click “Continue” to confirm adding the Calendar.
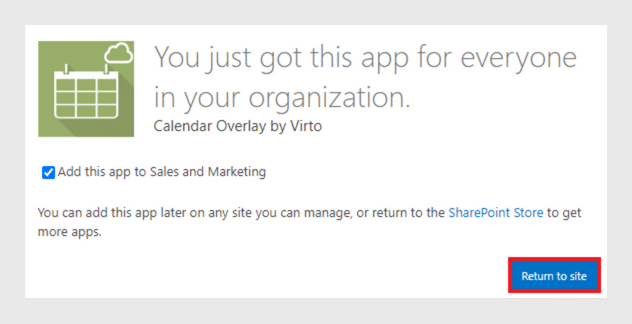
Step 9
Then click “Return to site”.
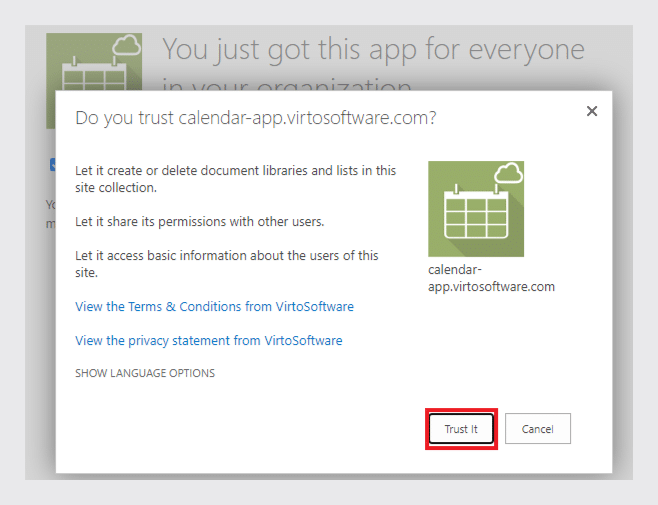
Step 10
And finally, click “Trust it” to finish adding the app.
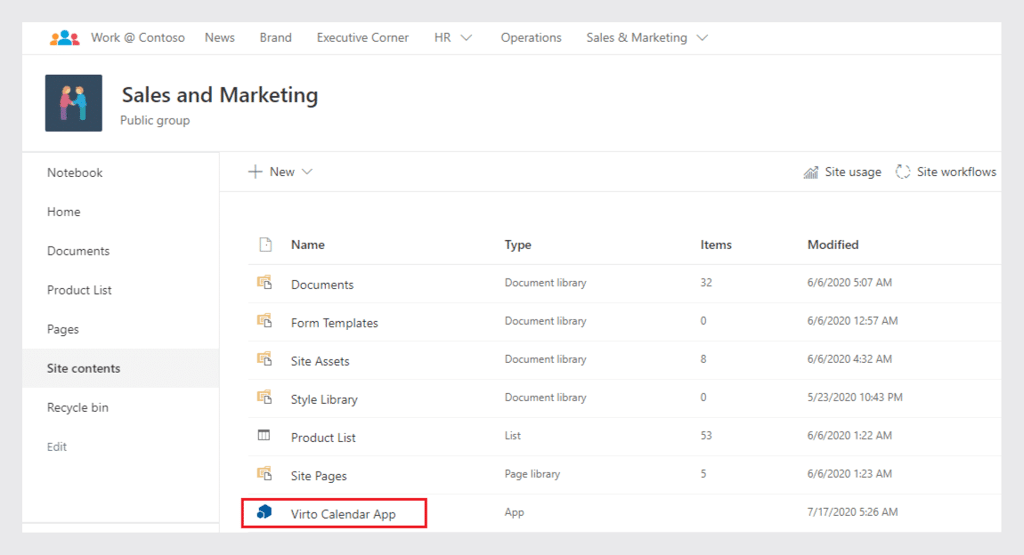
Step 11
In the “Site contents” of your SharePoint site find “Virto Calendar App”. Click the link.
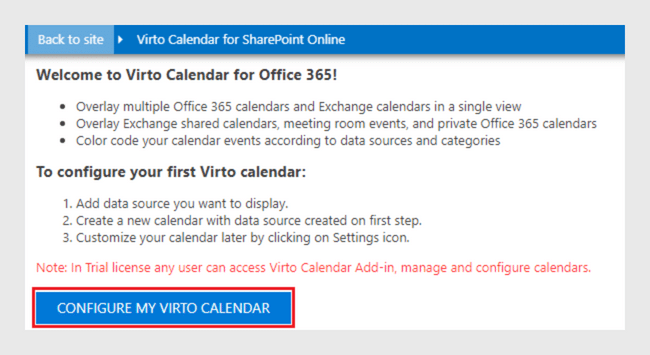
Step 12
Click “Configure my Virto Calendar”.
Step 13
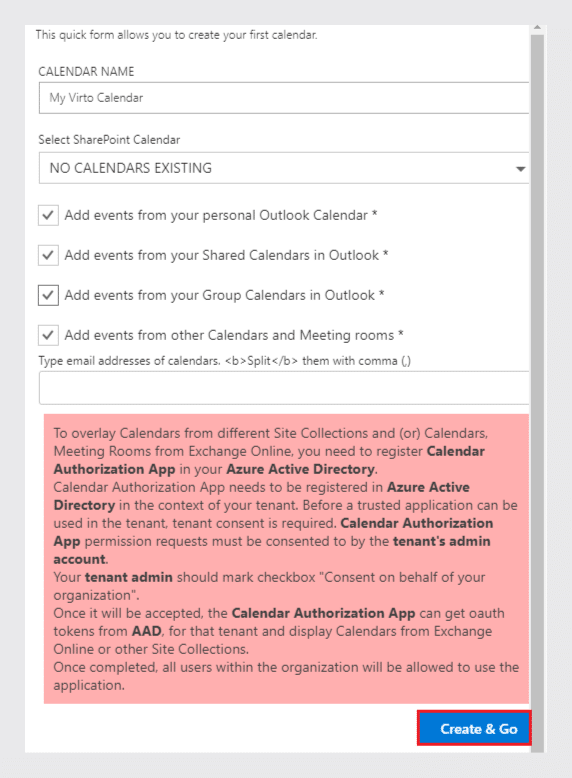
Type the name of your Virto calendar and if you do not have any existing SharePoint calendars, you can choose the events from your Outlook to add. Click “Create & Go”.
Step 14
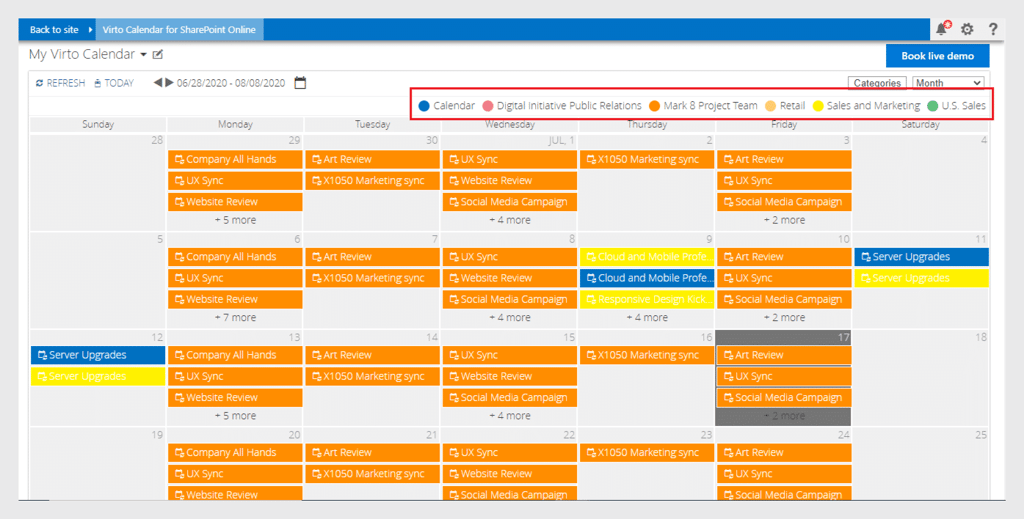
Now the calendar is created, and you can see all the selected types of events in the Virto Calendar overlay.
Step 15
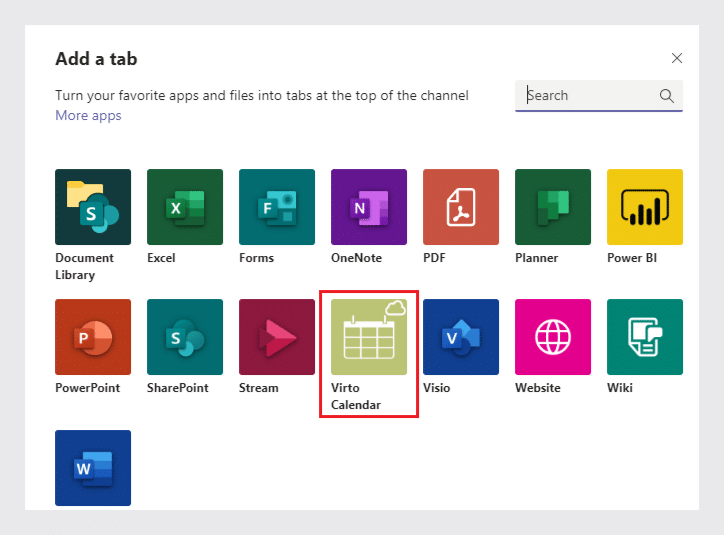
On this step, you can go back to your Teams, open the channel where you’ve decided to add the created Virto calendar, and click “Add a tab”.

Step 15
One more time, select Virto Calendar from the list of apps.
Step 16
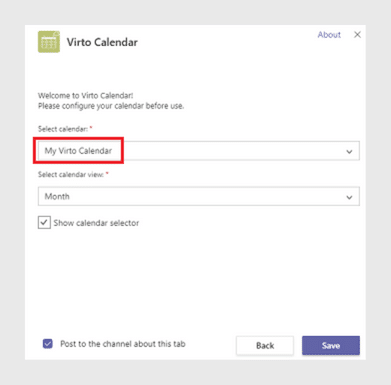
Choose the calendar which you’ve just created and click “Save”.
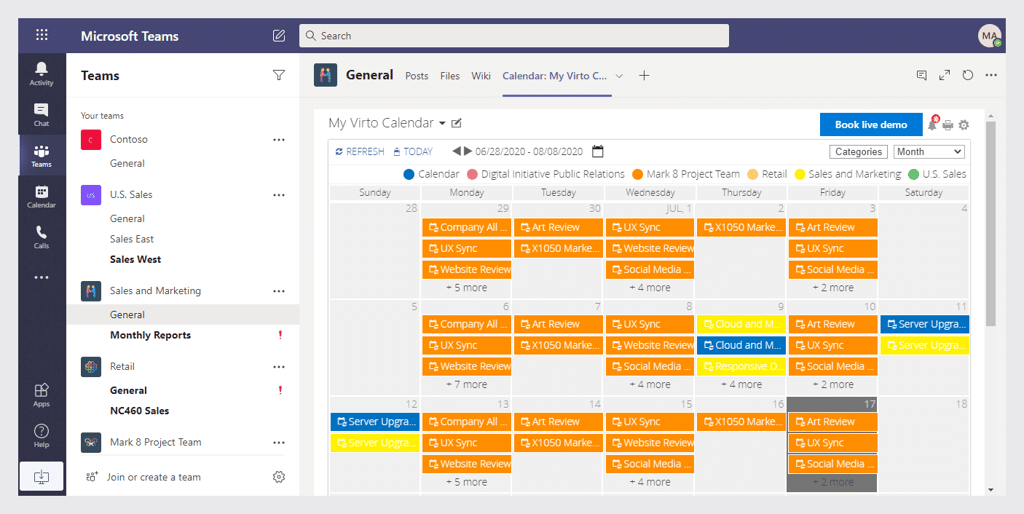
Now the Virto Calendar is added to your Microsoft Teams channel as a separate tab.
Start using it right from your Teams – create and manage events with Virto Calendar Overlay without switching to SharePoint.
Summary
In conclusion, integrating the Virto Calendar Overlay with Microsoft Teams enhances team collaboration and scheduling capabilities. This step-by-step guide ensures a smooth installation process, empowering users to optimize their scheduling within Microsoft Teams. By following these instructions, teams can achieve a more streamlined and efficient calendar management experience.
Struggling with Virto Calendar App setup?
Let our expert support team guide you