SharePoint Online Management Shell: SharePoint PowerShell Guide
Click fatigue is real—SharePoint administration gets faster the moment you switch from the browser to the shell. Our new guide explains SharePoint Online Management Shell from the ground up and shows where VirtoSoftware apps cut the busywork.
PowerShell is Microsoft’s universal command-line shell and scripting language. It gives administrators a single, consistent way to automate tasks and manage systems across the Microsoft ecosystem: Windows servers and clients, Azure resources, Microsoft 365 services, and SharePoint. Instead of clicking through multiple admin portals, you can express the same work as commands and scripts that are repeatable, auditable, and easy to share with your team.
Within that universe, the SharePoint Online Management Shell is a specialized PowerShell module built specifically for administering SharePoint Online in Microsoft 365. You load the module into PowerShell and gain access to SharePoint-focused cmdlets (commands) that let you create sites, set policies, manage users and permissions, tune sharing and storage settings, and handle day-to-day operations at tenant and site levels.
This article explains—in plain language—what SharePoint Online Management Shell (often called “SharePoint PowerShell” for short) is, what it can do, and where it fits alongside PnP PowerShell (another popular module used by many SharePoint professionals). We’ll cover the key features, how the two modules differ, how to get set up, and how to run the most useful commands safely.
You’ll find practical recommendations and copy-paste examples throughout. We’ll also point out where VirtoSoftware apps can simplify common admin workflows so you spend less time on plumbing and more time on policy, security, and user outcomes.
What Is SharePoint Online Management Shell
SharePoint Online Management Shell is a Microsoft PowerShell module—named Microsoft.Online.SharePoint.PowerShell—that gives administrators SharePoint-specific commands (cmdlets) to manage a Microsoft 365 tenant, site collections, and users from the command line.
PowerShell is the universal shell and scripting language from Microsoft. When you load the SharePoint Online Management Shell module into PowerShell, you unlock a set of SharePoint-focused commands (called cmdlets) such as Get-SPOSite, Set-SPOSite, and Add-SPOUser. These cmdlets let you perform admin tasks quickly, repeat them reliably, and automate everyday operations.
This is a separate module you install on your admin workstation. After installation, you connect to your tenant’s SharePoint admin center and run cmdlets that target your environment.
You’ll need the SharePoint administrator role in Microsoft 365 (a global administrator also has sufficient rights).
👉 Can you use PowerShell on SharePoint? Yes—administrators can manage SharePoint with PowerShell: use the SharePoint Online Management Shell for SharePoint Online (connect with Connect-SPOService and run SPO cmdlets) and the SharePoint Management Shell for on-prem farms; many also use cross-platform PnP PowerShell for site and content automation.
What you can manage with it
Think in terms of three layers—tenant, sites, and people—and a fourth layer for scale:
- Site collection management: Create and remove site collections; change storage quotas and site policies; configure settings like site locking or sharing limits.
- User and group management: Add users to sites, assign roles (e.g., site collection admin), adjust permissions, and remove access when people change roles or leave.
- Tenant-level settings: Set or audit external sharing policies, control storage allocation, tune OneDrive/SharePoint defaults, and apply organization-wide rules.
- Bulk operations: Run the same change across many objects—e.g., assign an access group to dozens of users, update quotas on hundreds of sites, or export inventories of sites and owners.
👉 Can you create a SharePoint site with PowerShell? Yes. Administrators can create site collections (and configure their properties) using SharePoint Online Management Shell cmdlets. This is one of the most common automation scenarios because it turns a multi-step UI process into a single scripted action you can standardize and reuse.
Who is it for?
The SharePoint Online Management Shell is aimed at administrators and IT professionals. It’s not a good fit for everyday business users because it assumes comfort with PowerShell, the command line, and administrative concepts like roles, policies, and tenant settings.
Use with care
PowerShell is powerful. Without experience, it’s easy to apply a change too broadly or remove the wrong access. Sensible safeguards:
- Test commands in a non-production tenant first.
- Prefer read operations (Get-*) to verify what will be changed before running write operations (Set-*, Add-*, Remove-*).
- Keep scripts in source control so you can review and roll back changes.
- Document what each script does and which scopes it touches (tenant vs. site).
In the next sections, we’ll compare this module with PnP PowerShell, show how to install and connect safely, and provide practical, copy-paste examples—including notes on where VirtoSoftware tools can simplify the heavy lifting.
👉What is PowerShell SharePoint? It’s the SharePoint Online Management Shell—a Microsoft PowerShell module that lets administrators manage SharePoint Online tenants and site collections with cmdlets (e.g., creating sites, setting policies, and managing users).
SharePoint PowerShell and modules
SharePoint can be administered with PowerShell, but there isn’t just one module. Microsoft provides different toolsets depending on where your SharePoint lives and what you need to manage. The choice starts with a simple fork:
- SharePoint Online (Microsoft 365) → use the SharePoint Online Management Shell.
- SharePoint Server on-premises → use the SharePoint Server Management Shell that ships with SharePoint Server.
- Cross-service, site-level automation (pages, libraries, lists, provisioning patterns, plus other M365 services) → consider PnP PowerShell.
Below is a clear map of each option, when to use it, and what it does.
SharePoint Online Management Shell (cloud)
This is the dedicated module for SharePoint Online administration. You install it on your Windows admin workstation, connect to your tenant, and run SharePoint-specific cmdlets such as Get-SPOSite, Set-SPOSite, Add-SPOUser, and Set-SPOTenant.
- What it’s for: tenant settings, site collection management, user/group administration, policy and quota changes, bulk changes across many sites.
- How you get it: download from Microsoft (MSI) or install from the PowerShell Gallery.
- Platform support: Windows only. If you use PowerShell 7 on Windows, you can load the module via the Windows PowerShell compatibility switch.
Permissions: you need the SharePoint administrator role in Microsoft 365; a global administrator also has sufficient rights.
👉 What is the SharePoint Online PowerShell module? It’s a set of Microsoft-supported PowerShell cmdlets that lets administrators manage SharePoint Online—tenants, sites, and users—through scripts and the command line.
SharePoint Server Management Shell (on-premises)
This shell is installed with SharePoint Server (on-prem). It loads the SharePoint snap-in and gives farm administrators commands to manage servers, service applications, web applications, content databases, search, and other farm-level components.
- What it’s for: provisioning and maintaining an on-prem farm, databases, services, and topology.
- How you get it: it’s included when you install SharePoint Server; you open the “SharePoint Management Shell” on the server.
- Platform support: Windows Server (on the farm).
PnP PowerShell (cross-platform, advanced)
PnP PowerShell is a community-driven, Microsoft-backed module focused on site-level and information architecture tasks across SharePoint and other Microsoft 365 services. It’s popular for provisioning templates, managing lists and libraries, pages, content types, and integrating with services like Teams.
- What it’s for: day-to-day site automation, IA changes, provisioning, modern content ops, and cross-service tasks.
- Command surface: 600+ commands (and growing).
- Platform support: Windows, macOS, and Linux.
How to decide which module to use
Choosing the right PowerShell module comes down to three things: where your SharePoint lives (Online vs on-prem), the layer you’re changing (tenant/site settings vs site content), and how you plan to automate (Windows-only console vs cross-platform/CI). If you’re setting policies and governing site collections, the SharePoint Online Management Shell is the natural fit; if you’re shaping sites, lists, pages, or orchestrating across Teams and Entra, PnP PowerShell is usually faster and more flexible. Use this rule of thumb:
- You’re a Microsoft 365 admin setting tenant policies, quotas, sharing rules, or enumerating all sites → SharePoint Online Management Shell.
- You’re a farm admin responsible for servers, databases, and service apps on-prem → SharePoint Server Management Shell.
- You’re automating sites, lists, libraries, pages, or building repeatable provisioning across environments (often cross-service) → PnP PowerShell.
| Scenario | Use this | How you connect | Why this fits |
| Set tenant policies, quotas, sharing, inventory all sites | SharePoint Online Management Shell | Connect-SPOService -Url https://<tenant>-admin.sharepoint.com | Maps directly to the SharePoint admin center for governance changes |
| Manage servers, databases, services (on-prem farm) | SharePoint Server Management Shell | Open “SharePoint Management Shell” on the server | Farm-level administration with on-prem cmdlets |
| Automate sites, lists, pages; cross-service flows (Teams/Planner/Entra) | PnP PowerShell | Connect-PnPOnline (modern auth) | Larger cmdlet surface and multi-service automation |
| Prefer UI for routine tasks (alerts, calendars, workflow status) | VirtoSoftware apps | Configure in SharePoint/Teams UI | Cuts scripting time for everyday operations |
How to check SharePoint Management Shell version?
In a PowerShell session on your Windows admin machine:
# Show installed versions discovered on disk
Get-Module Microsoft.Online.SharePoint.PowerShell -ListAvailable |
Select-Object Name, Version, Path
# If installed from the PowerShell Gallery, this also works
Get-InstalledModule Microsoft.Online.SharePoint.PowerShell |
Select-Object Name, Version
If nothing returns, the module isn’t installed on that machine.
What these modules let you do
Across the three modules, the core administrative actions fall into a few buckets. The exact cmdlets differ, but the themes are consistent.
- Create and manage site collections: Create new sites, set templates, adjust storage quotas, apply or lock policies, and remove or restore sites when needed.
- Manage users and groups: Add or remove site users, assign roles (e.g., site collection admin), manage group membership, and correct access issues.
- Change tenant-wide settings (Online): Set external sharing policies, control storage defaults, toggle features that affect all sites, and audit configuration across the tenant.
- Perform bulk operations: Run one change against many objects—assign a group to dozens of sites, update quotas across a portfolio, or export inventories and reports.
Availability and platform note
The SharePoint Online Management Shell is a Windows-only module provided by Microsoft’s official distribution channels. Admins who prefer PowerShell 7 on Windows can still use it by importing the module via Windows PowerShell compatibility:
Import-Module Microsoft.Online.SharePoint.PowerShell -UseWindowsPowerShell
Next, we’ll compare SharePoint Online Management Shell with PnP PowerShell in more detail and explain where each shines, with practical examples you can copy and adapt.
Getting Started with SharePoint Online Management Shell
This section is a hands-on starter. You’ll install the SharePoint Online Management Shell, connect to your tenant, then run a few safe read-only commands to confirm everything works.
How do I connect PowerShell to SharePoint Online?
Install the SharePoint Online Management Shell on a Windows machine, open PowerShell as administrator, then run:
Connect-SPOService -Url https://<tenant>-admin.sharepoint.com
Sign in with an account that has the SharePoint administrator role (a global admin works too). After that, you can run cmdlets like Get-SPOSite to list sites.
How do I connect to a SharePoint site with PowerShell?
With this module you connect to the admin endpoint (https://<tenant>-admin.sharepoint.com). Site-specific actions are then targeted by parameters in each cmdlet (for example, -Identity or -Site). If you want to connect directly to a site for content-level work (lists, pages, files), that’s typically done with PnP PowerShell—we’ll cover the differences later.
Prerequisites
- A Windows machine (the module is Windows-only).
- PowerShell 5.1 or PowerShell 7 on Windows.
- Internet access to Microsoft 365.
- An account with the SharePoint administrator role (or global admin).
Using PowerShell 7 on Windows? You can still use this module by importing it through the Windows PowerShell compatibility layer:
Import-Module Microsoft.Online.SharePoint.PowerShell -UseWindowsPowerShell
Step 1 — Install the SharePoint Online Management Shell
You have two easy options. Pick one.
Option A: PowerShell Gallery (recommended for updates)
- Open Windows PowerShell as administrator.
- Run:
Install-Module Microsoft.Online.SharePoint.PowerShell -Scope AllUsers
# Later, keep it current:
Update-Module Microsoft.Online.SharePoint.PowerShell
If you’re blocked by policy, you may need:
Set-ExecutionPolicy RemoteSigned -Scope LocalMachine
Use this only if required by your environment’s policy.
Option B: Microsoft Download Center (MSI)
- Download the SharePoint Online Management Shell installer from Microsoft.
- Run the MSI, accept defaults, and finish the setup.
- The module will be available in Windows PowerShell.
Check your install
Get-Module Microsoft.Online.SharePoint.PowerShell -ListAvailable |
Select-Object Name, Version, Path
Step 2 — Run PowerShell as administrator
Why this matters:
- Installing or updating modules often requires elevation.
- It avoids permission prompts that interrupt the setup.
Open Windows PowerShell (or Windows Terminal → PowerShell) with Run as administrator.
Step 3 — Connect to your tenant
Replace <tenant> with your Microsoft 365 tenant name (the same one used in your SharePoint URLs).
Connect-SPOService -Url https://<tenant>-admin.sharepoint.com
What you’ll see:
- A sign-in prompt using modern authentication.
- Enter the credentials of your SharePoint administrator account.
- If a browser-based prompt is preferred or required, use:
Connect-SPOService -Url https://<tenant>-admin.sharepoint.com -UseSystemBrowser $true
Tip: If you’re using PowerShell 7 on Windows and the module didn’t load automatically, import it first with:
Import-Module Microsoft.Online.SharePoint.PowerShell -UseWindowsPowerShell
| Step | What you do | Command/action | Expected result |
| Install (Gallery) | Install module from PowerShell Gallery | Install-Module Microsoft.Online.SharePoint.PowerShell | Module available system-wide |
| Install (MSI) | Run Microsoft installer | Download MSI → run setup | Module added to Windows PowerShell |
| Elevate | Run as administrator | Open Windows PowerShell as admin | Fewer permission prompts |
| Import (PS7 on Windows) | Use compatibility shim | Import-Module … -UseWindowsPowerShell | Module loads in PS7 |
| Connect | Authenticate to tenant admin | Connect-SPOService -Url https://<tenant>-admin.sharepoint.com | Authenticated session |
| Verify | List some sites | Get-SPOSite -Limit 10 | Sites render without errors |
Step 4 — Your first commands (safe and read-only)
Start with read cmdlets. They don’t change anything and help you verify the connection.
List a few sites
Get-SPOSite -Limit 10 |
Select-Object Url, Owner, StorageQuota, StorageUsageCurrent |
Format-Table -AutoSize
Find a specific site by URL
Get-SPOSite -Identity https://<tenant>.sharepoint.com/sites/ProjectX |
Select-Object Url, Owner, Template, LockState
See tenant-level settings at a glance
Get-SPOTenant |
Select-Object DefaultSharingLinkType, ExternalServicesEnabled, OneDriveStorageQuota, RequireAcceptingAccountMatchInvitedAccount
If these return data without errors, you’re connected and ready to administer.
What you can do next
From here, you can grow into common admin tasks:
- Create and manage site collections: New-SPOSite, Set-SPOSite, Remove-SPOSite.
- Manage users and groups: Add-SPOUser, Set-SPOUser, Remove-SPOUser.
- Change tenant-wide settings: Set-SPOTenant for sharing, storage, and policy controls.
- Run bulk operations: pipe inputs from CSVs into cmdlets to apply changes at scale.
We’ll walk through practical examples in the next sections, including tips to avoid mistakes and notes on where VirtoSoftware apps can simplify repetitive tasks.
👉 So, how to connect PowerShell to SharePoint Online? To connect SharePoint Online PowerShell, install the SharePoint Online Management Shell, open PowerShell, then run Connect-SPOService -Url https://<tenant>-admin.sharepoint.com and sign in with a SharePoint admin (or global admin) account.
Basic PowerShell Commands for SharePoint Online
The SharePoint Online Management Shell includes dozens of cmdlets that let administrators manage sites, users, and tenant-wide settings from the command line. PowerShell shines when you need to do something at scale—for example, assign a permission to hundreds of people—or when the web admin UI would take too many clicks.
Below are the essentials you’ll use most often, with copy-paste examples and notes on when to use each.
| Area | Cmdlet | Typical use | Example |
| Sites | Get-SPOSite | Inventory and filter sites | Get-SPOSite -Limit 50 |
| Sites | New-SPOSite | Create a site collection | New-SPOSite -Url … -Template COMMUNICATIONSITE#0 |
| Sites | Set-SPOSite | Change quota, sharing, lock | Set-SPOSite -Identity … -LockState NoAccess |
| Users | Add-SPOUser | Add user to a group | Add-SPOUser -Site … -Group “Members” -LoginName … |
| Users | Set-SPOUser | Toggle site collection admin | Set-SPOUser -IsSiteCollectionAdmin $true |
| Tenant | Set-SPOTenant | Default links, features | Set-SPOTenant -DefaultSharingLinkType Internal |
| Lifecycle | Remove-SPOSite | Delete a site collection | Remove-SPOSite -Identity … -Confirm:$true |
| Lifecycle | Restore-SPODeletedSite | Restore deleted site | Restore-SPODeletedSite -Identity … |
Site commands: How to connect to a SharePoint site with PowerShell
Site commands work at the site collection layer. Start with read-only queries to understand what you’re managing, then move to changes when you’re confident. Most examples follow this pattern: use Get-* to inventory and filter, then target a specific site with -Identity (or many sites via a pipeline) before using New-*, Set-*, or Remove-*. Make sure you’re connected with Connect-SPOService first.
Get-SPOSite — list sites: How do I get SharePoint sites in PowerShell?
Use Get-SPOSite. Start with a safe, read-only inventory to confirm your connection and see what you’re managing.
# List the first 50 site collections with key details
Get-SPOSite -Limit 50 |
Select-Object Url, Owner, Template, StorageQuota, StorageUsageCurrent, LockState |
Format-Table -AutoSize
Why it’s useful: in seconds you have an overview of URLs, owners, templates, quotas, storage use, and lock status—perfect for audits, license reviews, and cleanup tasks.
Filter examples
# Find sites that use more than 50 GB (values are in MB)
Get-SPOSite -Limit All | Where-Object { $_.StorageUsageCurrent -gt 51200 }
# Get one specific site by URL
Get-SPOSite -Identity https://<tenant>.sharepoint.com/sites/ProjectX
New-SPOSite — create a site collection
Use New-SPOSite to provision a new site collection and set its key properties in one go.
# Example: create a communication site
New-SPOSite `
-Url https://<tenant>.sharepoint.com/sites/MarketingHub `
-Owner admin@<tenant>.onmicrosoft.com `
-Title "Marketing Hub" `
-Template COMMUNICATIONSITE#0 `
-StorageQuota 102400 # in MB (here: 100 GB)
What this does: creates the site at the given URL, sets an owner, applies the communication site template, and caps storage.
Notes
- The -Template you choose determines the site experience. Communication sites use COMMUNICATIONSITE#0.
- Some modern, group-connected team sites are created through Microsoft 365 Groups rather than this cmdlet. For classic or non-group team sites, your tenant may allow templates such as STS#3.
User commands
User commands focus on access. In SharePoint Online you typically grant permissions via site groups (Owners, Members, Visitors) rather than assigning rights to individuals. The safe pattern is: inventory with Get-SPOUser, make changes with Add-SPOUser or Set-SPOUser, and prefer groups for least-privilege and easier maintenance (use Entra/Graph if you need Microsoft 365 group membership changes).
Add-SPOUser — add a user to a SharePoint group
Use this to grant access by putting users into site groups like Members, Owners, or Visitors.
# Add one user to a site's Members group
Add-SPOUser `
-Site https://<tenant>.sharepoint.com/sites/ProjectX `
-Group "ProjectX Members" `
-LoginName alex@contoso.com
Bulk add from CSV
# users.csv has a header: UserPrincipalName
$site = "https://<tenant>.sharepoint.com/sites/ProjectX"
$group = "ProjectX Members"
Import-Csv .\users.csv | ForEach-Object {
Add-SPOUser -Site $site -Group $group -LoginName $_.UserPrincipalName
}
Why it’s useful: this turns a time-consuming manual task into a repeatable one-liner.
Set-SPOUser — change a user’s role
Before you run it, know what this change means: a site collection admin has full control over the entire site collection (bypassing normal permissions). Use it sparingly, target the exact site URL, and remember you can toggle it off later by setting -IsSiteCollectionAdmin $false.
# Promote a user to site collection admin
Set-SPOUser `
-Site https://<tenant>.sharepoint.com/sites/ProjectX `
-LoginName alex@contoso.com `
-IsSiteCollectionAdmin $true
Get-SPOUser — inspect site users
Use Get-SPOUser to audit who has access to a specific site, including external users and site collection admins. It’s read-only, so it’s safe to run before any changes—handy for confirming membership, spotting elevated roles, and creating a baseline. You can then pipe the results to Select-Object, Sort-Object, or Export-Csv for reports.
Get-SPOUser -Site https://<tenant>.sharepoint.com/sites/ProjectX |
Select-Object LoginName, IsSiteCollectionAdmin |
Sort-Object IsSiteCollectionAdmin -Descending
Commands for changing site settings
Site settings control a site’s behavior and governance—storage limits, external sharing, lock state, and more. Treat these as higher-impact changes: verify the target with Get-SPOSite, start with a small scope, and document the before/after. When you’re confident, use Set-SPOSite to apply the update.
Set-SPOSite — change configuration of an existing site
Common scenarios include locking a site, changing quotas, or tightening sharing.
# Lock a site (no access) while you investigate or archive
Set-SPOSite -Identity https://<tenant>.sharepoint.com/sites/ProjectX -LockState NoAccess
# Raise the storage quota to 150 GB (values are MB)
Set-SPOSite -Identity https://<tenant>.sharepoint.com/sites/ProjectX -StorageQuota 153600
# Restrict external sharing (examples: Disabled, ExternalUserSharingOnly, ExistingExternalUserSharingOnly, Anyone)
Set-SPOSite -Identity https://<tenant>.sharepoint.com/sites/ProjectX -SharingCapability ExternalUserSharingOnly
Why it’s useful: you can standardize governance across many sites with a single script.
Other handy commands
These utilities cover lifecycle tasks you’ll use less often but must handle carefully—deleting and restoring sites, inspecting users, and tweaking tenant-wide defaults. Treat destructive actions as final: confirm the target URL, use -Confirm:$true, and know you can recover from the tenant recycle bin with Restore-SPODeletedSite if needed.
Remove-SPOSite — delete a site collectionRemove-SPOSite -Identity https://<tenant>.sharepoint.com/sites/OldProject -Confirm:$true
Restore-SPODeletedSite — restore a deleted site from the tenant recycle binRestore-SPODeletedSite -Identity https://<tenant>.sharepoint.com/sites/OldProject
Set-SPOTenant — change tenant-wide settings (sharing defaults, storage, features)Set-SPOTenant -DefaultSharingLinkType Internal
💡 Caution: Destructive actions (delete, lock, broad sharing changes) affect many users. Test in a non-production tenant, run read cmdlets first to confirm scope, and consider peer review for scripts.
Why admins prefer PowerShell for SharePoint
When everyday admin work gets repetitive or large, the shell pulls ahead of the browser. In practice, PowerShell gives you:
- Scale: one command can touch hundreds of sites or users.
- Consistency: you can apply the exact same settings across environments.
- Auditability: scripts document what changed and when.
- Speed: routine operations that take minutes in the UI complete in seconds.
And because commands can be chained and looped, you can build reliable scripts for complex scenarios—site provisioning, quarterly access reviews, storage tuning, or policy rollouts. We’ll cover scripting patterns and safe rollouts in the next section.
Running SharePoint PowerShell Scripts
A PowerShell script is a text file with the .ps1 extension. Inside, you place commands, variables, conditions, loops, and error handling. Scripts let you automate routine and bulk operations in SharePoint Online and SharePoint Server (on-premises) so you replace long click-paths with repeatable, auditable steps.
Below you’ll learn how to create a script, how to run it safely, and how to build in logging, dry-run behavior, and throttling protection.
Why scripts matter
Scripts take the commands you’d run interactively and package them into a saved, shareable file—complete with parameters, validation, logging, and retries. That makes changes predictable, repeatable, and easy to run across environments.
- Scale: one script can update hundreds of sites or users.
- Consistency: every run applies the same settings.
- Safety: you can add “dry-run,” logging, and validation logic before any change.
- Speed: jobs that take hours in the UI finish in minutes.
Recommended safety practices
Before you run anything, bake safeguards into your workflow. The checklist below captures simple habits that prevent surprises, make changes traceable, and keep production stable—use them every time, especially for bulk jobs.
- Run from an elevated PowerShell console (Run as administrator).
- Enable logging with Start-Transcript so you have a full record.
- Prefer a dry-run mode first, then switch to a live run.
- Build retry and backoff for SharePoint Online to handle throttling (HTTP 429/503).
- Test in a non-production tenant or farm before touching live data.
How to create a .ps1 file
Think of a script as a plain-text recipe for PowerShell: you write the steps once, save them with a .ps1 extension, and run them whenever you need. Here’s the fastest path from blank file to a runnable script:
- Open your editor (Visual Studio Code or Notepad).
- Paste your commands.
- Save the file with a .ps1 extension, for example: Add-BulkUsersToGroups.ps1.
If Windows blocks the file because it was downloaded, run:
Unblock-File .\Add-BulkUsersToGroups.ps1
If your execution policy prevents running scripts, you may need (ask your security team first):Set-ExecutionPolicy RemoteSigned -Scope CurrentUsero
Example: bulk add users to SharePoint Online groups
Scenario: You have a CSV file with columns SiteUrl, GroupName, and UserPrincipalName. For each row, the script connects to SharePoint Online, reads the CSV, checks state, and adds the user to the specified group. It logs everything, retries on throttling, and supports a dry-run.
CSV example (users.csv)
SiteUrl,GroupName,UserPrincipalName
https://contoso.sharepoint.com/sites/ProjectX,ProjectX Members,alex@contoso.com
https://contoso.sharepoint.com/sites/ProjectY,ProjectY Visitors,sam@contoso.com
Script: Add-BulkUsersToGroups.ps1
[CmdletBinding()]
param(
[Parameter(Mandatory=$true)]
[string]$AdminUrl, # https://<tenant>-admin.sharepoint.com
[Parameter(Mandatory=$true)]
[string]$CsvPath, # Path to CSV with SiteUrl, GroupName, UserPrincipalName
[ValidateSet('DryRun','Run')]
[string]$Mode = 'DryRun',
[int]$MaxRetries = 5
)
# --- logging (transcript) ---
$stamp = Get-Date -Format 'yyyyMMdd_HHmmss'
$logDir = Join-Path -Path $PSScriptRoot -ChildPath 'logs'
$logPath = Join-Path -Path $logDir -ChildPath "Add-BulkUsers_$stamp.log"
New-Item -ItemType Directory -Force -Path $logDir | Out-Null
Start-Transcript -Path $logPath -IncludeInvocationHeader
try {
# --- module load (PowerShell 5.1 or 7 on Windows) ---
try {
Import-Module Microsoft.Online.SharePoint.PowerShell -ErrorAction Stop
} catch {
# If you're using PowerShell 7 on Windows, load via compatibility
Import-Module Microsoft.Online.SharePoint.PowerShell -UseWindowsPowerShell -ErrorAction Stop
}
# --- connect to SharePoint Online admin ---
Write-Host "Connecting to $AdminUrl ..."
Connect-SPOService -Url $AdminUrl -ErrorAction Stop
# --- load and validate CSV ---
if (-not (Test-Path -Path $CsvPath)) { throw "CSV not found: $CsvPath" }
$rows = Import-Csv -Path $CsvPath
if (-not $rows) { throw "CSV has no rows: $CsvPath" }
$expected = 'SiteUrl','GroupName','UserPrincipalName'
$first = $rows | Select-Object -First 1
foreach ($c in $expected) {
if (-not ($first.PSObject.Properties.Name -contains $c)) {
throw "CSV is missing required column: $c"
}
}
function Invoke-WithRetry {
param(
[Parameter(Mandatory=$true)] [scriptblock]$Action,
[string]$Description = 'operation'
)
$delay = 2
for ($attempt = 1; $attempt -le $MaxRetries; $attempt++) {
try {
return & $Action
} catch {
$msg = $_.Exception.Message
if ($msg -match '429|503|throttl|temporar|too many') {
Write-Warning "Throttled on attempt $attempt ($Description): $msg"
Write-Host "Sleeping $delay second(s) before retry..."
Start-Sleep -Seconds $delay
$delay = [Math]::Min($delay * 2, 60)
continue
}
throw
}
}
throw "Failed after $MaxRetries attempts: $Description"
}
$success = 0; $skipped = 0; $failed = 0
$i = 0; $total = $rows.Count
foreach ($row in $rows) {
$i++
$site = $row.SiteUrl.Trim()
$grp = $row.GroupName.Trim()
$upn = $row.UserPrincipalName.Trim()
Write-Progress -Activity "Processing $i of $total" -Status "$upn → $grp @ $site" -PercentComplete (($i/$total)*100)
if ($Mode -eq 'DryRun') {
Write-Output "[DryRun] Would add $upn to '$grp' on $site"
$skipped++
continue
}
try {
# Try to add; if already a member, SharePoint may report it in the error text. Treat as idempotent.
Invoke-WithRetry -Description "Add $upn to '$grp' on $site" -Action {
Add-SPOUser -Site $site -Group $grp -LoginName $upn -ErrorAction Stop
} | Out-Null
Write-Output "Added $upn to '$grp' on $site"
$success++
Start-Sleep -Milliseconds 200 # small pause to be gentle
} catch {
$msg = $_.Exception.Message
if ($msg -match 'already.*member') {
Write-Output "Already a member: $upn in '$grp' on $site"
$skipped++
} else {
Write-Error "Failed: $upn → '$grp' @ $site"
Write-Verbose $msg
$failed++
}
}
}
Write-Host "Summary — Success: $success, Skipped: $skipped, Failed: $failed"
Write-Host "Log file: $logPath"
}
finally {
# There is no Disconnect-SPOService cmdlet; ending the session or closing the console clears the context.
Stop-Transcript
}
Key points in this script
Before you run this at scale, understand the design choices behind it. The principles below—idempotency, throttling resilience, and full logging—make reruns safe, keep bulk jobs stable under load, and leave a clear audit trail.
- Idempotency: adding a user to a group is safe to re-run. If the user is already in that group, the run won’t change state; the script treats “already a member” as a skip.
- Throttling protection: SharePoint Online can return 429 (too many requests) or 503 (temporary). The Invoke-WithRetry function sleeps with exponential backoff and retries a few times.
- Logging: Start-Transcript captures every command and message to a log file so you can audit, troubleshoot, or share results.
- Gentle pacing: a tiny pause between operations reduces the chance of throttling during large batches.
Apply the same pattern for site creation, quota changes, or mass locking of outdated sites: read inputs from CSV, validate, loop with retry, and log everything.
How to run the script
With the script saved and your CSV ready, you’re set to execute it. Follow the steps below—start in an elevated console and do a quick dry-run to verify scope before making changes.
- Open Windows PowerShell as administrator.
- Navigate to the folder containing your script and CSV.
Dry-run first:.\Add-BulkUsersToGroups.ps1 `
-AdminUrl https://<tenant>-admin.sharepoint.com `
-CsvPath .\users.csv `
-Mode DryRun
If the dry-run output looks correct, run for real:.\Add-BulkUsersToGroups.ps1 `
-AdminUrl https://<tenant>-admin.sharepoint.com `
-CsvPath .\users.csv `
-Mode Run
SharePoint Online vs SharePoint Server (on-premises)
Which tool and connection flow you use depends on where SharePoint runs. Online tenants use the SharePoint Online Management Shell against the admin endpoint with cloud authentication (and possible throttling), while on-prem farms use the SharePoint Management Shell on servers to manage farm components directly.
- SharePoint Online: you use the SharePoint Online Management Shell and connect with Connect-SPOService to the admin URL. Throttling is possible, so keep retry logic.
- SharePoint Server (on-premises): you run the SharePoint Management Shell on a farm server. It loads the SharePoint snap-in automatically. You don’t connect to an admin URL; you run farm-level cmdlets such as New-SPSite, Set-SPSite, and use server-side APIs. Throttling is not a factor, but resource usage still matters—pace bulk jobs accordingly.
Template: structure of a reliable admin script
Use this skeleton as a drop-in starting point. It wires up parameters, module loading, connection, input validation, retry/backoff, logging, a safe dry-run mode, a main loop, and a clean summary—ready for you to adapt.
[CmdletBinding()]
param(
[string]$AdminUrl,
[string]$CsvPath,
[ValidateSet('DryRun','Run')] [string]$Mode = 'DryRun'
)
# 1) Header: metadata, parameters, and defaults
# 2) Initialize: load modules, check versions
# - Import-Module Microsoft.Online.SharePoint.PowerShell
# - Optional: -UseWindowsPowerShell if running PS7 on Windows
# 3) Connect: for SharePoint Online
# Connect-SPOService -Url $AdminUrl
# 4) Validate input:
# - Check CSV exists
# - Verify required columns
# - Optionally test a few rows before bulk processing
# 5) Start logging
# Start-Transcript -Path <logPath> -IncludeInvocationHeader
# 6) Define helpers:
# - Invoke-WithRetry (handles 429/503)
# - Write-Progress wrapper
# - Convert/validate functions
# 7) Main loop:
# foreach ($item in $data) {
# if ($Mode -eq 'DryRun') { Write-Output "[DryRun] Would do X"; continue }
# try {
# Invoke-WithRetry { <do the work> }
# $success++
# } catch {
# $failed++; Write-Error "Why it failed"
# }
# }
# 8) Final report:
# Write-Host "Success: $success, Failed: $failed, Log: $logPath"
# 9) Cleanup:
# Stop-Transcript
# # Close the session or console (no explicit Disconnect cmdlet for SPO)
| Section | Purpose | Example line |
| Parameters | Control inputs, allow dry-run | [ValidateSet(‘DryRun’,’Run’)] $Mode = ‘DryRun’ |
| Module load | Ensure SPO module loads (PS5.1/PS7) | Import-Module Microsoft.Online.SharePoint.PowerShell -UseWindowsPowerShell |
| Connect | Create admin context | Connect-SPOService -Url $AdminUrl |
| Validate input | Guard against bad CSV | if (-not (Test-Path $CsvPath)) { throw “CSV not found” } |
| Transcript | Log everything | Start-Transcript -Path .\logs\Script.log |
| Retry/backoff | Handle 429/503 | Invoke-WithRetry { Add-SPOUser … } |
| Main loop | Do the work safely | foreach ($row in $rows) { … } |
| Summary | Report outcomes | Write-Host “Success: $success, Failed: $failed” |
| Cleanup | Close transcript | Stop-Transcript |
Test before production
Always test scripts in a test tenant (or non-production farm) with dummy data. Start with a handful of rows, review the transcript, and only then scale up. This habit prevents surprises and gives you a clean audit trail for change management.
In the next section, we’ll cover side-by-side differences between SharePoint Online Management Shell and PnP PowerShell, then move into provisioning and governance examples you can adapt for your environment.
👉What are Sharepoint Powershell commands? SharePoint PowerShell commands are cmdlets—verb-noun commands—exposed by the SharePoint Online Management Shell (and optionally PnP PowerShell) that let admins script and automate SharePoint Online tasks. Examples include Get-SPOSite to list sites, New-SPOSite to create a site, Set-SPOSite to change settings, Add-SPOUser/Set-SPOUser to manage access, and Remove-SPOSite or Restore-SPODeletedSite for lifecycle operations.
The Difference Between SharePoint Online Management Shell and PnP PowerShell
PnP PowerShell (Patterns and Practices PowerShell) began as a Microsoft 365 PnP community project that Microsoft actively supports. It updates rapidly and now exposes a very broad surface area across Microsoft 365—well beyond SharePoint alone. As of 2025, it offers well over 600 cmdlets (in fact, 800+ in recent releases) and runs cross-platform.
By contrast, the SharePoint Online Management Shell (SPO module) is Microsoft’s official, Windows-only admin module for tenant- and site-level SharePoint settings. It’s focused, conservative in scope, and designed for classic administrative operations against the SharePoint Online admin center.
💡 Learn more here:
Why many admins care about PnP
Here’s why PnP PowerShell becomes the go-to once you move past baseline tenant settings—it evolves quickly, spans more scenarios, and works across services, making everyday automation far easier.
- More cmdlets: PnP PowerShell exposes far more commands than the SPO module (815 in the March 2025 v3 release). This breadth covers modern site features, content operations, provisioning, and governance scenarios.
- Cross-platform: runs on Windows, macOS, and Linux (including PowerShell 7, Azure Automation, and Cloud Shell), which is handy for DevOps pipelines and non-Windows admin machines.
- Works across Microsoft 365: not only SharePoint, but also Teams, Planner, Entra (Azure AD), Purview, Search, and more—useful when your automation spans services.
This pace and breadth make PnP a go-to for DevOps engineers, developers, and automation-heavy administrators who need to script complex, multi-service workflows.
👉 In short, what is the difference between SharePoint Online Management Shell and PnP PowerShell? SharePoint Online Management Shell is the official Windows module for tenant and site administration (quotas, external sharing, locking, user access, org-wide settings). PnP PowerShell is the cross-platform module with many more cmdlets for content, lists/libraries, pages, provisioning, and cross-service automation (Teams, Planner, Entra, etc.). Most seasoned admins use both: SPO for core tenant/site settings; PnP for day-to-day site/content automation and multi-service tasks.
Side-by-side comparison
| Criterion | SharePoint Online Management Shell | PnP PowerShell |
| Primary scope | SharePoint Online tenant & site collection administration | SharePoint sites & content plus other M365 services (Teams, Planner, Entra, etc.) |
| Typical tasks | Set tenant policies, quotas, site locking/sharing; add users; manage classic admin operations | Provision sites, manage lists/libraries/pages, apply templates, content moves, and cross-service automations |
| Cmdlet breadth | Focused set | Well over 600; ~800+ as of Mar 2025 |
| Platform | Windows only | Windows, macOS, Linux (PowerShell 7) |
| Update cadence | Slower, conservative | Faster, frequent community + Microsoft-backed releases |
| Auth/connect | Connect-SPOService to the admin center | Connect-PnPOnline with modern auth flows; guidance for tenant-specific Entra app registrations |
| Best for | SharePoint administrators configuring tenant & site settings | DevOps/developers and admins automating complex or cross-service scenarios |
👉 Is there any difference between Sharepoint Online Management Shell commands and Sharepoint Online Powershell Commands? Short answer: no—the phrases usually mean the same thing. Powershell commands for SharePoint Online typically refers to the cmdlets in the official SharePoint Online Management Shell module. The only caveat is that some people use the term loosely to mean PnP PowerShell commands, which are a separate, community-driven module with different cmdlets.
Practical guidance
Use this quick playbook to choose the right tool for the job. Match the task to the module—governance and tenant settings vs site/content automation—and you’ll land on the fastest, safest path.
- If you’re setting tenant defaults, adjusting external sharing, or auditing site inventories, start with the SPO module. It maps closely to admin center concepts and is easy to reason about for governance work.
- If you’re provisioning sites, scripting list/library changes, manipulating pages, or orchestrating Teams/Planner alongside SharePoint, reach for PnP PowerShell. It gives you richer, higher-level commands and cross-service reach.
- For many organizations, the sweet spot is using both: SPO for baseline governance and PnP for day-to-day automation and DevOps pipelines.
💡 Note on authentication: recent PnP guidance favors tenant-specific Entra ID app registrations (rather than the historical multi-tenant app) for better control and least-privilege. If you haven’t updated your setup, review the current PnP instructions. Learn more here: PnP PowerShell Changes Its Entra ID App & here Register an Entra ID Application to use with PnP PowerShell
In the next section, we’ll turn this comparison into action—showing how to install PnP, connect safely, and run a few practical examples alongside the SPO module so you can see where each tool shines.
Virtosoftware’s PowerShell alternative
PowerShell solves a lot of admin pain—especially at scale—but it comes with trade-offs:
- you need to know the syntax, cmdlets, and scripting patterns
- scripts must be maintained as Microsoft 365 evolves
- bulk jobs require careful error handling and throttling protection
For many routine SharePoint tasks, you can swap code for configuration by using VirtoSoftware apps. These give you an admin UI to do what you’d normally script—often in a few clicks—while adding dashboards, scheduling and guardrails.
Workflow automation and monitoring—without writing scripts
Prefer configuring over coding? These apps let you model processes, trigger actions, and monitor runs right in the browser—giving you repeatable workflows and clear status dashboards without maintaining PowerShell.
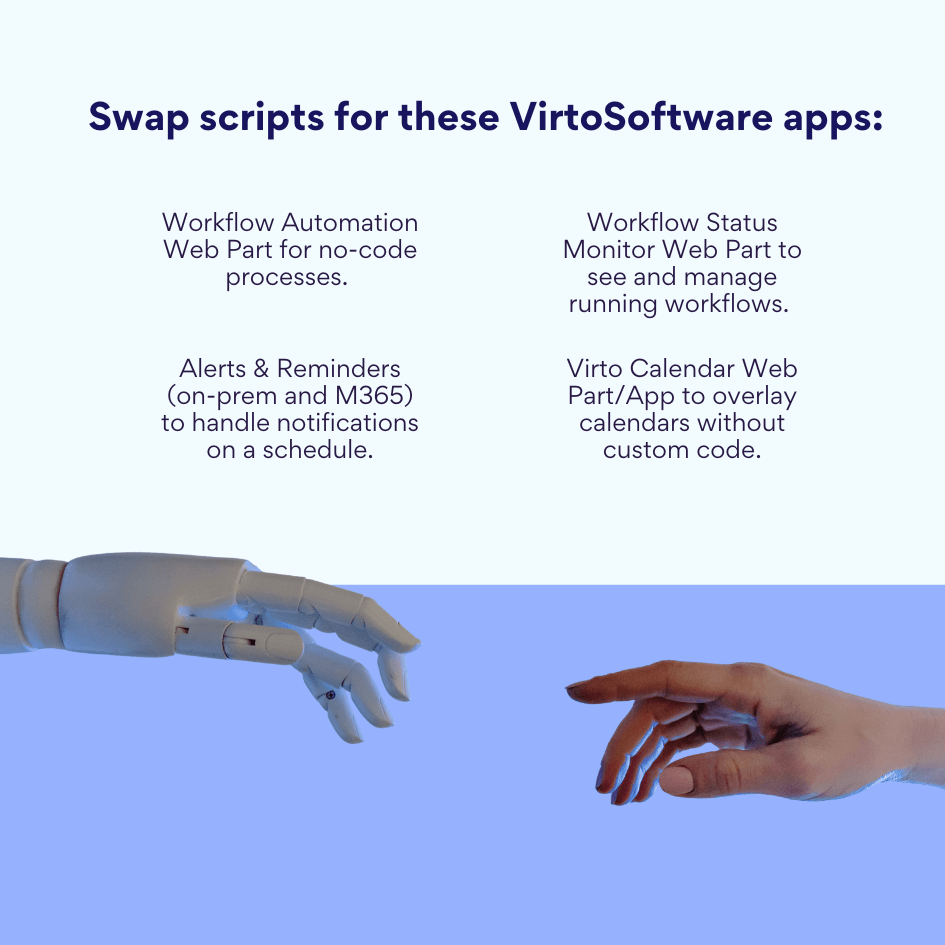
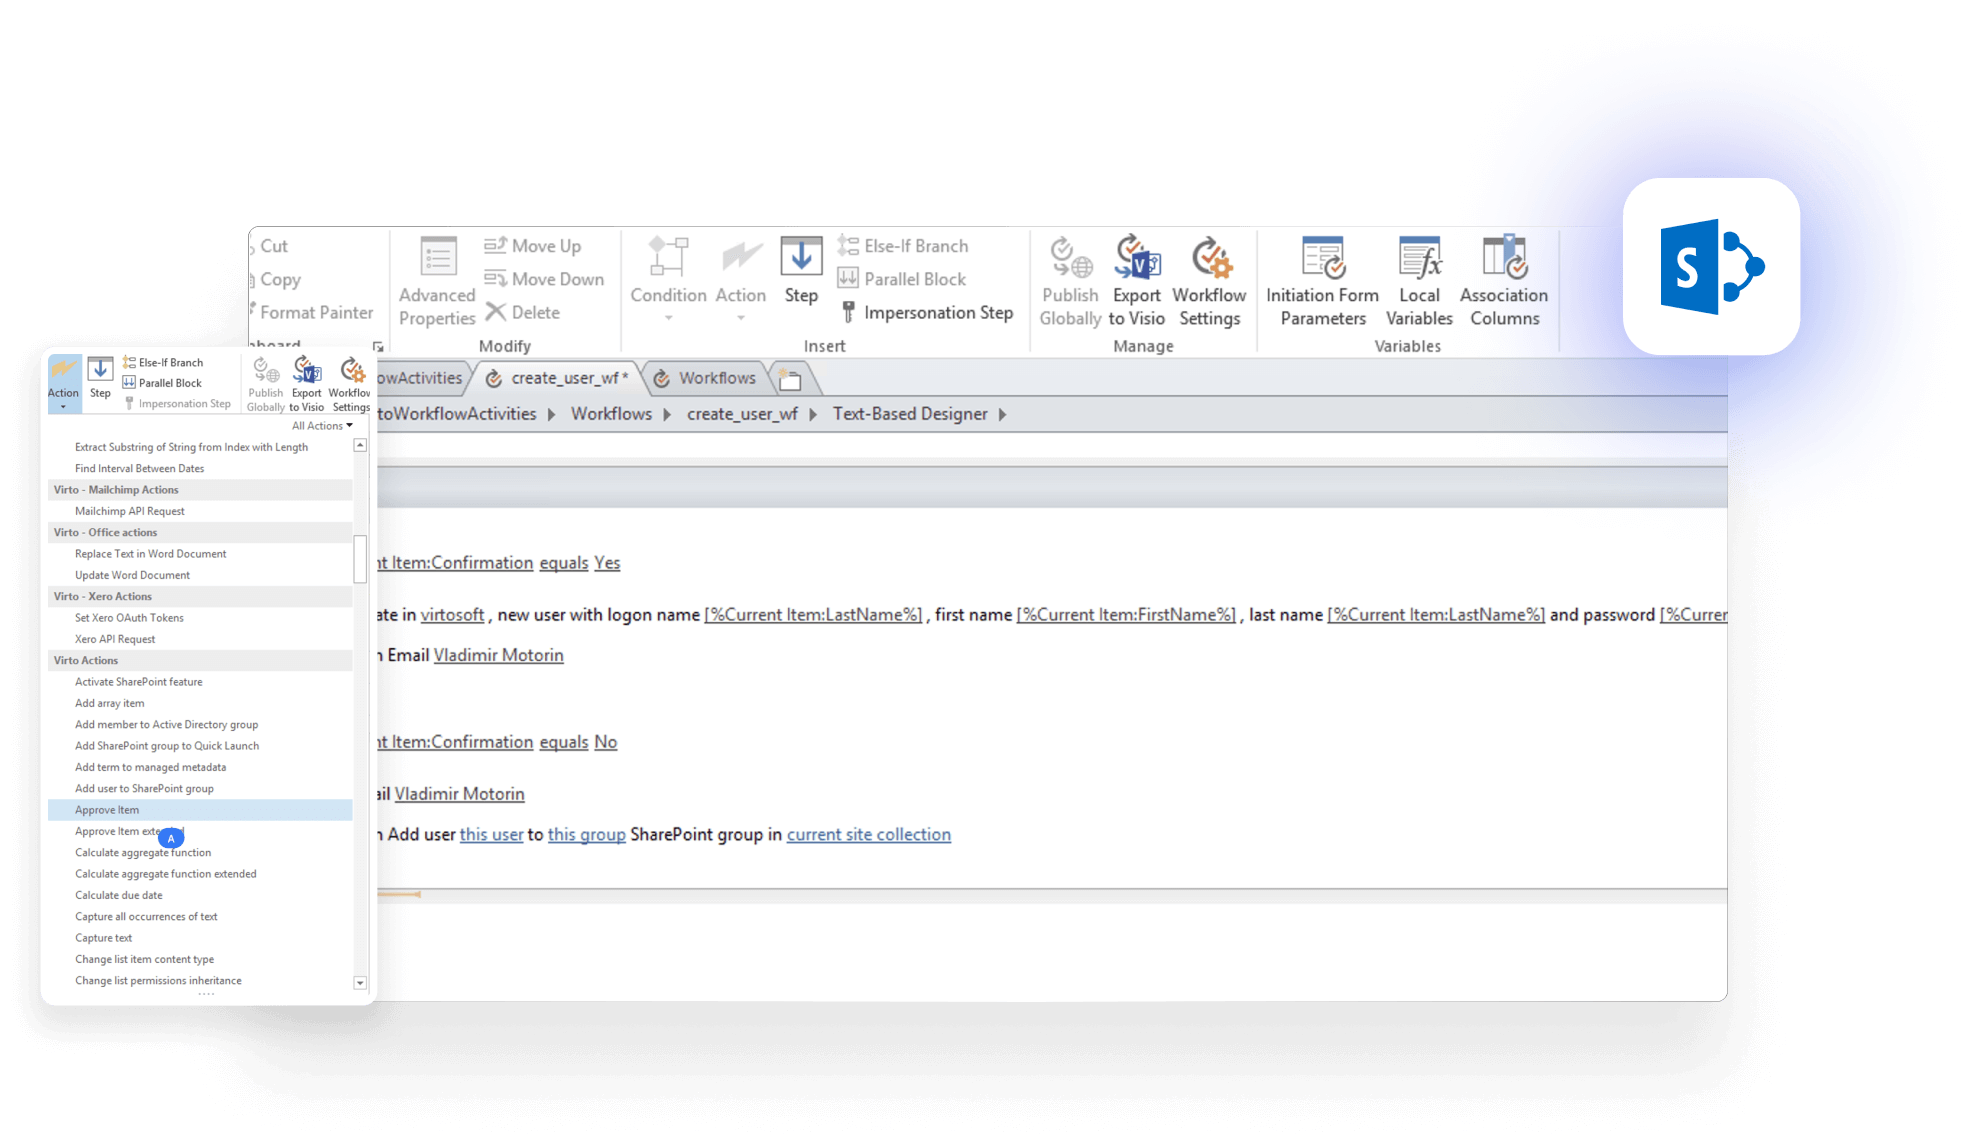
- Virto Workflow Automation Web Part — a large library of no-code workflow activities you can assemble visually to automate business processes in SharePoint. Virto lists 270+ activities designed to extend SharePoint Designer-style workflows and speed up common patterns.
Virto Workflow Automation
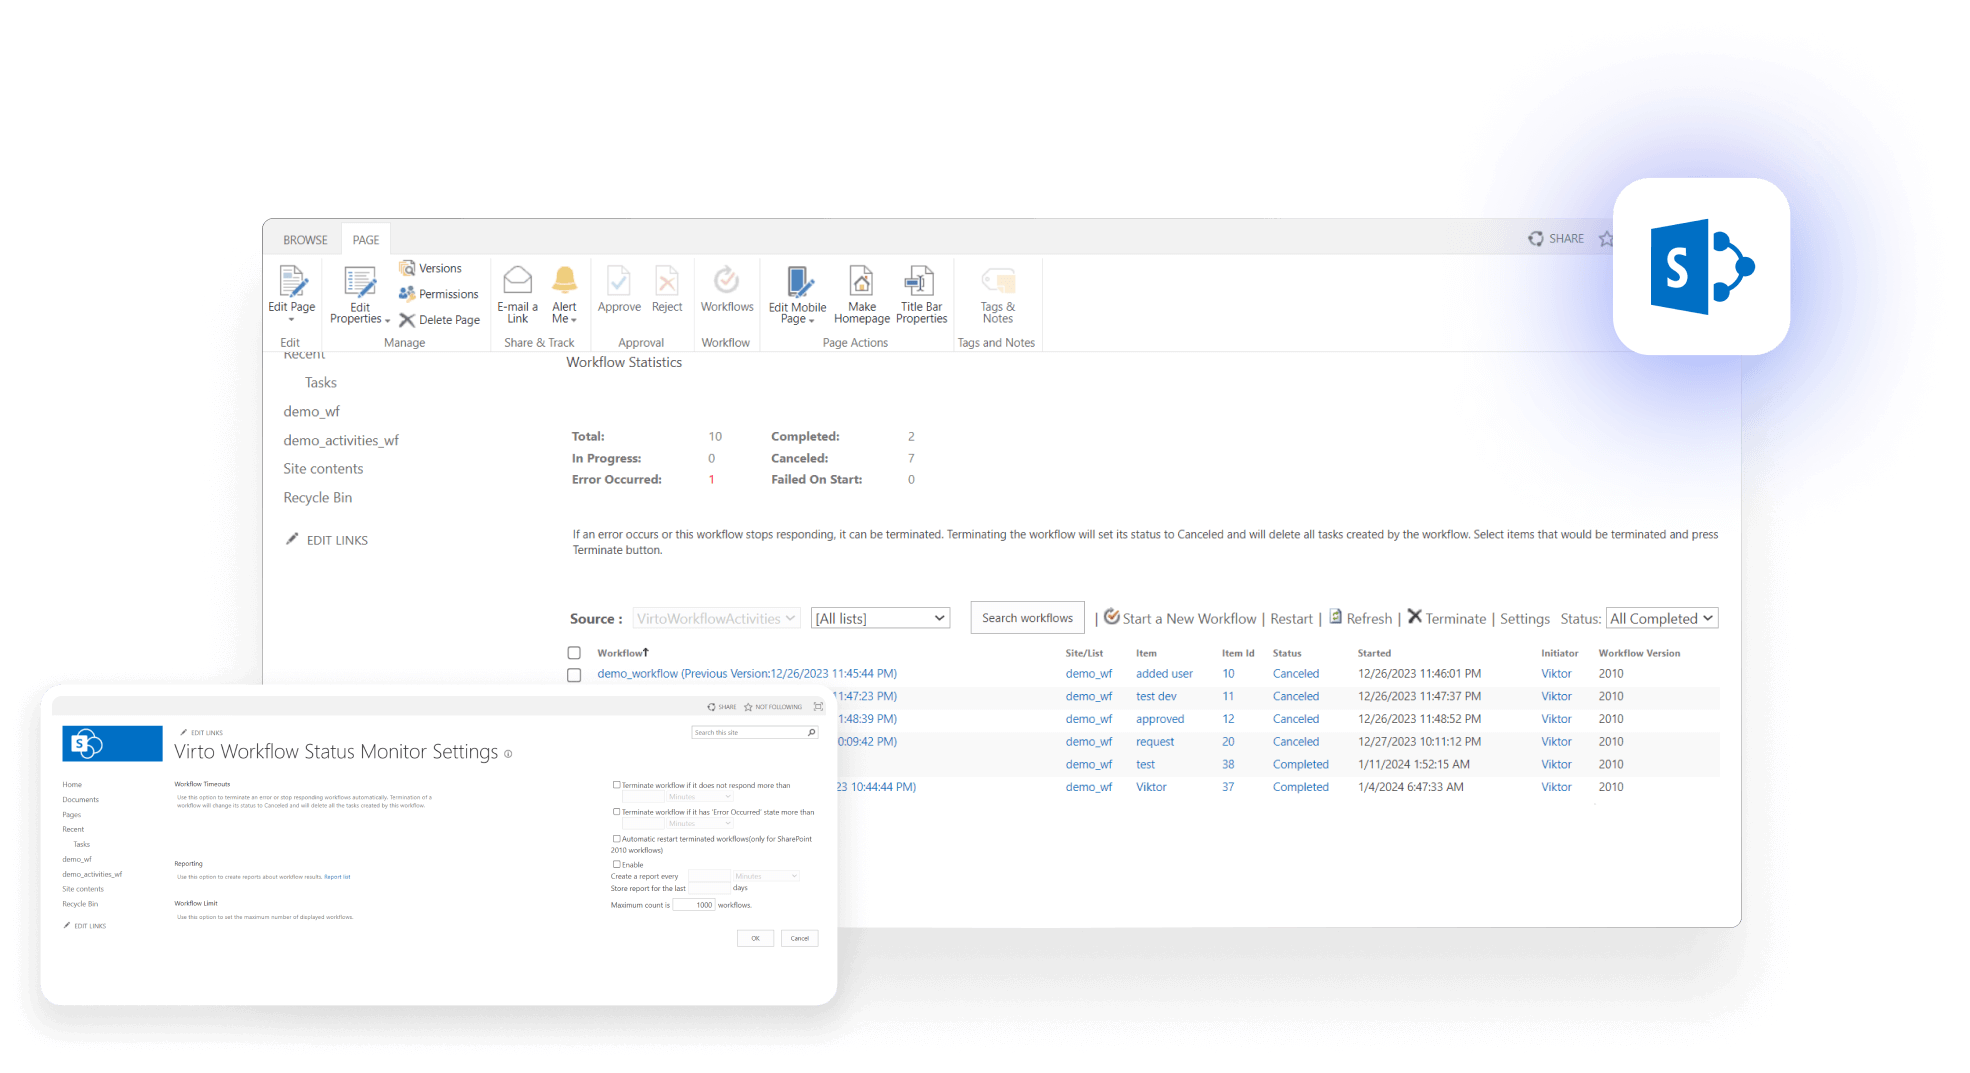
- Virto Workflow Status Monitor Web Part — a visual console that shows all running workflows on a site and their current state (in progress / error), so admins can track and manage processes directly from SharePoint—no custom scripts required. Compatible with SharePoint Server 2016/2019.
Virto Workflow Status Monitor
Typical comparison
Here’s a quick side-by-side of the two approaches—first the code-driven route, then the point-and-click alternative—so you can see where each saves time.
- PowerShell path: write a script that enumerates sites, queries workflow instances, parses statuses, and retries or restarts failures; add logging and throttling handling.
- VirtoSoftware path: open the workflow status monitor page to see a unified list of instances and act from a visual interface. Faster to triage, less error-prone, and easier to hand off to non-scripters.
Notifications and reminders—configure instead of coding
If you’d usually script email/SMS notifications from list events:
- Virto Notifications & Alerts (on-premises web part) — create alerts, reminders and digest emails for users or groups with flexible schedules; supports email and SMS gateways. All settings are in the UI.
Virto Notifications & Alerts
Try Virto Calendar to Sync all data
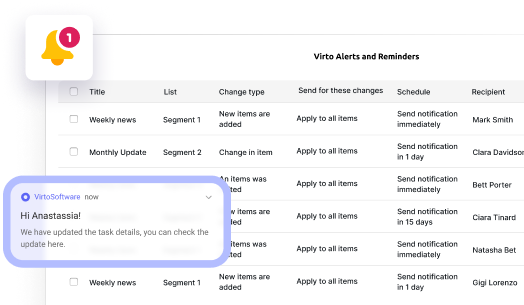
- Virto Alerts & Reminders (Microsoft 365 / AppSource) — a cloud app that automates alerts and reminders across SharePoint Online and Microsoft 365 with conditions, scheduling and templates. There’s also a Teams version if you want notifications to land in channels.
Virto Alerts & Reminders
Result: instead of maintaining a custom script that watches lists and sends messages, you configure the rules once and let the app handle delivery and recurrence.
Calendar and event management—UI overlays instead of scripts
When you need to merge multiple calendars or surface schedules:
- Virto Calendar Web Part (on-premises) — aggregates calendars (SharePoint lists, Exchange/Outlook, Google, SQL, XML) into a single, color-coded view with rich display modes (day/week/month/year/task).
Virto Calendar Web Part
Try Virto Calendar to Sync all data
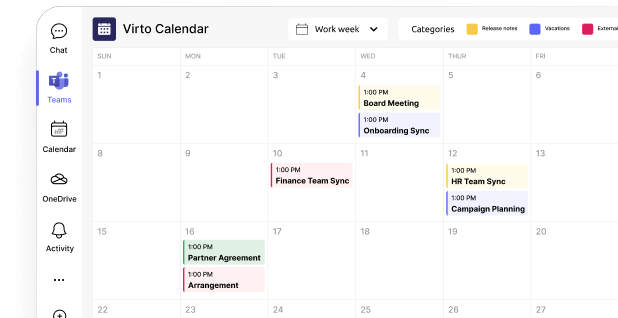
- Virto Calendar App (Microsoft 365 / Teams) — overlays unlimited Microsoft 365 and web calendars directly in Teams for a unified schedule view; also available via AppSource. Ideal when your users live in Teams.
Merge all calendars in one place
Try Virto Calendar to Sync all data
Outcome: instead of scripts that stitch together calendar feeds, admins drop in a ready-made overlay that end users can filter and use immediately.
Why this matters for admins
Here’s what you gain when you offload routine ops to ready-made apps and reserve PowerShell for the complex jobs:
- Time saved: configure once in the UI; avoid building and babysitting scripts
- Fewer errors: guardrails and visuals reduce the risk of mis-scoped bulk changes
- Handoff-friendly: operations staff can manage routine tasks without PowerShell expertise
- Works alongside PowerShell: keep scripts for advanced governance, but offload repetitive jobs to apps that are easier to operate
If you already rely on PowerShell, these tools don’t replace your governance automation—they complement it. Use the apps for everyday operations (alerts, calendars, workflow monitoring/automation) and keep scripts for tenant-level policy, inventory, and one-off bulk jobs.
Best Practices for SharePoint PowerShell
PowerShell is enormously capable, but it rewards discipline. A thoughtful approach prevents mistakes, improves security, and keeps your SharePoint environment stable. The practices below will help you work faster and safer.
Why best practices matter
Think of these as the pillars that keep your environment healthy. Nail each one and your PowerShell work becomes safer, more predictable, and easier to support at scale.
- Security: clear separation between personal and admin actions, least-privilege roles, strong authentication.
- Reliability: changes are predictable, reversible, and logged.
- Productivity: repeatable scripts, fewer surprises, and easier handoffs to colleagues.
Use separate accounts for administration
Don’t run tenant operations from your everyday user account.
- Create a dedicated admin account with only the roles it needs (e.g., SharePoint administrator; use global administrator only when necessary).
- Protect it with MFA and conditional access.
- Benefit for audits: logs clearly show which operations were performed by the administrator account, not mixed with personal activity.
Test scripts in a non-production environment
Always test new or modified scripts in dev/stage first.
- Start with small samples (a few sites/users) before scaling up.
- PowerShell can change many objects at once; a single mistake can remove access for hundreds of users.
- Validate with read cmdlets (Get-*) before any write (Set-*, Add-*, Remove-*).
- For bulk runs, export a baseline of current settings (e.g., Get-SPOSite | Export-Csv) so you can verify outcomes after the change.
Document frequently used commands and scripts
Treat your scripts like product code—document them and keep them in version control.
- Keep an internal reference: what each script does, when to use it, required parameters, and known risks.
- Add comments directly in code using # to explain intent and edge cases.
- Store scripts in Git (or another VCS) with commit messages, code reviews, and release tags.
- Include a README with usage examples and a change log.
Build safety into your scripts
Design patterns that reduce risk and increase clarity:
- Parameters and modes
[CmdletBinding()]
param(
[Parameter(Mandatory=$true)][string]$AdminUrl,
[Parameter(Mandatory=$true)][string]$CsvPath,
[ValidateSet('DryRun','Run')][string]$Mode = 'DryRun'
)
Start in DryRun, then switch to Run when you’re confident.
- Logging and traceability
$ts = Get-Date -Format 'yyyyMMdd_HHmmss'
Start-Transcript -Path ".\logs\Script_$ts.log" -IncludeInvocationHeader
Capture every action for audits and troubleshooting.
- Input validation
if (-not (Test-Path $CsvPath)) { throw "CSV not found: $CsvPath" }
- Idempotency: Write scripts so re-running them is safe (e.g., adding a user who’s already a member results in a no-op, not an error).
- Throttling resilience (SharePoint Online): Add retry with backoff for HTTP 429/503 responses and include small delays in bulk loops.
- Progress and confirmations: Use Write-Progress for visibility, and -Confirm:$true where supported for destructive actions.
- Error handling: Wrap critical calls in try { } catch { }, log the exception, and continue or stop based on severity.
- Clean exit: Stop the transcript and clearly summarize results (successes, skips, failures, log path).
Combine PowerShell with automation tools (e.g., VirtoSoftware apps)
PowerShell is ideal for complex, one-off, or very large changes. For everyday operations, a UI-driven tool is often faster and safer.
Examples
- Workflow monitoring: You can script checks to list workflow instances and states, but the Virto Workflow Status Monitor Web Part shows all processes in a visual dashboard that’s easier to triage and doesn’t require code.
- Bulk permission updates: You can write and maintain custom scripts, or configure rules with the Virto Workflow Automation Web Part to push consistent changes through a point-and-click interface.
💡 Why mix approaches? Using PowerShell + Virto apps reduces admin workload, lowers the chance of typos or mis-scoped scripts, and lets non-scripters handle routine tasks while engineers focus on policy and advanced automation.
Balance: when to script vs when to use ready-made apps
Use this simple split to decide in seconds—choose PowerShell for bespoke, heavy-duty changes, and lean on ready-made apps for repeatable, everyday operations.
- Use PowerShell for complex, rare tasks; fleet-wide audits; integrations with other systems; or when you need full control over logic and sequencing.
- Use ready-made apps (e.g., VirtoSoftware) for regular day-to-day operations—alerts, reminders, calendar overlays, workflow monitoring—where a graphical interface speeds setup and reduces errors.
This approach:
- Reduces dependence on a single scripting expert—new administrators can work productively with the app UI.
- Speeds up routine tasks and frees time for higher-value work.
- Increases reliability: well-tested UI flows are less brittle than ad-hoc scripts.
Quick checklist before you run anything at scale
Before you launch a bulk change, run this quick sanity check—it helps prevent surprises, validates scope, and ensures you can verify or roll back if needed.
- Tested in dev/stage with a small sample
- Baseline exported (pre-change CSV/report)
- Dry-run output reviewed
- Transcript logging enabled
- Retry/backoff and error handling in place
- Clear rollback or remediation plan
Adopting these habits makes your SharePoint administration safer, faster, and far more maintainable—no heroics required.
Check out VirtoSoftware use cases
Conclusion on Sharepoint Powershell Module
SharePoint Online Management Shell is the official PowerShell module for administering SharePoint Online at the tenant and site-collection levels. It gives administrators a consistent command set for policy changes, provisioning, access management, reporting, and bulk operations—work that’s difficult or time-consuming in the browser.
PowerShell remains a professional tool: it rewards experience with scripts, parameters, and safe rollout practices. That’s where VirtoSoftware can help. For routine, high-frequency tasks—alerts, calendar overlays, workflow automation and monitoring—Virto apps give you a visual, point-and-click alternative that saves time, reduces error, and is easier to hand off to teammates who don’t live in PowerShell.
Recommendation: keep using SharePoint PowerShell for complex or high-volume scenarios (governance changes, fleet-wide updates, scripted provisioning). For day-to-day operations, lean on Virto applications to simplify administration and accelerate delivery.
If you’d like to see this in action, book a short demo or start a free trial of the apps we discussed on the VirtoSoftware site. We’re happy to walk through your specific use cases.
Check out VirtoSoftware use cases
Further reading from Microsoft: