SharePoint Workflows: How to Create and Use Them
Here's your complete guide to mastering SharePoint workflows before workflows retire in April 2026, including the tools and strategies that will keep your automation running smoothly.
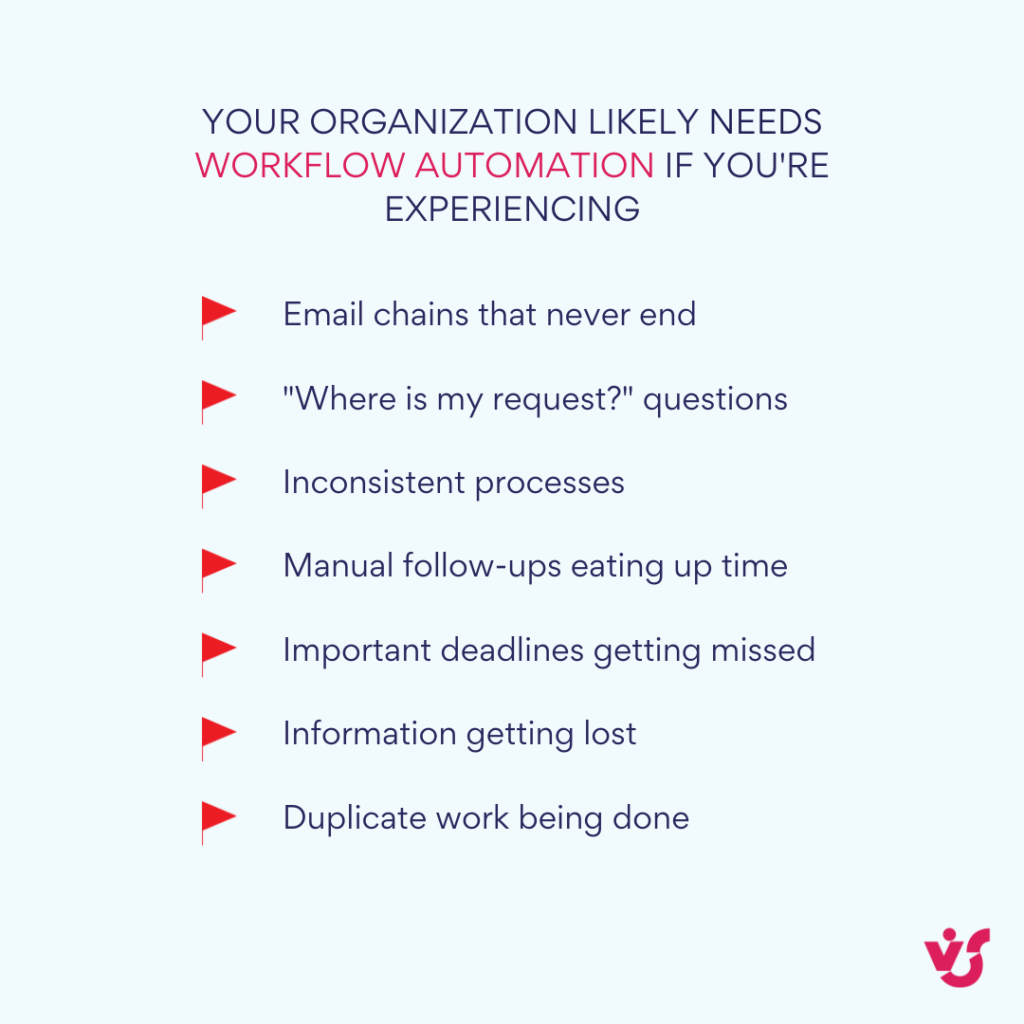
Workflow automation has become essential for modern companies looking to boost efficiency and reduce manual work. Instead of having employees constantly send emails, track document approvals, or remind colleagues about overdue tasks, automated workflows can handle these repetitive processes in the background.
SharePoint offers built-in tools for creating and managing these workflows, making it possible to automate everything from vacation requests to document approvals without writing a single line of code.
In this article, we’ll explore SharePoint Workflow in detail—a solution built into SharePoint Designer that was used to automate business processes in classic versions of SharePoint. These workflows are available in versions like SharePoint 2010 and SharePoint 2013, and partially in SharePoint 2016 and SharePoint 2019.
Now, here’s something important to know: Microsoft has officially announced the end of support for SharePoint 2010 Workflow and is gradually moving users to modern cloud solutions like SharePoint Online and Microsoft 365. In these newer environments, Power Automate has replaced the old Workflows as a more flexible and capable automation tool.
However, there are still many organizations using classic On-Premises SharePoint. This might be due to significant investments in existing infrastructure, special data security requirements that require on-premises storage, or simply because migrating to the cloud is complex and expensive.
If you’re one of these organizations, this article is especially for you. We’ll walk you through creating and managing Workflows using SharePoint Designer, and we’ll cover the most practical use cases for them.
👉 A note for modern SharePoint users: If you’re working in the SharePoint Online or Microsoft 365 ecosystem, we recommend reading our article on SharePoint Automation instead, which covers the modern tools for automating processes.
What Are SharePoint Workflows and Why Do You Need Them?
A workflow in SharePoint is a predefined sequence of actions that lets you automate business processes and cut down on manual work. Think of it as a digital assistant that follows a set of instructions you’ve given it, carrying out tasks automatically when certain conditions are met.
At its core, workflow in SharePoint operates on simple “if-then” logic, using triggers and actions. For example: “If a new document is uploaded, then send it to the manager for approval and notify the team.”
SharePoint workflows can handle a wide variety of tasks that would otherwise require constant human attention:
- Coordinating vacations, business trips, and various applications
- Reviewing, editing, and approving documents
- Sending notifications to specific employees
- Assigning tasks and monitoring deadlines
- Moving or archiving files when their status changes
- Creating business process logic for HR, finance, marketing, and project activities
- Collecting feedback from team members
Let’s look at some practical examples to see how this works in real situations:
Notification when uploading a document
When a user uploads a document to a SharePoint library, a workflow automatically launches. It sends the file to the manager for approval and then notifies the employee about the result. No one has to remember to forward the document or follow up on its status.
Submitting an approval request
An employee fills out a vacation request form in SharePoint. The workflow automatically sends the approval request to their manager, then updates the status in the list based on the manager’s response. The employee gets notified of the decision without anyone having to manually track the request.
Assigning tasks at project start
After someone creates a “New Project” item in SharePoint, the system automatically adds related tasks to To Do lists or Planner for specific team members. Project kickoff becomes consistent and nothing falls through the cracks.
Without automation, all these actions happen manually. People send emails, track statuses in spreadsheets, and spend time reminding colleagues about pending tasks. It’s not just time-consuming—it’s also prone to human error and inconsistency.
SharePoint workflows standardize these processes, reducing the chance of mistakes while increasing transparency. Team members can see exactly where things stand, managers get better visibility into operations, and everyone saves time. The result is higher employee productivity, lower operational costs, and much better control over business processes.
👉 What is a workflow in SharePoint? Simply put, it’s an automated sequence of actions that takes care of routine business tasks, so your team can focus on more important work.
The Difference Between SharePoint Workflows and SharePoint Automation
If you’ve been researching SharePoint automation lately, you might be wondering about the relationship between “SharePoint Workflows” and “SharePoint Automation.” The distinction is important, especially if you’re planning for the future.
Are SharePoint workflows going away?
The short answer is yes, but with some important nuances. Microsoft is phasing out support for SharePoint Designer and classic workflows, particularly in cloud environments like SharePoint Online. However, if you’re using SharePoint On-Premises, classic workflows are still relevant and actively used, especially when combined with third-party solutions.
Here’s the timeline you need to know: SharePoint 2013 workflows are scheduled for full retirement by April 2, 2026. This means organizations currently relying on these workflows need to start planning their migration strategy now.
👉 What are SharePoint Online workflows? SharePoint Online workflows are automated business processes that run in Microsoft’s cloud-based SharePoint environment, primarily using Power Automate (formerly Microsoft Flow) instead of the classic SharePoint Designer workflows. These modern workflows offer enhanced capabilities including integration with hundreds of external services like Teams, Outlook, Excel, and third-party applications through pre-built connectors. They’re created using a visual, drag-and-drop interface that’s more user-friendly than traditional SharePoint Designer, making automation accessible to business users without technical expertise.
What replaced SharePoint workflow?
Microsoft Power Automate has become the successor to SharePoint Designer and classic workflows. It’s a cloud-based automation tool that works with SharePoint Online and integrates with other Microsoft services like Outlook, Teams, and Excel.
What’s the difference between Power Automate and SharePoint workflows?
The differences go beyond just the interface—they represent fundamentally different approaches to automation:
SharePoint workflows (On-Premises):
- Run directly within the SharePoint platform itself
- Require configuration through SharePoint Designer
- Work primarily with SharePoint data and limited external connections
- Created using a more traditional, form-based approach
Power Automate (Cloud-based):
- Operates as a cloud service that connects to SharePoint and many other applications
- Uses a modern, visual flow designer with drag-and-drop functionality
- Offers extensive integrations with hundreds of services beyond Microsoft
- Provides a no-code interface that’s more accessible to business users
👉 What is SharePoint workflow automation? SharePoint workflow automation is the process of creating automated sequences of actions that handle routine business tasks without manual intervention. Instead of employees manually sending emails, tracking approvals, or following up on overdue tasks, workflows automatically execute these actions based on predefined triggers and conditions. For example, when someone uploads a document, a workflow can automatically send it to the appropriate manager for approval, notify relevant stakeholders, and update the document status based on the decision. This automation reduces human error, ensures consistent processes, and frees up employees to focus on higher-value work. SharePoint workflows can be created using tools like SharePoint Designer for on-premises environments or Power Automate for cloud-based solutions.
How workflows differ between classic and modern SharePoint
To help you understand where your current setup fits and what your options are, let’s compare the workflow capabilities across different SharePoint environments:
SharePoint On-Premises (2013/2016/2019):
- Supports built-in workflow templates like Approval, Feedback, and Collect Signatures
- Allows custom workflow creation through SharePoint Designer
- Workflows run on the local SharePoint server infrastructure
- Limited to the capabilities and integrations available within the on-premises environment
SharePoint Online/Microsoft 365:
- Uses Power Automate for all automation needs
- Offers hundreds of pre-built connectors to external services
- Benefits from continuous updates and new features
- Includes AI-powered capabilities and advanced analytics
Why this matters for your organization
Understanding these differences helps you make informed decisions about your automation strategy. If you’re currently using SharePoint On-Premises with classic workflows, you have some time to plan, but you shouldn’t wait too long. The April 2026 retirement date for SharePoint 2013 workflows means you’ll need to either:
- Migrate to SharePoint Online and Power Automate
- Upgrade to newer SharePoint On-Premises versions with alternative automation solutions
- Implement third-party workflow tools that work with your current infrastructure
For organizations that must stay on-premises due to security, compliance, or infrastructure requirements, understanding how to maximize your current SharePoint workflow capabilities becomes even more critical—which is exactly what the rest of this article will help you accomplish.
👉What is the difference between Power Automate and SharePoint workflows? Power Automate is Microsoft’s modern, cloud-based automation platform that works across the entire Microsoft 365 ecosystem and hundreds of third-party services, while SharePoint workflows refer to the classic, on-premises automation tools built into SharePoint Designer. Power Automate offers a more intuitive visual interface, continuous updates, AI-powered features, and extensive integration capabilities that go far beyond SharePoint to include Teams, Outlook, Excel, and external applications. SharePoint workflows, on the other hand, are primarily designed for on-premises SharePoint environments, have limited external integrations, and use an older interface that requires more technical expertise to navigate.
Types of Workflow in SharePoint
Different types of workflows solve different business problems—from document approvals to collecting feedback and obtaining signatures. Understanding which type fits your specific needs will help you choose the right approach and set realistic expectations for what each workflow can accomplish.
SharePoint offers both ready-made templates for common scenarios and the flexibility to create custom workflows for unique business requirements. Let’s explore each type and see where they work best.
Built-in workflows (Ready-made templates)
These are pre-configured workflows that you can set up quickly without any programming or complex configuration. They cover the most common business processes that organizations need to automate.
Approval workflow
This workflow automates the process of approving documents, applications, vacation requests, and other items. It solves the major problem of manually tracking approval statuses and helps minimize delays that happen when approvals get stuck on someone’s desk.
How it works: When someone adds a new contract to a document library, the workflow automatically sends it to the designated manager for approval. The manager receives a notification, reviews the document, and responds with approved, rejected, or “requires revision.”
Key features:
- Can include multiple levels of approval (employee → manager → director)
- Tracks the current status and shows who has the document
- Automatically notifies participants when action is required
- Maintains a complete audit trail of all decisions
Best for: Document approvals, expense reports, vacation requests, policy changes, contract reviews
Feedback workflow
This workflow allows you to automatically collect opinions and suggestions from employees on documents or projects. Unlike approval workflows, feedback workflows don’t require formal approval—they’re about gathering input from multiple people.
How it works: You send a project proposal document for review to several department heads. Each person can provide comments and suggestions without blocking others from reviewing simultaneously. The workflow collects all feedback and compiles it for the document owner.
Key features:
- Supports parallel collection of feedback from multiple reviewers
- No formal approval required—purely consultative
- Consolidates all comments in one place
- Allows reviewers to see others’ feedback if desired
Best for: Policy reviews, project planning documents, training materials, process improvement initiatives
Collect signatures workflow
This workflow is used to obtain digital signatures on documents like reports, agreements, and internal documents. It’s particularly useful for documents that require formal sign-off from multiple parties.
How it works: A legal agreement is uploaded to SharePoint and automatically routed to each required signatory in the correct order. Each person receives a notification, reviews the document, and provides their digital signature before it moves to the next person.
Key features:
- Enforces signing order when required
- Tracks who has signed and who still needs to sign
- Supports integration with digital signature services
- Maintains legal compliance for signature requirements
Best for: Contracts, HR documents, compliance certifications, policy acknowledgments
Note: This workflow requires support for digital signatures, which may need integration with services like Adobe Sign or DocuSign depending on your organization’s setup.
Custom workflows
Custom workflows allow you to automate unique, company-specific processes that can’t be handled by standard templates. These are built from scratch using SharePoint Designer and can include complex logic with multiple conditions and actions.
How they work: Let’s say you need to automate a marketing campaign launch process. When someone creates a new campaign item, the custom workflow automatically:
- Creates related tasks for different team members
- Sets up project timelines and milestones
- Generates initial reports and dashboards
- Sends notifications to stakeholders
- Schedules follow-up reviews
Key capabilities:
- Can include dozens of conditions and branching logic
- Integrate with multiple SharePoint lists and libraries
- Send customized notifications based on specific criteria
- Perform calculations and data manipulations
- Create new items in other lists automatically
Best for: Complex business processes unique to your organization, multi-step project workflows, intricate approval chains, processes that involve multiple departments
Consider custom workflows when:
- Built-in templates don’t match your business process
- You need complex conditional logic
- The workflow involves multiple SharePoint sites or lists
- You want to integrate with external systems
- Your process requires detailed tracking and reporting
The choice between built-in and custom workflows often comes down to complexity and uniqueness. Start with built-in workflows when possible—they’re faster to implement and easier to maintain. Move to custom workflows when your business processes require the additional flexibility and sophistication.
| Workflow type | Setup time | Complexity | Best for | Customization level |
| Approval workflow | Quick | Low | Document approvals, requests | Basic |
| Feedback workflow | Quick | Low | Document reviews, input gathering | Basic |
| Collect signatures | Medium | Medium | Legal documents, formal sign-offs | Medium |
| Custom workflows | Extended | High | Unique business processes | Extensive |
How to Create a Workflow in SharePoint
Creating workflows in SharePoint On-Premises requires a methodical approach, but once you understand the basic steps, the process becomes straightforward. The most popular and powerful way to create workflows is through SharePoint Designer, which gives you complete control over triggers, conditions, and actions.
How do I create a flow in SharePoint?
In SharePoint On-Premises, you create workflows using SharePoint Designer by following a logical sequence: select a trigger event, add any necessary conditions, and define the actions you want to happen.
Let’s walk through the complete process, from planning to implementation.
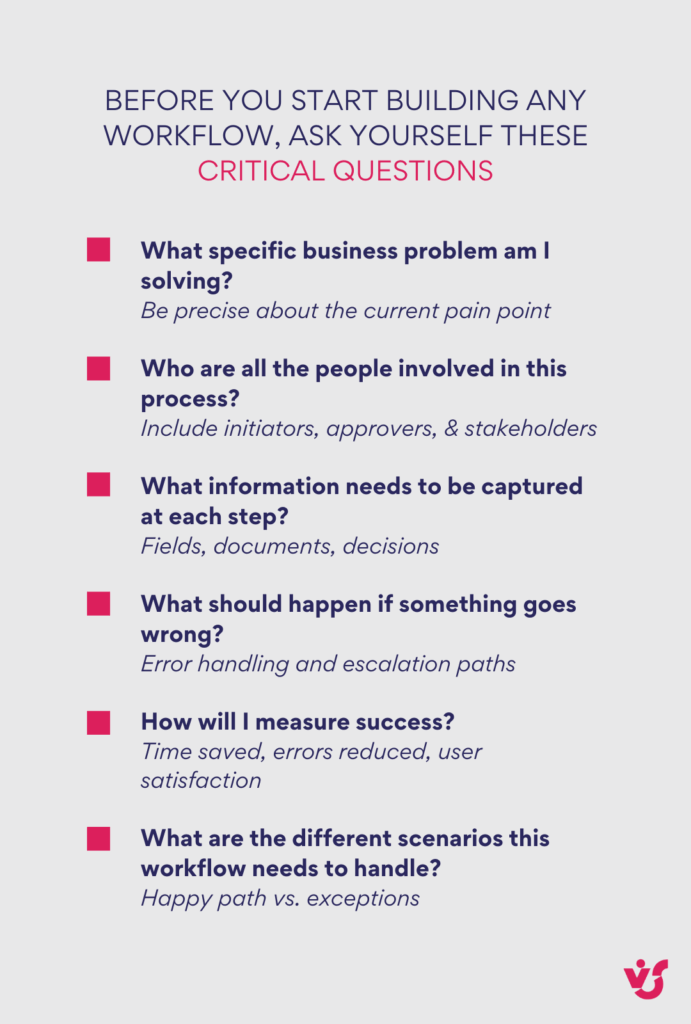
Step 1: Define the purpose of the process
Before you open SharePoint Designer, take time to clearly describe what you want to automate. This planning phase is crucial because it helps you determine exactly what triggers, conditions, and actions you’ll need.
Ask yourself these questions:
- What specific task or process am I trying to automate?
- What event should start this workflow?
- Who needs to be involved or notified?
- What information needs to be captured or changed?
- What should happen in different scenarios?
Example planning: “I want to automate vacation requests so that when an employee submits a request, it automatically goes to their manager for approval, and both the employee and HR get notified of the decision.”
Step 2: Create a new workflow in SharePoint Designer
SharePoint Designer is your primary tool for building custom workflows. Here’s how to get started:
- Open SharePoint Designer and connect to your SharePoint site
- Navigate to the “Workflows” section in the left navigation panel
- Choose your workflow type:
- List Workflow: Attached to a specific list or library
- Reusable Workflow: Can be used across multiple lists of the same content type
- Site Workflow: Runs at the site level, not tied to specific list items
- Give your workflow a descriptive name that clearly indicates its purpose
- Select the list or library where the workflow will operate (for list workflows)
Tip: Start with List Workflows if you’re new to SharePoint Designer—they’re easier to test and debug.
Step 3: Set up triggers, conditions, and actions
This is where you define the logic of your workflow. Think of it as building a flowchart that SharePoint will follow automatically.
Configure the trigger
Choose what event will start your workflow:
- When an item is created: Perfect for welcome processes or initial notifications
- When an item is modified: Good for tracking changes or status updates
- Manual start: Users can choose when to run the workflow
Add conditions (If needed)
Conditions let you create branching logic in your workflow:
- “If the Status field equals ‘Pending Review’…”
- “If the Amount field is greater than $1,000…”
- “If the Created By field equals current user’s manager…”
Define actions
Actions are what actually happens when your workflow runs:
- Send an email to specific people or groups
- Change field values in the current item or other items
- Assign tasks to users with due dates
- Create new items in other lists
- Copy or move files to different libraries
- Log information for tracking purposes
Step 4: Test and publish the workflow
Before making your workflow available to users:
- Review your logic step by step to catch any errors
- Check for typos in email addresses, field names, or text content
- Test with sample data if possible
- Publish the workflow to make it active
- Monitor the first few runs to ensure everything works as expected
| Step | Task | Key questions | Estimated time |
| 1. Define purpose | Plan workflow logic | What triggers this? Who’s involved? | 30-60 minutes |
| 2. Create in Designer | Set up workflow structure | Which type? What’s the scope? | 15-30 minutes |
| 3. Configure logic | Add triggers, conditions, actions | What happens when? What if…? | 1-3 hours |
| 4. Test & publish | Validate and deploy | Does it work as expected? | 30-60 minutes |
👉 So, how to create workflow in SharePoint? To create a workflow in SharePoint, you’ll use different tools depending on your environment: SharePoint Designer for on-premises installations or Power Automate for SharePoint Online. The process involves defining your business logic (triggers, conditions, and actions), then using the visual designer to build the workflow by connecting these elements in sequence. Once configured and tested, you publish the workflow to make it available to users, who can then trigger it manually or automatically based on the conditions you’ve set.
Practical example: “Notification when new employee added”
Let’s create a simple but useful workflow that notifies HR when a new employee is added to the company directory.
Step 1: Define the goal
Purpose: Automatically notify the HR department when a new employee record is created in the Employee Directory list, so they can begin the onboarding process immediately.
Step 2: Create the workflow in SharePoint Designer
- Open SharePoint Designer and connect to your site
- Go to Workflows → New → List Workflow
- Select the “Employee Directory” list
- Name it “New Employee HR Notification”
- Click “OK” to create the workflow
Step 3: Configure the logic
Trigger: When an item is created (this happens automatically when someone adds a new employee)
Action: Send an email to HR with the new employee’s details
Email configuration:
- To: hr@yourcompany.com
- Subject: “New Employee Added: [Employee Name]”
- Body: Include key details like employee name, department, start date, and manager
Step 4: Publish and test
- Click “Publish” in SharePoint Designer
- Go to your Employee Directory list
- Add a test employee record
- Verify that HR receives the notification email with correct information
Result: Now every time someone adds a new employee to the directory, HR automatically gets notified with all the relevant details, ensuring no new hire falls through the cracks.
👉 What does SharePoint workflow management involve? SharePoint workflow management involves the ongoing oversight, monitoring, and optimization of automated business processes within your SharePoint environment. This includes tracking workflow performance through status dashboards, identifying bottlenecks or failures, and making adjustments to improve efficiency and reliability. Workflow management also encompasses maintaining user permissions, updating processes when business requirements change, and ensuring workflows continue to function properly after system updates or organizational changes.
Workflow Sharepoint Use Cases & Sharepoint Workflow Examples
Seeing workflows in action helps you understand their real-world value and gives you ideas for automating your own business processes. Let’s explore several practical examples that demonstrate how SharePoint workflows can handle common organizational tasks while saving time and reducing errors.
| Business need | Manual process problems | Workflow solution |
| Vacation requests | Lost emails, unclear status | Automated routing & notifications |
| Document approvals | Delayed reviews, missed deadlines | Structured approval chains |
| New employee onboarding | Forgotten tasks, inconsistent experience | Automated task creation |
| Budget approvals | Paper trails, unclear process | Multi-level digital approval |
Automatic vacation approval
Managing vacation requests manually often creates bottlenecks, especially during busy periods when managers might overlook requests in their overflowing inboxes.
How the workflow works:
- An employee submits a vacation request using a SharePoint form with dates, duration, and reason
- The workflow automatically forwards the request to their immediate manager
- The manager receives an email notification with all request details and approval options
- Once approved, notifications are automatically sent to HR and the department calendar gets updated
- If the request is denied, the employee receives a notification with the manager’s comments
The process handles multiple scenarios:
- Overlapping requests: Can check for conflicts with other team members’ time off
- Policy compliance: Verifies minimum notice periods and available vacation days
- Escalation: Routes requests over certain durations to higher-level managers
- Documentation: Maintains a complete record of all requests and decisions
Value delivered: Fast and transparent approval process without paperwork, reduced administrative overhead, and better visibility into team availability for project planning.
Informing HR when a new employee starts
Employee onboarding involves multiple departments and numerous tasks that can easily be forgotten or delayed, creating a poor first impression for new hires.
How the workflow works: When a new employee completes the onboarding form in SharePoint, the workflow automatically:
- Notifies key stakeholders: HR receives the full employee information, IT gets technical requirements, and the office administrator learns about workspace needs
- Creates specific tasks: Document processing tasks for HR, equipment setup tasks for IT, and access card creation for security
- Sets deadlines: Each task includes appropriate due dates based on the employee’s start date
- Tracks progress: Managers can see which onboarding steps are complete and which are pending
- Sends reminders: Automatic follow-ups ensure nothing gets overlooked
Additional features:
- Department-specific logic: Different workflows trigger based on whether the new hire is in sales, engineering, or administration
- Manager notifications: The new employee’s manager gets a summary of onboarding progress
- Equipment tracking: IT receives specific requirements for laptops, phones, and software licenses
Value delivered: Eliminates forgotten steps in the onboarding process, ensures consistent experience for all new hires, and reduces the time-to-productivity for new employees.
👉What are some common SharePoint workflow examples? Common SharePoint workflow examples include vacation request approvals, where employees submit time-off requests that automatically route to their managers and notify HR upon approval. Document approval workflows send new contracts or policies to designated reviewers, track their decisions, and maintain a complete audit trail. Employee onboarding workflows automatically create tasks for IT, HR, and facilities when new hires complete their paperwork, ensuring nothing gets forgotten during the process. Budget and expense approval workflows route financial requests through appropriate approval chains based on amounts and departments. Other popular examples include project status notifications that automatically update stakeholders when milestones are reached, and task deadline reminders that alert both employees and managers when due dates approach.
Budget or cost request approval
Financial approvals often require multiple levels of review, and tracking these requests manually can lead to delays and lost documents.
How the workflow works:
- A project manager uploads a budget document and fills out a request form with amount, project details, and justification
- The workflow routes the request through a structured approval chain:
- First stop: Finance department reviews for budget availability and compliance
- Second stop: Executive director provides final approval for requests over a certain threshold
- At each approval stage: Reviewers can add comments, request modifications, or approve/deny
- Complete audit trail: Every decision, comment, and modification is automatically logged
- Final notification: The initiator receives detailed results including any conditions or comments
Advanced features:
- Amount-based routing: Smaller requests might skip the executive level
- Department budgets: Automatic checking against available departmental funds
- Quarterly limits: Built-in logic to prevent overspending in any given period
- Emergency approvals: Fast-track process for urgent requests
Value delivered: Simplifies multi-level approval with complete transparency, reduces approval cycle time, and provides clear audit trails for financial compliance.
Notification of overdue tasks or project stages
Project deadlines can slip when team members get busy with other priorities, and manual follow-up consumes valuable management time.
How the workflow works:
- Scheduled monitoring: The workflow automatically checks task statuses against their due dates (daily or weekly)
- Multi-level notifications:
- Warning phase: Sends reminders 2-3 days before due dates
- Overdue phase: Notifies both the task owner and their manager when deadlines pass
- Escalation phase: Alerts project managers and department heads for significantly overdue items
- Automatic status updates: Can change task priority from “Normal” to “High” or “Critical” based on how overdue they are
- Progress tracking: Identifies patterns in missed deadlines for process improvement
Smart features:
- Workday awareness: Doesn’t send notifications on weekends or holidays
- Context-sensitive messages: Different notification templates for different types of tasks
- Manager dashboards: Provides summary views of team performance and deadline compliance
Value delivered: Minimizes the human factor in deadline management, helps teams meet commitments consistently, and provides data for improving project planning accuracy.
Updating project status with automatic stakeholder notification
Keeping all stakeholders informed about project progress typically requires manual effort that’s often forgotten during busy periods.
How the workflow works:
- Status trigger: When a project manager updates key project status fields (milestone completion, budget changes, timeline adjustments)
- Stakeholder identification: The workflow automatically determines who needs to be notified based on their role and the type of update
- Customized communications: Different stakeholder groups receive tailored notifications:
- Clients: High-level progress updates with key milestones
- Team members: Detailed task assignments and deadline changes
- Management: Budget implications and timeline impacts
- Document generation: Automatically creates PDF status reports and attaches them to notifications
- Follow-up scheduling: Sets reminders for the next required status update
Advanced capabilities:
- Risk flagging: Highlights potential issues based on status changes
- Trend analysis: Compares current progress against historical project data
- Integration ready: Can connect with project management tools and financial systems
Value delivered: Ensures transparent communication with all project participants, reduces the administrative burden on project managers, and improves overall project visibility and accountability.
These examples demonstrate how SharePoint workflows can transform routine business processes from manual, error-prone activities into reliable, automated systems. The key is identifying repetitive processes in your organization and gradually automating them, starting with the simplest and most impactful ones.
Best Practices for Creating and Implementing SharePoint Workflows
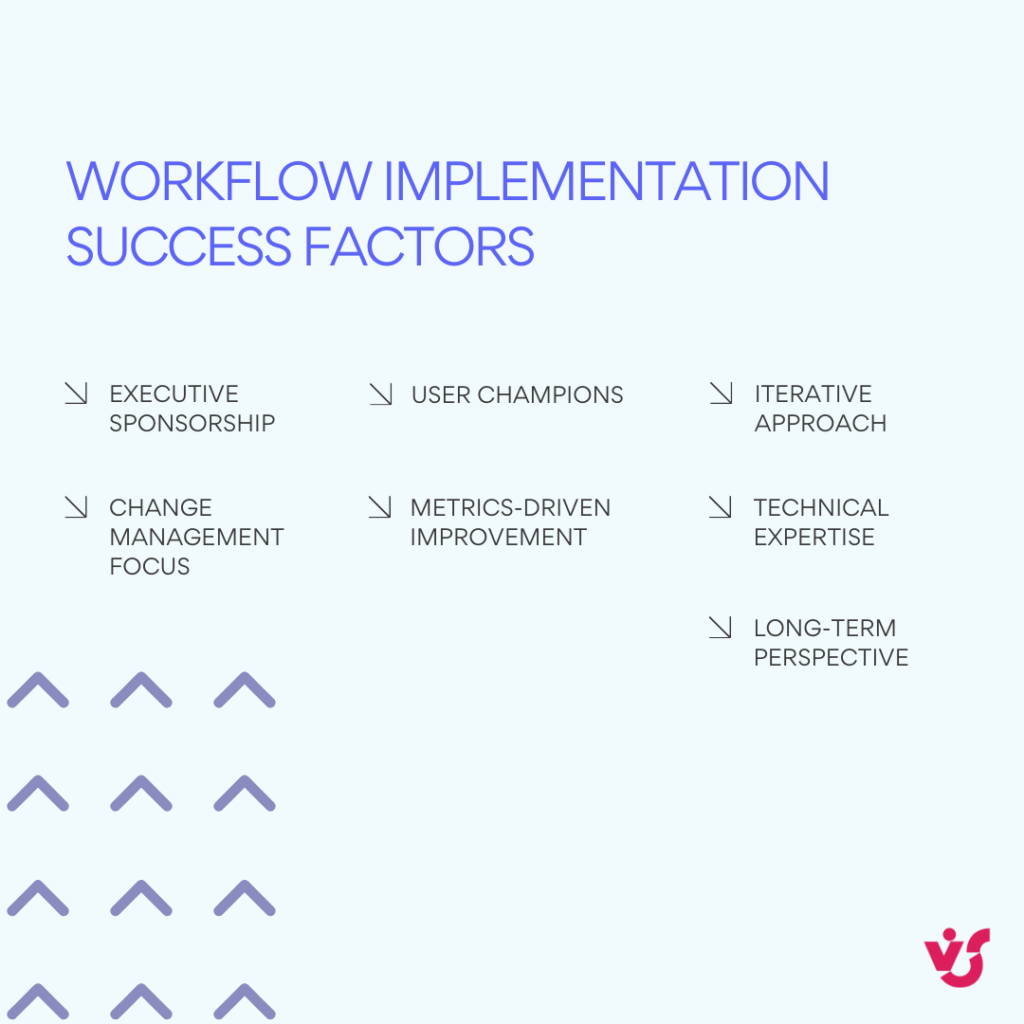
Successful automation implementation in SharePoint requires more than just technical know-how. It demands a thoughtful approach to design, implementation, and ongoing maintenance of your workflows. The difference between workflows that deliver lasting value and those that become maintenance headaches often comes down to following proven practices from the start.
Here are ten essential practices that will help increase the reliability and business value of your automated processes:
- Start with simple and repeatable processes
When you’re beginning your workflow automation journey, resist the temptation to tackle your most complex business process first. Instead, choose processes that have clear structure and occur regularly throughout your organization.
Ideal starting points include:
- Vacation request approvals
- New employee notifications
- Document review requests
- Equipment requests
- Basic status updates
Why this approach works: Simple processes let you achieve quick wins, demonstrate value to stakeholders, and establish standards that you can apply to more complex workflows later. You’ll also build confidence and expertise without getting overwhelmed by edge cases and exceptions.
- Document the logic and steps of each process
Before you open SharePoint Designer, take time to thoroughly document your business process. This isn’t just good practice—it’s essential for creating workflows that actually match how your organization operates.
Document these key elements:
- Purpose: What business problem does this solve?
- Launch conditions: What triggers the workflow to start?
- Responsible persons: Who needs to take action at each step?
- Process steps: What happens in what order?
- Exceptions: What should happen when things don’t go as planned?
- Success criteria: How do you know the process worked correctly?
The benefits extend beyond initial creation: Good documentation enables teamwork during development, makes troubleshooting easier, and provides the foundation for scaling successful workflows to other departments or processes.
- Continuously test and verify the workflow
Never deploy a workflow directly to production without thorough testing. Create test scenarios that cover both normal operations and edge cases that might break your logic.
Testing strategies that work:
- Happy path testing: Verify the workflow works perfectly under ideal conditions
- Exception testing: See what happens with incomplete data, missing approvers, or unusual timing
- Load testing: Ensure the workflow performs well when multiple instances run simultaneously
- User acceptance testing: Have actual end users try the workflow with real-world scenarios
Use SharePoint’s built-in tools: Enable workflow history logging and monitor the workflow status page to identify where processes might hang or fail. This diagnostic information becomes invaluable when troubleshooting issues.
- Use variables, conditions, and branches for flexibility
Build flexibility into your workflows from the beginning using logical operators and variables. This approach makes your workflows adaptable to different scenarios without requiring complete rebuilds.
Practical examples:
- Use if/then conditions to route approvals differently based on request amounts
- Employ switch statements to handle different document types with appropriate workflows
- Create variables for common values like department email addresses or approval thresholds
- Build branching logic that accommodates different user roles or business units
The long-term payoff: Flexible workflows can adapt to organizational changes, handle exceptions gracefully, and often serve multiple departments with minor modifications.
- Involve business users at the design stage
The people who actually perform the process every day understand nuances that might not be obvious to IT professionals or workflow designers. Involve them early and often throughout the design process.
How to engage business users effectively:
- Conduct process mapping sessions with actual end users
- Show them workflow prototypes and gather feedback before full implementation
- Ask about seasonal variations, common exceptions, and pain points in current processes
- Include them in testing phases to validate the workflow meets real-world needs
This collaboration delivers two critical benefits: More accurate workflow scenarios that actually match how work gets done, and higher user acceptance because people helped design the solution.
- Consider access rights and security
Security isn’t an afterthought—it should be built into your workflow design from the beginning. Ensure your workflows respect your organization’s security policies and data access requirements.
Key security considerations:
- User context: Verify that workflow actions are performed using appropriate user credentials
- Data access: Ensure sensitive information is only visible to authorized personnel
- Approval authority: Confirm that only properly authorized individuals can approve or modify items
- Audit requirements: Include logging that meets your compliance and audit needs
Common security mistakes to avoid: Running workflows with elevated privileges when not necessary, exposing sensitive data in email notifications, and allowing unauthorized users to modify workflow-controlled items.
- Update workflows when business processes change
Business processes evolve, and your workflows need to keep pace. Establish a regular review cycle to ensure your automated processes still match current business requirements.
Changes that might require workflow updates:
- Organizational restructuring or new reporting relationships
- Modified approval limits or policy changes
- New compliance requirements
- Changes in document types or required fields
- Integration with new systems or applications
Version management strategy: Use SharePoint Designer’s versioning capabilities or create copies of working workflows before making significant changes. This approach gives you a rollback option if updates cause unexpected problems.
- Implement control and transparency
Monitoring your workflows isn’t optional—it’s essential for maintaining reliable automation. Implement tools and processes that give you visibility into workflow performance and help you identify issues quickly.
Monitoring approaches:
- Use workflow status pages to track individual workflow instances
- Implement tools like Virto Workflow Status Monitor for comprehensive oversight
- Configure notifications for workflow failures, unusual delays, or completion milestones
- Create dashboards that show workflow performance metrics and trends
Proactive monitoring benefits: Early identification of bottlenecks, faster resolution of problems, and data-driven insights for process improvements.
- Standardize approaches and create templates
As you build more workflows, develop standard templates and approaches for common scenarios. This standardization accelerates development and makes maintenance much easier.
Template categories to develop:
- Approval workflows: Standard patterns for single and multi-level approvals
- Notification workflows: Consistent formatting and routing for different types of communications
- Project workflows: Reusable task creation and tracking patterns
- Integration workflows: Standard methods for connecting with external systems
The compound benefits: Faster implementation of new processes, easier training for new team members, and reduced maintenance overhead across your workflow portfolio.
- Provide training, user support, and feedback
Even the best-designed workflow will fail if users don’t understand how to work with it effectively. Invest in user education and create feedback channels for continuous improvement.
Training and support elements:
- Quick reference guides: Simple instructions for common user actions
- Video walkthroughs: Visual demonstrations of key processes
- Regular training sessions: Both for new users and refreshers for existing users
- Help desk support: Clear escalation paths when users encounter problems
- Feedback mechanisms: Regular surveys or feedback sessions to identify improvement opportunities
Continuous improvement mindset: Treat your workflows as living systems that improve over time based on user experience and changing business needs.
Following these best practices doesn’t guarantee perfect workflows, but it dramatically increases your chances of creating automation that delivers lasting business value while remaining maintainable and user-friendly over time.
SharePoint Workflow Solutions & Recommended Tools for Workflow Automation
For effective automation of processes in SharePoint, choosing the right tools is crucial. The best solution depends on your architecture, your team’s technical expertise, and your scalability requirements. The landscape includes both built-in Microsoft solutions and third-party tools that can significantly extend your automation capabilities.
Let’s explore the solutions that allow you to organize workflow management more flexibly, transparently, and conveniently.
Built-in solutions from Microsoft
While Microsoft has shifted focus to cloud-based Power Automate for modern SharePoint environments, SharePoint Designer remains the primary built-in tool for on-premises workflow automation.
SharePoint Designer (On-Premises Only)
SharePoint Designer remains the primary free tool from Microsoft for creating classic workflows in on-premises environments. While it’s no longer being actively developed, it continues to serve organizations with existing SharePoint installations.
Key capabilities:
- Basic workflow scenarios: Handles notifications, conditions, tasks, and approval routes effectively
- Visual workflow designer: Provides a drag-and-drop interface for building automation logic
- List and library integration: Works seamlessly with SharePoint content management
- Custom forms and views: Allows customization of user interfaces for workflow interactions
Compatibility: Works with SharePoint 2013, 2016, and 2019 on-premises versions
Important considerations: Microsoft has not released new versions since 2013, and support ends in 2026. While still functional for basic needs, organizations should plan for eventual migration to modern solutions.
Best for: Organizations with simple workflow requirements who need a free, immediately available solution and have the technical expertise to work within its limitations.
Third-party SharePoint workflow tools
Third-party tools fill the gap left by Microsoft’s limited on-premises workflow development, offering advanced features, extended support, and capabilities that go far beyond what SharePoint Designer can provide.
Virto Workflow Automation Web Part for SharePoint On-Premises
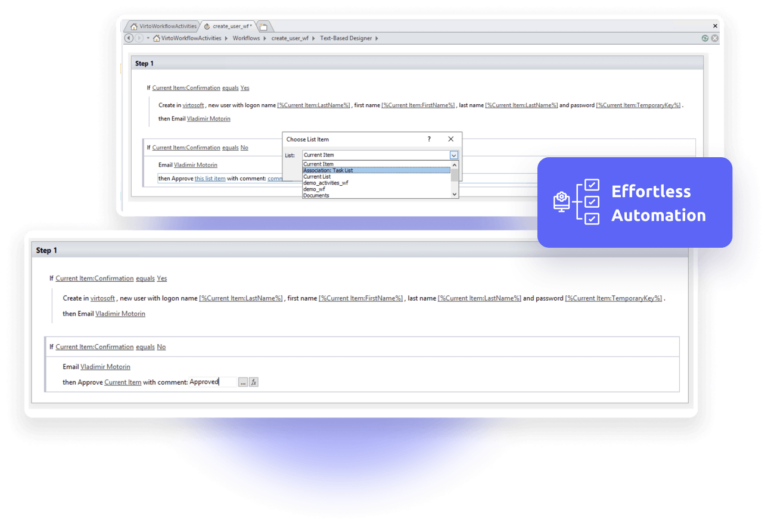
This comprehensive tool is designed to automate business processes in on-premises SharePoint environments without requiring programming skills. It transforms workflow creation into an intuitive, fast process that significantly reduces development time.
Advanced capabilities:
- Extensive activity library: Over 270 pre-built, no-code activities covering everything from email notifications to Active Directory integration
- Visual drag-and-drop designer: Create complex automation sequences using an intuitive interface
- Flexible execution: Run processes based on conditions, events, or scheduled triggers
- Complex scenario support: Handle everything from simple document routing to multi-level approvals with branching logic
- Universal compatibility: Works across SharePoint SE, 2019, 2016, 2013, and 2010 versions
- Beyond Designer limitations: Create workflows that exceed SharePoint Designer’s built-in capabilities
Unique features:
- Custom activity requests: Virto promises to deliver specific workflow activities within 3 days of request
- Seamless integration: Integrates directly with SharePoint Designer without requiring additional tools
- Full automation capabilities: Supports emails, SMS, Active Directory management, and SharePoint site administration
How it helps: Enables both IT professionals and business users to quickly create and modify complex processes without involving developers, dramatically reducing implementation time and ongoing maintenance overhead.
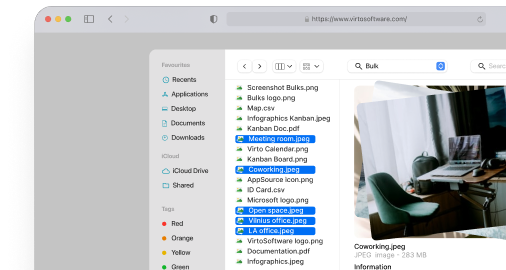
Virto Multiple File Operations
Streamline your content workflow with advanced bulk capabilities
Virto Workflow Status Monitor Web Part for SharePoint On-Premises
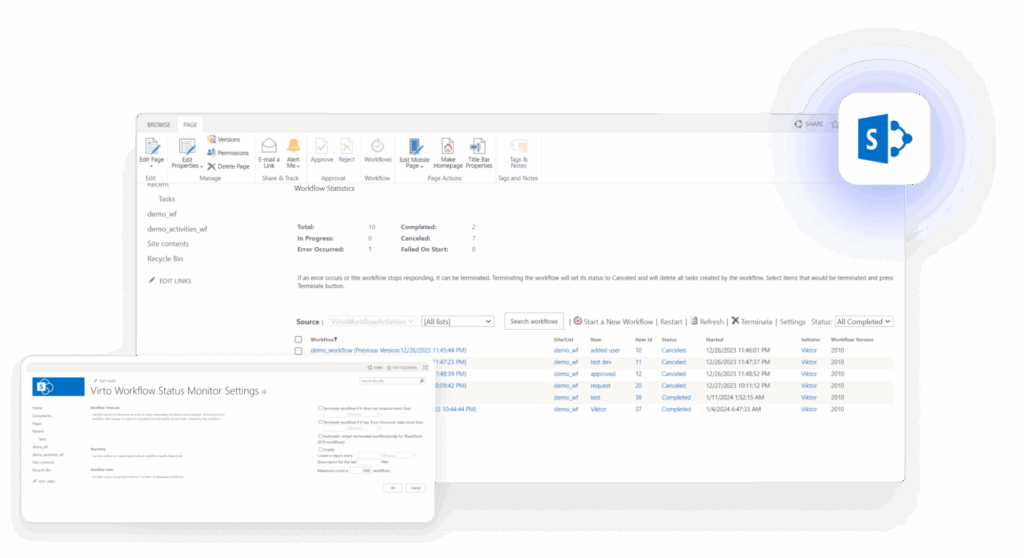
This monitoring solution addresses one of the biggest challenges in workflow management: visibility and performance analysis. It’s specifically designed to track, analyze, and optimize running processes.
Monitoring capabilities:
- Real-time status tracking: Shows all active, completed, and suspended workflows across your SharePoint environment
- Error detection: Automatically identifies crashes, delays, restarts, and failures
- Performance analysis: Generates graphical reports to analyze workflow performance and identify bottlenecks
- Proactive alerting: Enables administrators to respond quickly to problems before they impact users
- Visual dashboard: Provides an intuitive interface that integrates seamlessly with existing SharePoint pages
Analytics features:
- Workflow performance metrics: Track completion times, failure rates, and process efficiency
- Bottleneck identification: Pinpoint where processes typically slow down or fail
- Historical reporting: Analyze trends and patterns over time for continuous improvement
- Real-time monitoring: Get immediate visibility into workflow status and health
How it helps: Provides the transparency and control needed to maintain reliable automation, even in complex scenarios with multiple parallel processes. Essential for organizations that need to ensure workflow reliability and optimize performance.
Integration advantages: Both Virto solutions integrate seamlessly with SharePoint On-Premises infrastructure, receive regular updates and support from VirtoSoftware, and scale effectively from small companies to large organizations with hundreds of concurrent processes.
Nintex Workflow (for SharePoint Online and On-Premises)
Nintex represents the enterprise-grade solution for organizations with demanding workflow requirements and complex business processes.
Enterprise capabilities:
- Powerful visual editor: Advanced drag-and-drop designer with sophisticated branching and logic options
- Extensive customization: Build complex business processes including custom forms, task management, and external system integration
- Hybrid environment support: Works seamlessly across on-premises, cloud, and hybrid SharePoint deployments
- Advanced automation: Handles complex scenarios including document approvals, task assignments, and multi-system workflows
- Process optimization: Includes analytics and optimization tools for continuous improvement
Integration strength: Connects with various line-of-business applications and third-party systems, making it ideal for organizations with complex IT ecosystems.
Long-term support: Nintex offers extended support beyond Microsoft’s end-of-life dates, providing an extra year of critical security support for SharePoint 2016 and 2019.
Best for: Organizations with high requirements for workflow reliability, flexibility, and enterprise-level features. Particularly valuable for companies that need sophisticated process management across multiple systems.
FlowForma BPM (for SharePoint On-Premises and Online)
FlowForma focuses on making powerful process automation accessible to business users without technical backgrounds.
User-friendly features:
- No-code automation: Empowers process owners to create sophisticated workflows without programming
- Decision-making integration: Combines workflow automation with voting, eSignatures, tracking, and collaborative features
- Intuitive prototyping: Rapid development and deployment capabilities that encourage adoption
- Mobile accessibility: Enables remote teams to participate in processes from anywhere
- Hybrid flexibility: Operates seamlessly between on-premises and online environments
Data integration: Connects with SharePoint data and external systems, automatically populating information to reduce manual effort.
Best for: Organizations seeking user-friendly, no-code solutions with strong integration capabilities, particularly effective for teams that want to democratize process automation.
K2 Appit (for SharePoint On-Premises)
K2 Appit bridges the gap between traditional on-premises workflows and modern cloud-based automation.
Bridging capabilities:
- Cloud-based platform: Browser-based designers that work with on-premises SharePoint through K2 Five or blackpearl 4.7
- Systems integration: Connects with Microsoft CRM, Exchange, SQL Server, and other line-of-business systems
- Data connectivity: Pulls external data into SharePoint workflows and forms
- Mobile support: Provides mobile access for workflow management and task completion
Best for: Organizations transitioning from on-premises to cloud solutions while maintaining legacy system support.
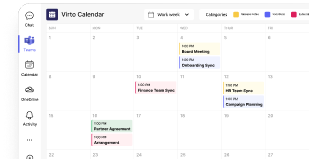
Merge all calendars in one place
Check VirtoSoftware calendar use cases
Choosing the right SharePoint workflow software
With multiple SharePoint workflow tools available, selecting the best tool depends on your specific requirements, budget, and technical resources. Here’s guidance to help you make the right choice:
For basic workflow needs: SharePoint Designer remains viable if you need a free solution and have the technical expertise to work within its limitations.
For extensive customization and no-code development: Virto Workflow Automation Web Part offers the most comprehensive activity library and flexibility for SharePoint On-Premises.
For monitoring and optimization: Virto Workflow Status Monitor Web Part is essential for maintaining visibility and performance in any workflow environment.
For enterprise-level requirements: Nintex Workflow provides the most sophisticated capabilities for complex, multi-system business processes.
For user-friendly automation: FlowForma BPM excels at making powerful automation accessible to business users.
For hybrid environments: K2 Appit helps bridge on-premises and cloud workflows during transition periods.
Recommendation for SharePoint On-Premises: The combination of Virto Workflow Automation Web Part and Virto Workflow Status Monitor Web Part provides the best balance of capability, ease of use, and long-term support for organizations committed to on-premises SharePoint. These tools allow you to build and manage sophisticated processes without programming while maintaining the visibility and control needed for reliable automation.
| Tool | Price | Activities | Compatibility | Best for |
| SharePoint Designer | Free | Basic built-in | 2013, 2016, 2019 | Simple workflows |
| Virto Workflow Automation | $2,890/year | 270+ activities | 2010-2019, SE | Advanced automation |
| Virto Status Monitor | $1,049/year | Monitoring tools | 2010-2019, SE | Workflow oversight |
| Nintex Workflow | Contact vendor | Enterprise features | 2010-2019 | Complex processes |
| FlowForma BPM | Contact vendor | No-code platform | On-premises & Online | User-friendly automation |
Conclusion
SharePoint workflows represent a powerful way to automate routine business processes, transforming manual, error-prone tasks into reliable, consistent automation. When properly configured, these workflows deliver significant benefits: increased productivity as employees focus on higher-value work, improved process transparency that keeps everyone informed, and reduced manual workload that eliminates repetitive tasks.
The key to successful workflow automation lies in choosing the right tools and taking a systematic approach to implementation. For organizations running SharePoint On-Premises, professional tools like Virto Workflow Automation and Virto Workflow Status Monitor can dramatically extend your automation capabilities beyond what’s possible with built-in solutions alone.
Start small and scale up. Begin with simple, high-impact processes like vacation approvals or document notifications. As you gain experience and demonstrate value, gradually expand to more complex workflows that address your organization’s unique business needs.
Ready to explore how workflow automation can transform your SharePoint environment? Schedule a demo or visit the dedicated pages to learn more about the tools mentioned in this article:
- Virto Workflow Status Monitor: Track and manage your workflows with precision
- Virto Workflow Automation: Access 270+ activities for advanced automation
Deepen your understanding with these official Microsoft resources:
- Overview of Workflows Included with SharePoint
- Introduction to SharePoint Workflow
- Get Started with Workflows in SharePoint
- SharePoint 2013 Workflow Retirement
- About the Workflows Included with SharePoint
- Power Automate SharePoint Overview
For more insights and practical guidance, explore our additional resources and blog articles on SharePoint automation and workflow best practices:
- SharePoint Web Parts product page
- SharePoint Modern vs. Classic: Key Differences and Reasons to Migrate
- SharePoint Overview: Your Ultimate Guide to Collaboration and Document Management
- The Ultimate Guide to SharePoint Limitations in 2025: Online vs On-Premises
- SharePoint Online vs SharePoint On-Premises: A Comprehensive Comparison [2025]