This article describes how to adjust cross-browser drag and drop of files from your computer to SharePoint Document Library with the help of Virto Bulk Upload.

You will also learn how you can adjust file properties, resize Jpeg images before upload to the server and automatically unpack ZIP archive after uploading to the server.
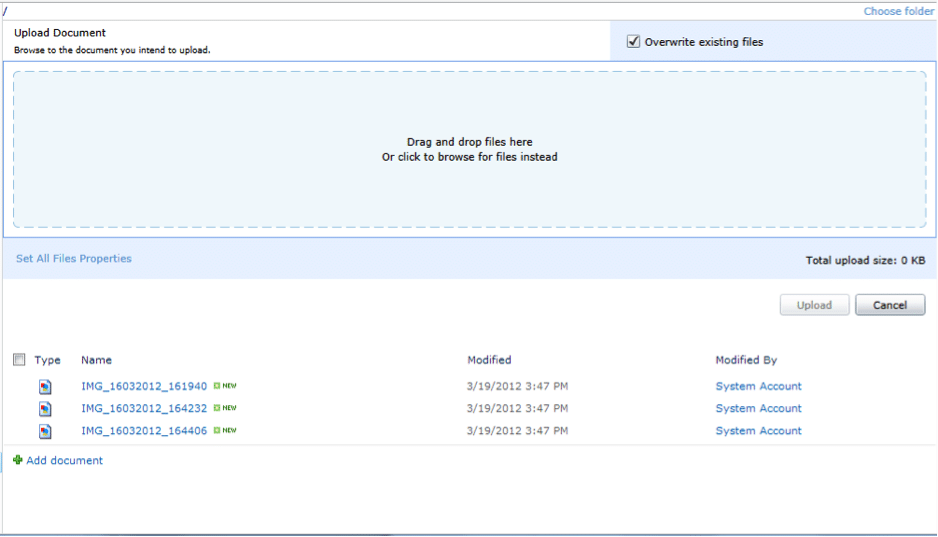
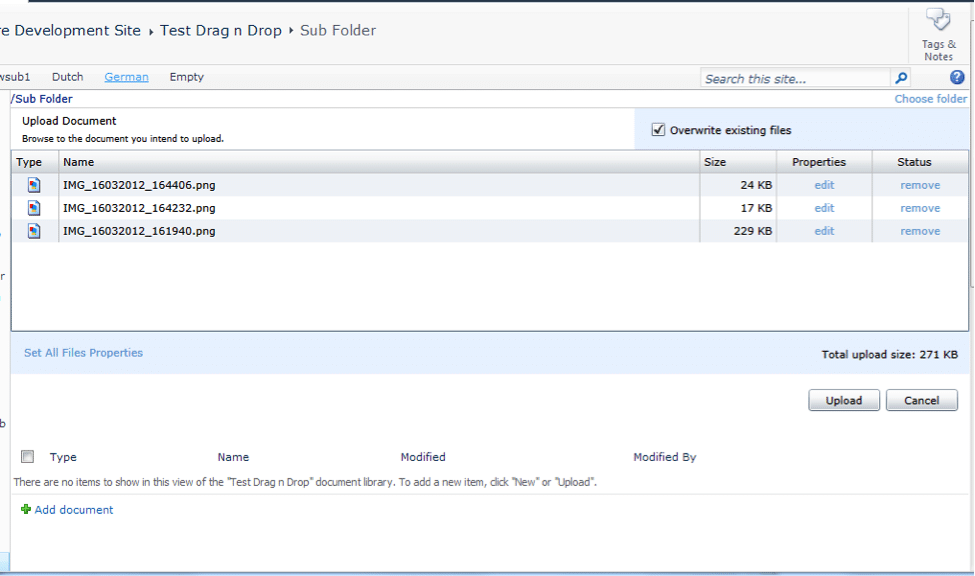
Virto Bulk Upload Preview
Virto Bulk File Upload is a Silverlight based solution for easy & simple uploading multiple files and attachments to SharePoint. It allows users to upload multiple files into the document library in a more comfortable way, manage the upload process and view the files they are working with.
Please download and install Virto Bulk File Upload from product page.
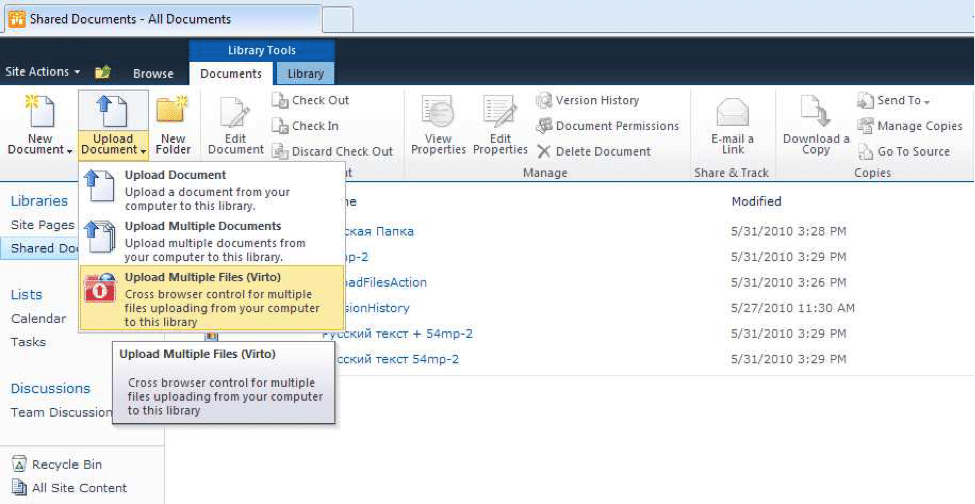
Once Virto Bulk File Upload is installed, it adds Menu extension and the Web Part. For example, to upload files you need to use “Upload Multiple Files (Virto)” in the “Documents” tab:
Adjustment
In order to add Virto Bulk File Upload Web Part to your library, go to a SharePoint library.
Add the key ToolPaneView=2 to the request string.

This way you will redirect the page into add web part mode.
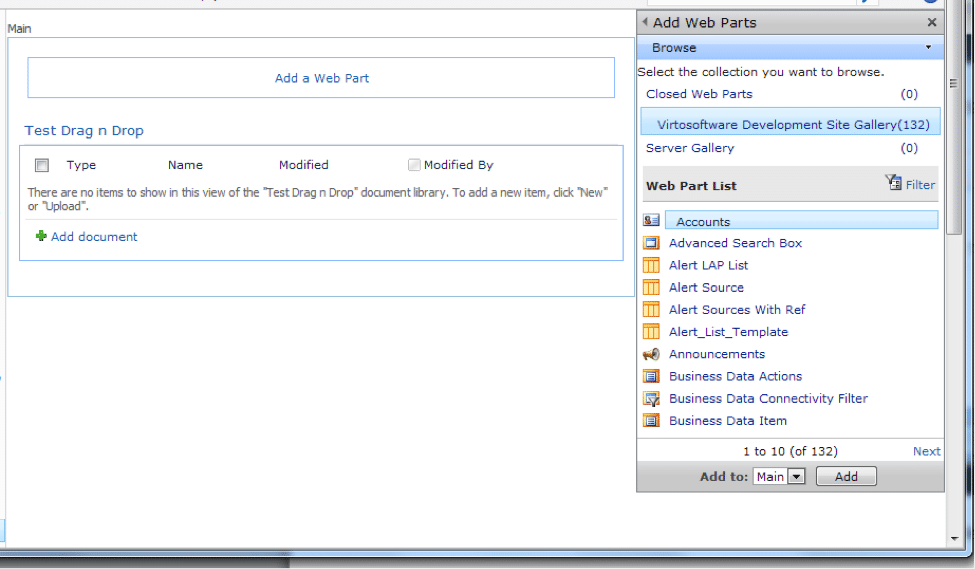
Click the link “Add a Web Part”, select Virto Solutions category, choose Virto Bulk Upload Web Part click Add. SharePoint will add Virto Bulk Upload Web Part to the page.
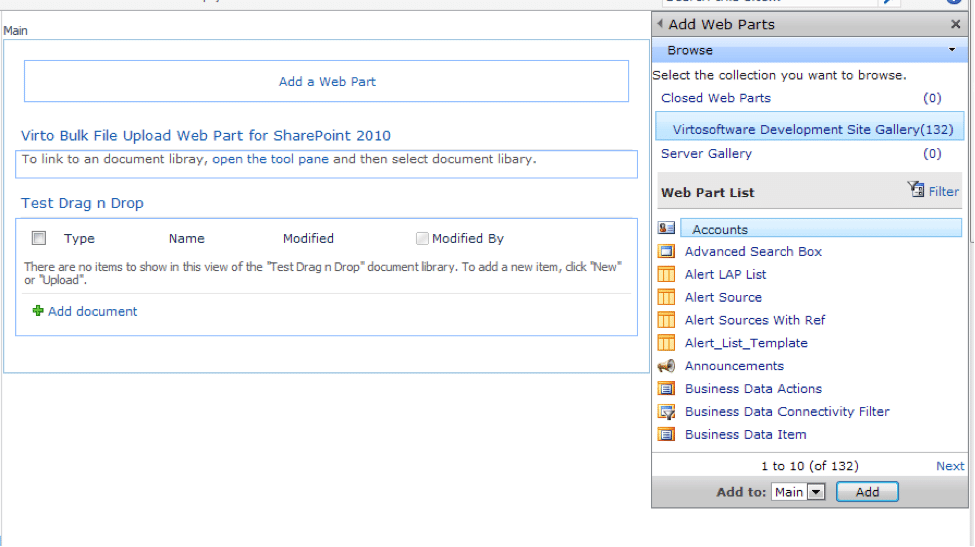
It is not related to the library by default.
To link it to a document library, open the tool pane and then select current document library. Leave the “Destination Folder” filed empty. Web Part will define the current folder automatically. Set refresh as Redirect Url in order to refresh current folder after files upload.
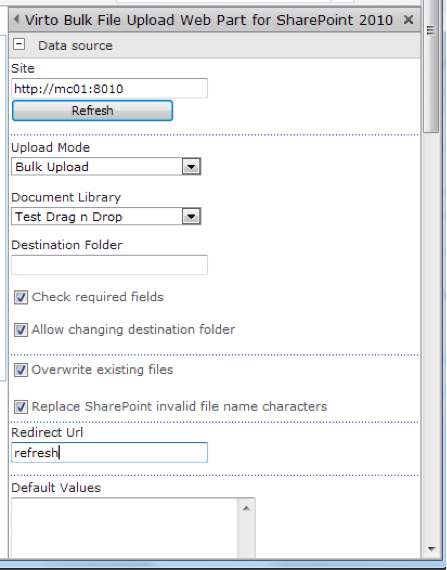
You can also adjust values of other properties. Please see detailed information in the documentation.
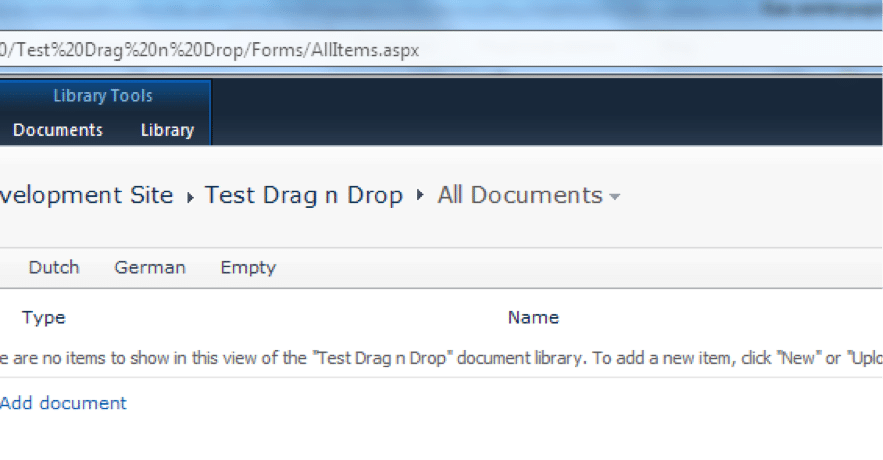
As a result we have the document library page where the files upload web part which supports cross-browser Drag&Drop documents from your computer to a SharePoint library, and the document library under it.
Moving around the library folder, Virto Bulk Upload Web Part automatically defines the current folder.
Adjusting File Properties
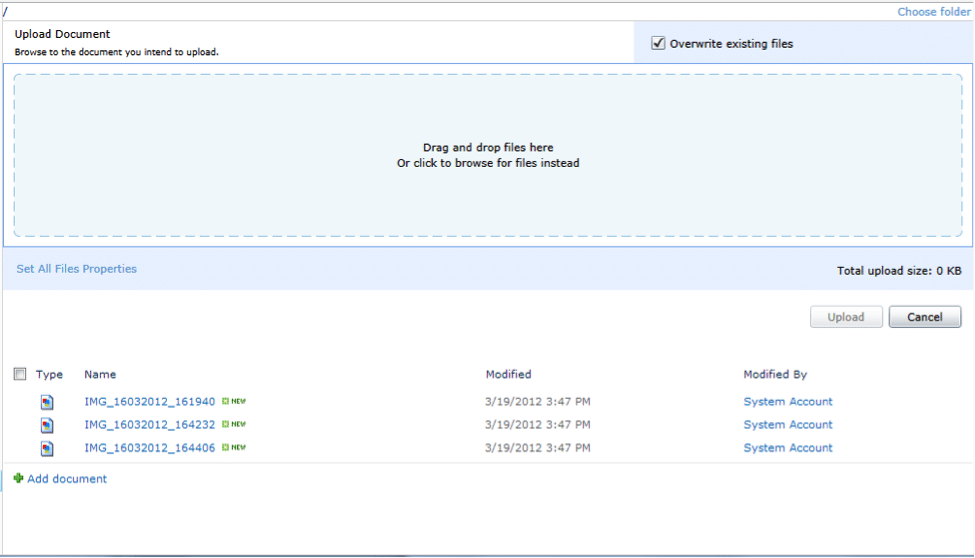
When uploading files with a standard form, you upload a file first and then define the properties. Sometimes this may be not really convenient.
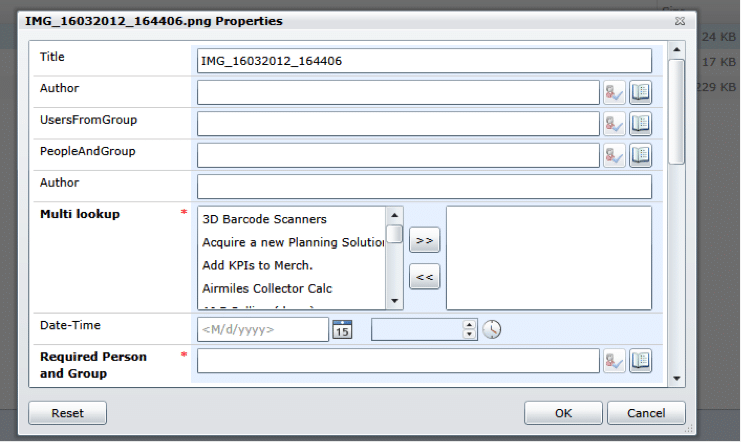
In addition you can define properties for all files at once.
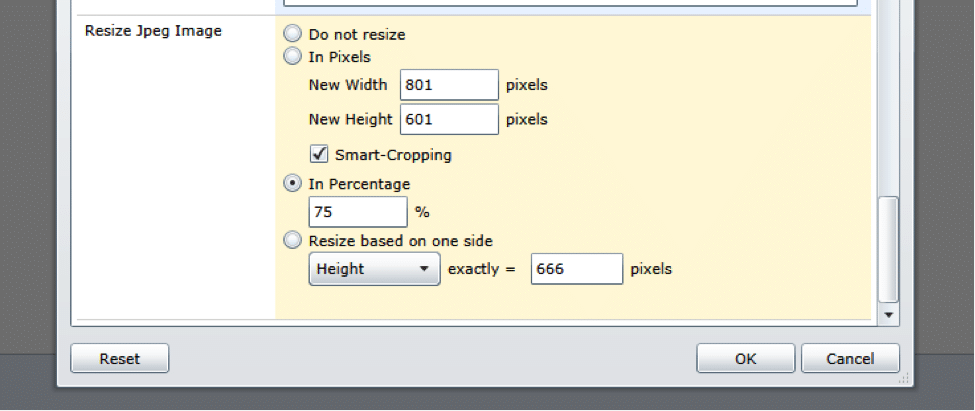
Custom Resize of Jpeg Images
To simplify the task for those who prepare images before upload to SharePoint, we have added the ability to resize Jpeg images before upload to Virto Bulk Upload .

Default values for Resize Jpeg Image block can be set in Virto Bulk Upload Web Part settings.
Automatic ZIP Archive Unpacking
Virto Bulk Upload can automatically unpack ZIP archives on the server with a saving folder structure ability.
You need to download and install Virto Bulk File Unzip Utility in order to do this.
After installing Virto Bulk File Unzip Utility, if a ZIP archive is chosen, the Unpack archive block appears in the settings. Here you can adjust ZIP archive unpacking after uploading to the server.

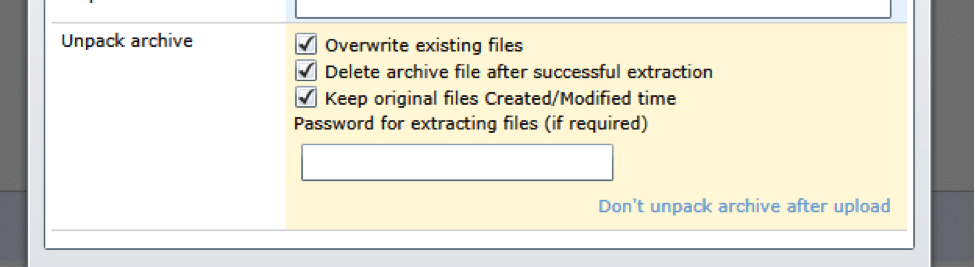
Bulk Upload with help of Virto Bulk File Unzip Utility can:
- Save folders’ structure after unpacking;
- Automatically overwrite files;
- Delete archive after unpacking;
- Save original create and modify dates;
- Save the SharePoint properties you defined for ZIP archive for unpacked files.
You can learn more about Virto Bulk Products on our website: SharePoint Bulk Files