How to Migrate SharePoint Online Lists
Here is the showcase of how to proceed list migration across SharePoint Online site collections with the Virto Backup & Recovery solution.
The starting point of the list migration process is like that:
- Save the required SharePoint list as a template (List settings -> Save list as template);
- Download the saved template from the List Template Gallery;
- In List Template Gallery, upload the list to the site collection, that is supposed to restore the list.
Note that the method works properly only if a SharePoint Online list does not contain the “Person” and “Lookup” column types. The “Person” column may be restored, but its values may fail to correspond to the original list. The “Person” column’s values are stored as 19; #User Name (where “19” refers to ID User, and “User Name” refers to a username) and restored by their ID. User ID is unique within one site collection. That is why, when transferring a list to other site collection, the ID value may appear to be assigned to a different user, or not found at all.
Lookup field also can`t be restored with the List Template. Even if we restore the list with lookup field by saving as a template, the values from lookup will not be restored. The ID of list from the referenced column is stored in the list template. And the list receives a new unique ID after restoring from a template.
We can use Virto SharePoint Online Backup & Recovery tool to solve this issue.
Virto Backup & Recovery Cmd is a migration solution that allows you to save / restore data in SharePoint Online.
We will examine the solution with Virto Backup & Recovery in the example below.
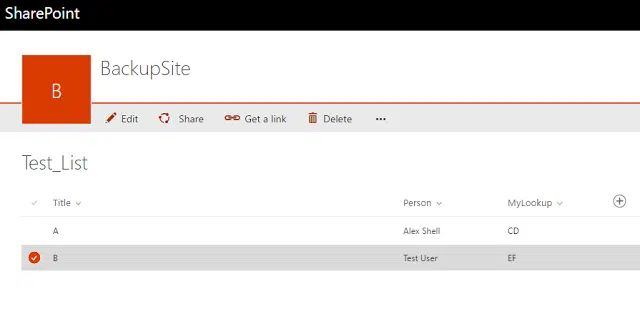
I have created two lists: Test_List and Test_List_2.
In Test_List list are added two fields:
– Person (type Person or Group)
– MyLookup (type Lookup) that refers to the Title field from the list Test_List_2
Virto SharePoint Online Backup & Recovery saves in backup a great amount of data by default (users, lists, group, etc.) But I need to move two lists only. In this case, I should create a configuration file.
Find Config.xml file in the folder with the utility (virtobr.exe). Copy this file with a new name, for example, TestConfig.xml.
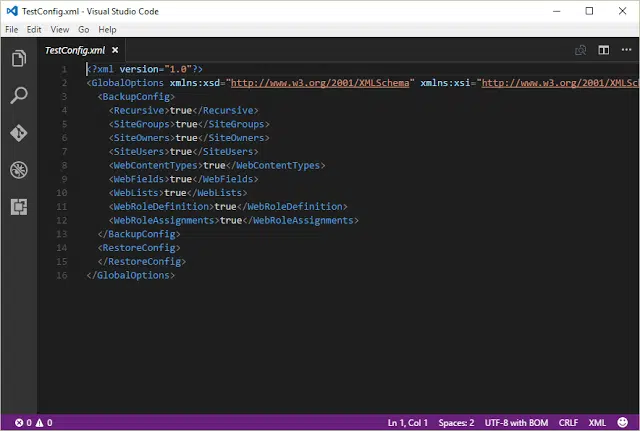
Open TestConfig.xml in any text editor (I’ve used the VS Code)
I have replaced all true values to false in this example, except SiteUsers and WebLists.SiteUsers is needed to properly map source site users IDs to the destination users IDs. WebLists is used to save lists.
Since I do not want to save all the lists, but two lists only (Test_List and Test_List_2), I`ll add this requirement to configuration file.
ServerRelativeUrl is the relative address of a site with lists.
You can see the values examples below:
|
Absolute Site Url
|
Relative Site Url
|
|
https://testportal.sharepoint.com
|
/
|
|
https://testportal.sharepoint.com/subsite
|
/subsite
|
|
https://testportal.sharepoint.com/sites/testsite
|
/sites/testsite
|
The final content of the xml file TestConfig.xml:
Now run cmd.exe (win -> cmd.exe), and go to the folder with the utility Virto Backup & Recovery.
(Using VS Code, you can press F1, type “Create new integrated terminal” and press enter)
Run virtobr.exe with parameters:
virtobr.exe -o backup -s https://testportal.sharepoint.com/sites/b -d c:TestBackup -u [email protected] -p MyP@$sWoRD1 –ConfigPath TestConfig.xml
-o: the type of operation being performed (backup, recovery)
-s: site address (or a folder address for recovery operation)
-d: folder address (the site address for recovery operation), where the backup will be saved (folder will be created automatically with TimeStamp added (e.g. TestBackup_201608251011))
-u: user login to connect to SharePoint
-p: user password to connect to SharePoint
–ConfigPath: The name of configuration file (if you do not specify the name, default Config.xml will be used)
As a result, the folder (such as TestBackup_201608251011) will be created, that will contain the backup files.
You need to run the utility once again with a few changes to restore (move) saved lists to this folder:
virtobr.exe -o recovery -s “c: TestBackup_201608251011” -d “https://testportal.sharepoint.com/sites/c” -u [email protected] -p MyP@$sWoRD1
Type recovery as the operation (-o). The backup folder address is the source (-s), and the destination (-d) is the address of site collection where I need to restore backup.
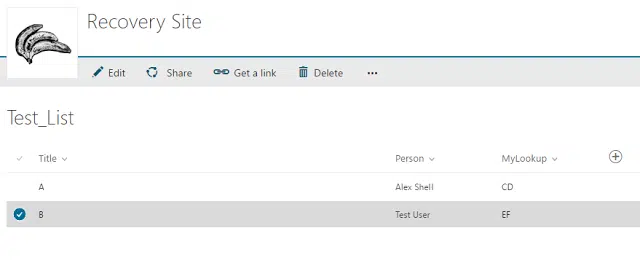
After the recovery is done, check the result:
As you can see, we have items with restored Lookup and Person fields.
You can download and use Virto SharePoint Online Backup & Recovery solution and try its 30-days free trial as well.
| Related Products: |
|---|
 |
| SharePoint Online Backup |


