How to Automate SharePoint Provisioning for Teams and Projects
Manual SharePoint setup works—right up to the moment you need your tenth site this week. This guide shows how provisioning makes new workspaces predictable in Microsoft 365 and on-prem, with concrete tools, patterns, and steps you can actually use.
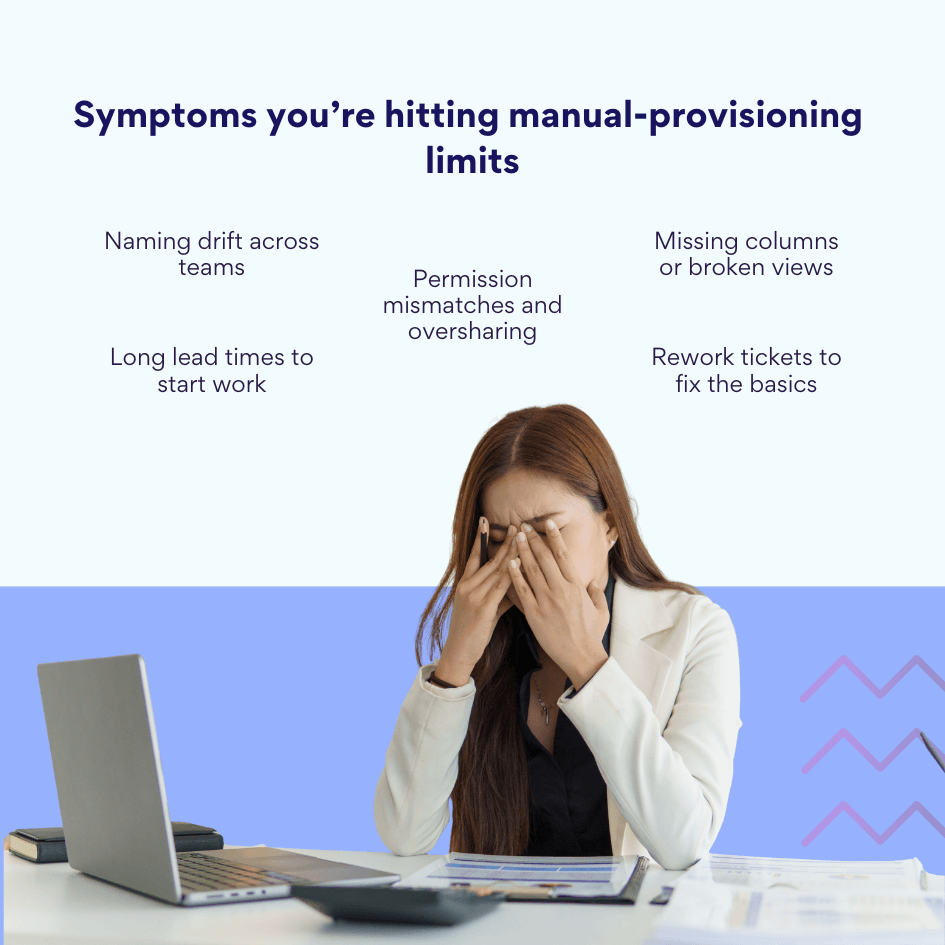
Creating SharePoint workspaces one item at a time sounds simple—until you have to do it at scale. In medium-sized and large organizations, teams need new collaboration spaces constantly: project sites, client workspaces, department hubs, and ad-hoc areas for initiatives. Manually building each site, library, and list is slow, inconsistent, and easy to get wrong. Naming drifts. Permissions vary from team to team. Required columns get missed. A month later, you’re fixing broken navigation and cleaning up oversharing. Multiply that by dozens or hundreds of workspaces and the cost becomes obvious.
SharePoint provisioning is how you take the human error out of that work. Instead of clicking through the UI each time, you define the workspace you want once—its structure, content types, libraries, lists, pages, web parts, permissions, and policies—and then apply that pattern whenever you need it. Provisioning turns repeatable setup into a reliable, scripted process. In Microsoft 365 this typically involves site templates (formerly “site designs”), PnP provisioning templates, and automation via PowerShell or APIs. For Microsoft Teams-connected workspaces, it also means understanding how files live in SharePoint: standard channels use folders in the team’s existing SharePoint site, while private and shared channels create their own separate sites. Getting that model right up front avoids messy sprawl later.
A unified approach matters most when multiple groups need the same kind of workspace or when your organization runs recurring projects. Marketing launches, customer projects, store openings, clinic rollouts, regional events—each follows a pattern. If every team builds their site by hand, you end up with five different folder structures, three versions of a “Status” list, and inconsistent permissions. With provisioning, you standardize the pattern once and give everyone a fast, consistent way to create it again and again. The result: better governance, faster ramp-up, and fewer surprises for IT and end users.
What you’ll find in this article
- Provisioning types. When to use out-of-the-box site templates, PnP provisioning templates, scripted approaches with PnP.PowerShell, and when to involve Microsoft Graph or admin-level controls.
- Tools that work today. How to combine site templates+site scripts, the SharePoint Provisioning Service (Look Book), PnP provisioning, and automation options like Power Automate for cloud scenarios.
- Step-by-step configuration. A practical walkthrough to define your template, wire up permissions and metadata, and roll it out safely.
- Use cases. Patterns for project workspaces, client portals, department hubs, and Teams-connected sites—with notes on governance and lifecycle.
By the end, you’ll have a clear, repeatable way to stand up SharePoint workspaces at scale without the rework or drift that manual setup invites.
What is SharePoint provisioning?
SharePoint provisioning is the process of creating and configuring SharePoint workspaces—either manually or automatically—so that teams get a ready-to-use environment with the right structure, content, and access.
In practice, provisioning means defining and setting up any combination of:
- Sites (team sites or communication sites)
- Document libraries
- Lists (including content types, columns, views, and rules)
- Pages (home, hub, landing, news, and any required web parts)
- Permissions (roles, groups, and sharing settings)
- Navigation (global/hub nav and local site nav)
You can use provisioning to stamp out templated environments (e.g., a standard project site pattern) or to stand up unique environments with specific metadata, security, and content. The core idea is repeatability: define once, apply many times—with fewer clicks and fewer mistakes. Provisioning applies to SharePoint on its own and to SharePoint as the files layer for Microsoft Teams workspaces.
💡 Learn more about SharePoint: How to Use SharePoint: Steps, Setup, and Best Practices
SharePoint provisioning methods: manual and automated
There are two broad approaches. Both are valid—the right choice depends on volume, repeatability, and control.
Manual provisioning (via the UI):
- What it is: An administrator or site owner creates sites, lists, and libraries directly in SharePoint’s interface, adds pages/web parts, and assigns permissions.
- Good for: One-off or low-volume needs, pilots, and situations where you’re still discovering requirements.
- Trade-offs: Slower, inconsistent across teams, and vulnerable to drift (naming, columns, permissions). Requires careful checks and documentation to keep things uniform.
Automated provisioning (via templates & scripts):
- What it is: Create workspaces from a defined template using automation: site templates+site scripts, the PnP Provisioning Engine, PnP.PowerShell, Microsoft Graph/CSOM, Power Automate, or custom solutions.
💡 Note: Pair the PnP Provisioning Engine with PnP.PowerShell; current releases typically require PowerShell 7.4+.
- Good for: Medium-to-large scale and any repeatable pattern (projects, clients, regions, stores, clinics, brands).
- Benefits: Faster, consistent, auditable, and easier to govern. You can include metadata standards, page layouts, default content, and pre-wired permissions every time.
💡 Tip: Manual and automated aren’t mutually exclusive. Many teams prototype manually, then codify the final pattern into a template so future workspaces are created consistently.
| Dimension | Manual (UI-driven) | Automated (templates & scripts) |
| Speed | Slow; many clicks per site | Minutes; one run creates all assets |
| Consistency | Varies by person | Uniform; template-enforced |
| Governance | Hard to police | Guardrails applied at creation |
| Scale | OK for one-offs | Built for dozens/hundreds |
| Tooling | SharePoint UI | Site templates, PnP + PnP.PowerShell, Graph/REST, Power Automate |
| Best for | Pilots, discovery | Repeatable patterns and programs |
Provisioning is especially valuable when you operate at scale—many teams, many projects, and frequent workspace creation—where standardization and access control are non-negotiable. It gives you a predictable foundation for governance, lifecycle, and reporting, while keeping setup fast for end users. We’ll get into the importance of provisioning in more detail in the next section.
What is SharePoint Online provisioning, and how does it differ from SharePoint on-prem provisioning?
SharePoint Online provisioning is the automated creation and configuration of sites, libraries, lists, pages, permissions, and navigation in Microsoft 365 using site templates and site scripts or PnP provisioning (often via PnP.PowerShell), with Power Automate or custom code orchestrating approvals and post-creation steps.
It differs from on-prem provisioning in where it runs and which tools you use: Online is cloud-based and leverages site templates, PnP, Microsoft Graph/REST, and the Provisioning Service (Look Book), while on-prem (SharePoint 2016/2019/Subscription Edition) relies mainly on PowerShell with CSOM/REST and ISV tools. Power Automate is cloud-hosted (it can reach on-prem data via a gateway but doesn’t provision inside SharePoint Server). Online also pairs cleanly with Microsoft Teams and Microsoft 365 governance features such as sensitivity labels and retention, whereas on-prem governance is handled within your farm and local policies.
💡 Learn more about SharePoint Online & On-prem: SharePoint Online vs SharePoint On-Premises: A Comprehensive Comparison [2025]
Why Automating Provisioning Is Important
Manual site creation doesn’t scale. When admins or site owners click through the UI to create every site, library, list, page, and permission set, several problems show up fast: people make mistakes, teams drift from the standard, and small differences add up to real friction. In short: manual setup is fine for a proof-of-concept, but it’s slow, fragile, and costly when you need dozens or hundreds of workspaces.
Benefits of automation
Automation replaces ad-hoc steps with a defined, repeatable process:
- Time and resource savings. Workspaces are created in minutes without manual data entry or repeated click paths.
- Consistency. Every site follows the same template—structure, pages, metadata, branding, and permissions are applied the same way each time.
- Quick launch. Users get a ready-to-work site immediately after creation, with lists, libraries, and pages already in place.
- Easy scaling. You can deploy tens or hundreds of sites for new teams, offices, or products with the same reliability you used for the first one.
- Reduced human error. Templates and scripts eliminate accidental misconfigurations (wrong columns, broken views, incorrect groups).
👉 So, why is site provisioning important in SharePoint? Because it turns workspace setup into a predictable service. Provisioning ensures every team starts with the right structure, the right access, and the right guardrails—without waiting on IT or relying on memory and checklists.
Why this matters even more with Microsoft Teams
Teams uses SharePoint as its files layer. That means your provisioning approach needs to align with how channel files are stored and how access is managed.
- In day-to-day collaboration, new channels appear frequently. If you build related SharePoint components manually, you’ll struggle to keep pace and you’ll introduce inconsistencies in folder structure, metadata, and permissions.
- Automation applies the correct pattern wherever channel files live, so owners don’t have to remember rules or fix mistakes after the fact.
💡 Note: Standard channels store files in the team’s existing SharePoint site (Documents library); only private and shared channels create separate SharePoint sites. Align your templates and scripts with this behavior to avoid sprawl and broken permissions.
What automated processes ensure
A good provisioning pipeline does more than “create a site.” It also coordinates people, permissions, and policies:
- Synchronization between Teams and SharePoint. Membership changes flow from Microsoft 365 Groups/Azure AD to site permissions; channel creation maps to the right file location.
- Role-based access. Owners, members, and visitors get the correct groups from the start; sensitive areas (e.g., private channel sites) inherit tighter defaults.
- Compliance and governance. Default sensitivity labels, sharing settings, retention, and lifecycle rules are applied at creation—no retrofits required.
Automation for a hybrid workforce
When teams are distributed, the request volume goes up and the time to value needs to go down. Automation helps you deliver both:
- Fast self-service from anywhere. Business users trigger a template and start working immediately, whether they’re in a clinic, a store, or a home office.
- Central control without bottlenecks. IT defines the patterns and policies once, then monitors rather than manually provisioning each request.
- Built-in security and compliance. Every workspace starts with approved settings, so remote and field teams don’t invent their own shortcuts.
Bottom line: automation turns SharePoint provisioning into a dependable, scalable service. You get speed and uniformity; your users get a workspace that’s ready on day one; and your administrators keep control without living in tickets.
SharePoint Provisioning Methods and Tools
Provisioning isn’t one thing—it’s a toolkit. Depending on scale, control, and whether you’re in SharePoint Online or on-premises, you’ll mix and match the options below.
Popular tools at a glance
In Microsoft 365, most teams combine site templates+site scripts for simple patterns, PnP provisioning (driven by PnP.PowerShell) for richer builds, and Power Automate to handle approvals and post-creation steps. On-premises, scripted PowerShell/CSOM/REST takes the lead, while Microsoft’s Provisioning Service (Look Book) offers curated starting points you can extend. Here’s how the main pieces compare and when to use each:
- PnP provisioning engine. A schema-based way to describe everything a workspace needs—sites, libraries, lists, pages, content types, navigation, and more—and apply that description again and again. You can export a site as a template, refine the XML/JSON, then provision new workspaces programmatically. Most teams drive this with PnP.PowerShell; current builds typically target PowerShell 7.4+.
- Power Automate + SharePoint actions. Great for orchestrating the steps around provisioning (approvals, notifications, post-creation tasks) and for wiring business logic that runs after a site is created. In Microsoft 365, Power Automate is the go-to workflow layer—SharePoint Designer workflows are deprecated and being retired, so new automation should live here.
- Site templates and site scripts (formerly “site designs”). Microsoft’s native templating for SharePoint Online. Site scripts define actions (create lists, add fields, set nav, apply themes), while a site template bundles those scripts for end users or automation to invoke. Ideal when you want admins or users to pick a template at creation time with guardrails in place.
- SharePoint Provisioning Service (Look Book). A catalog of Microsoft-maintained templates you can apply to your tenant—useful for jump-starting intranet designs such as the SharePoint Success Site. Many teams start with a Look Book template and then extend it with PnP or site scripts to meet their standards.
- PowerShell and REST/Graph APIs. The raw ingredients for advanced scenarios. Use PowerShell (PnP or Microsoft-provided modules) plus REST/CSOM/Graph calls to handle edge cases, integrate with HR or ERP systems, or sequence complex tenant-level tasks.
👉Can I automate site provisioning in SharePoint Online? Yes. Use site templates/scripts for straightforward patterns or PnP provisioning for complex sites. Orchestrate the flow with Power Automate (approvals, notifications, post-creation jobs), and pull from the Look Book when you want a Microsoft-curated starting point.
Which tools fit where?
Use this quick matrix to see where each option fits. It shows support for SharePoint Online and on-premises, the typical role in a rollout, and each tool’s main strengths or limits. Pick the combination that matches your environment, then layer Power Automate or scripting as needed.
| Tool/approach | SharePoint Online (Microsoft 365) | SharePoint on-premises (2016/2019/SE) | Strengths |
| PnP provisioning engine + PnP.PowerShell | ✅ | ⚠️ (limited, mainly legacy CSOM; internet access not required) | Rich, repeatable templates; developer-friendly; easy to version |
| Site templates + site scripts | ✅ | ❌ | Native admin/user experience; simple to invoke at site creation |
| Power Automate | ✅ | ⚠️ (via on-premises data gateway for data access, not for server-side site creation) | Approvals, notifications, post-provision tasks, lifecycle jobs |
| Provisioning Service (Look Book) | ✅ | ❌ | Curated, tenant-ready templates you can customize later |
| PowerShell (server/CSOM) | ⚠️ (used with Graph/CSOM) | ✅ | Full control; works in restricted networks; ideal for scripted rollouts |
| REST/CSOM/Graph APIs | ✅ | ✅ (REST/CSOM) | Fine-grained operations and integrations |
| Virto provisioning tools (on-prem) | ❌ | ✅ | Prebuilt web parts/utilities to orchestrate setup and governance on SharePoint Server |
Notes on environments
Here’s how the environment shapes your choices. The notes below call out what works best in Microsoft 365 versus SharePoint Server, where each tool shines, and the constraints to consider before you lock in a template:
- Cloud (SharePoint Online). The most common stack is site templates + site scripts for simple patterns, and PnP provisioning + PnP.PowerShell for richer patterns. Power Automate coordinates approvals and post-creation steps (e.g., add owners, seed folders, apply labels). The Provisioning Service supplies ready-made designs you can extend.
- On-premises (SharePoint Server 2016/2019/Subscription Edition). Subscription Edition is the actively updated release and should be included in any on-prem plan. Provisioning typically relies on PowerShell with CSOM/REST, plus ISV tooling such as Virto’s on-prem web parts. If you use Power Automate, treat it as a cloud workflow layer that can reach on-prem data through the gateway; it doesn’t replace server-side provisioning scripts.
👉So, what tools are available for SharePoint site provisioning? PnP provisioning (with PnP.PowerShell), site templates + site scripts, Power Automate, the SharePoint Provisioning Service (Look Book), and direct automation via PowerShell/REST/Graph APIs. On-premises environments add server-side PowerShell/CSOM and third-party tooling such as Virto’s components.
When to choose what
Use these quick heuristics to pick a starting point. Choose the lightest option that meets your needs today, then layer in PnP/PowerShell or workflows as scale and governance requirements grow:
- Simple, end-user-driven patterns: Site templates + site scripts.
- Rich, repeatable structures with lots of objects and metadata: PnP provisioning with PnP.PowerShell.
- Enterprise workflows and handoffs: Power Automate on top of your chosen templating approach.
- Highly controlled or offline networks (on-prem): PowerShell + CSOM/REST and on-prem ISV tools.
Whichever path you choose, keep your templates in source control, document required parameters (owners, sensitivity, region), and run provisioning through a short approval flow. That combination gives you speed, consistency, and traceability—without sacrificing governance.
Provisioning Scenarios and Types
Provisioning shines when you turn common workspace patterns into repeatable templates. Below are the most frequent scenarios and what you can automate in each.
Provisioning SharePoint Teams sites (linked to Microsoft Teams)
Team sites are the SharePoint backbone for Microsoft Teams workspaces—files live in SharePoint and membership maps from the Microsoft 365 group. Standard channels use folders in the team’s existing site, while private and shared channels create their own scoped sites. Provisioning makes sure each team site starts with the right libraries, metadata, pages, and permissions.
- Purpose: day-to-day collaboration for a team or project.
- How Teams and SharePoint work together: Teams uses SharePoint to store channel files. Standard channels save files in the team’s existing SharePoint site (Documents library). Private and shared channels create their own, separate SharePoint sites with scoped permissions. Team membership comes from the Microsoft 365 group, so owners and members map cleanly to SharePoint permissions.
- Tasks and discussions: tasks inside Teams are handled by Planner (the Tasks app), not classic SharePoint task lists. Conversations happen in Teams channels, not a SharePoint discussion board. Your SharePoint team site typically focuses on files, lists, pages, and dashboards, while Teams handles chat, meetings, and Planner tasks.
- What automation can do here:
- Create the team site with the right libraries, lists, and pages.
- Apply a consistent folder and metadata structure for each channel’s files area.
- Create Planner plans and buckets to mirror the project workflow, then pin them as tabs in Teams.
- Set owners/members, sensitivity labels, sharing settings, and retention—so access and compliance start out correct.
| Channel type | Files stored in | Separate SharePoint site? | Typical use | Notes |
| Standard | Team’s main site → Documents/Channel | No | Open collaboration | Easiest for governance & search |
| Private | Dedicated site for the channel | Yes | Sensitive sub-team | Membership scoped to channel |
| Shared | Dedicated site for the channel | Yes | Cross-team collab | Can include users outside the Team |
Communication sites
Communication sites are SharePoint’s publishing hubs. They’re built for one-to-many communication—news, announcements, policies—rather than day-to-day team work. They prioritize pages, navigation, branding, and reach, often connecting to a hub for rollups and consistency.
- Purpose: publish information broadly—think department portals or organization-wide hubs.
- Common examples: news portal, corporate policy center, internal training site.
- What automation can do here:
- Stamp a branded layout with prebuilt pages (home, news, resources, FAQs).
- Add visual sections and web parts (news, events, hero, Quick Links) and wire navigation.
- Embed PowerPoint/Stream videos, forms, and Yammer/Viva Engage conversations where needed.
- Seed core content types (e.g., Policy, Announcement) with standard columns and approval flows.
Project workspaces
Project workspaces package your project playbook into a repeatable site. Each one lands with the same folder structure, lists for risks/issues/decisions, milestones and reporting pages, plus the right permissions. If you use Microsoft Teams, the site pairs with a team and Planner so files, tasks, and status live in predictable places.
- Purpose: give each project a consistent, governed place to work.
- What to include:
- Documentation libraries with required metadata and default folders (e.g., “1_Initiation”, “2_Delivery”, “3_Closure”).
- Calendars and timelines (often surfaced via Planner or a list with milestones).
- Lists for risks, issues, decisions, and change requests, each with views and rules.
- Reporting web parts (Power BI, list rollups, status summaries) on a project home page.
- Security groups and roles pre-assigned—project managers, contributors, read-only stakeholders.
- What automation can do here:
- Create the entire structure in one pass, connect the site to a hub, and register it with your portfolio directory.
- Generate a Planner plan, map buckets to phases, and link it on the site home page and the Teams channel.
- Add flows for status approvals and notifications to leadership.
Custom learning and success sites
Custom learning and success sites package training and change guidance into a reusable hub. Built from Microsoft templates or your own, they surface curated playlists, role-based pages, step-by-step guides, and feedback forms—ideal as a central place that’s linked from Teams and your intranet.
- Purpose: accelerate adoption and change management.
- Custom Learning: curated training hubs for Microsoft 365 and internal tools.
- Success Site: a ready-made pattern for rollout communications, onboarding, and change resources.
- What automation can do here:
- Provision the site with training categories, playlists, and role-based pages.
- Prepopulate video libraries and step-by-step guides.
- Add feedback forms and pulse surveys to capture what users need next.
What can be automated inside any workspace
No matter the scenario, your template can prebuild the essentials so every site starts consistent and compliant. The items below are all stampable—define them once, parameterize what varies (name, owners, sensitivity), and let automation apply them reliably on each run.
- Document libraries pre-created with metadata (content types, columns, views) and a starter folder structure.
- Tasking via Planner or list-based templates with statuses, due dates, owners, and reminders.
- Information pages—welcome page, “getting started”, and links to key documents—built and published automatically.
- Communication components—news, announcements, feedback forms, Viva Engage web parts.
- Dashboards—embed Power BI reports or list rollups for at-a-glance status.
- Permissions and governance—owners/members/visitors groups, sensitivity labels, external sharing rules, retention, and lifecycle settings.
Elements commonly packaged in a provisioning template
Treat this as your template’s bill of materials—the default pieces you include every time. Keep them versioned in source control, and parameterize what varies (name, owners, sensitivity, region) so the same package works across teams and scenarios.
- Site type (team or communication) and hub association
- Web parts (news, document library, list, calendar, Power BI, Planner)
- Lists and libraries with columns, content types, views, and rules
- Security groups and roles (including project-specific or department-specific roles)
- Initial content (starter pages, folders, sample records, guidance)
- Automated workflows (alerts, approvals, review reminders)
Example: sales team site
When a new sales region spins up, a template can generate a ready-to-use workspace in minutes:
- Collateral library with standard folders for presentations, proposals, and case studies—plus metadata for product line, segment, and stage.
- Templates list that links to approved proposal and SOW templates and tracks version ownership.
- Client intake form (Power Apps or Microsoft Forms) that writes to a “Leads” list with automatic routing to the right manager.
- Meetings calendar and a Planner plan with buckets for prospecting, qualification, proposal, and negotiation.
- Role-based access—regional managers as owners, account executives as members, external consultants with limited guest access—applied at creation with the correct sharing and sensitivity settings.
This approach gives the team a consistent environment on day one, limits rework, and keeps IT in control without handling every request by hand.
💡 Learn more about SharePoint sites:
- SharePoint Site Types Explained: Choosing the Right Site for Your Needs
- SharePoint Communication Site: Improve Communication and Teamwork
- Understanding SharePoint Subsite: From Basics to Implementation
- SharePoint Hub Sites: for Simplified Collaboration and Easy Navigation
- SharePoint Team Site vs Communication Site: Choosing the Right One
Step-by-Step Configuration of Automatic Provisioning
Automatic provisioning is easiest to run—and to support—when you treat it like a small product: clear inputs, a repeatable build, and good telemetry. The steps below walk from planning to go-live.
Determine the site type and its purpose
Start by deciding what you’re creating and why.
- Team site—day-to-day collaboration for a group or project. Often connected to Microsoft Teams.
- Communication site—broad publishing for a department or the whole company.
- Scenario templates—Learning, Success, or Project sites with specialized pages, lists, and governance.
For each template, answer four questions:
- Who are the users? Owners, members, visitors, and any guests.
- What tasks do they perform? Files, lists, news, dashboards, approvals, training.
- What components must exist? Libraries, lists, pages, content types, navigation, Power BI/reporting, Planner plans.
- What governance applies? Sensitivity labels, external sharing rules, retention, hub association, lifecycle policy.
💡 Tip: Decide naming and URL conventions now (e.g., proj-{region}-{client}-{yyyymm}) so you never have to fix them later.
Prepare a template
Choose the templating mechanism that matches your needs and environment.
- PnP provisioning template. XML/JSON that defines site structure: lists, libraries, content types, fields, pages, web parts, themes, navigation, and more. Apply with PnP.PowerShell; current builds typically run on PowerShell 7.4+.
- Site templates + site scripts (formerly “site designs”). Native to SharePoint Online. Scripts declare actions (create list, add column, apply theme), and the site template packages them for admins or end users.
- Custom JSON or configuration files. Useful when you orchestrate multiple services—SharePoint, Teams, Planner, Power BI—and want a single source of truth (e.g., region, sensitivity, owners) to drive all steps.
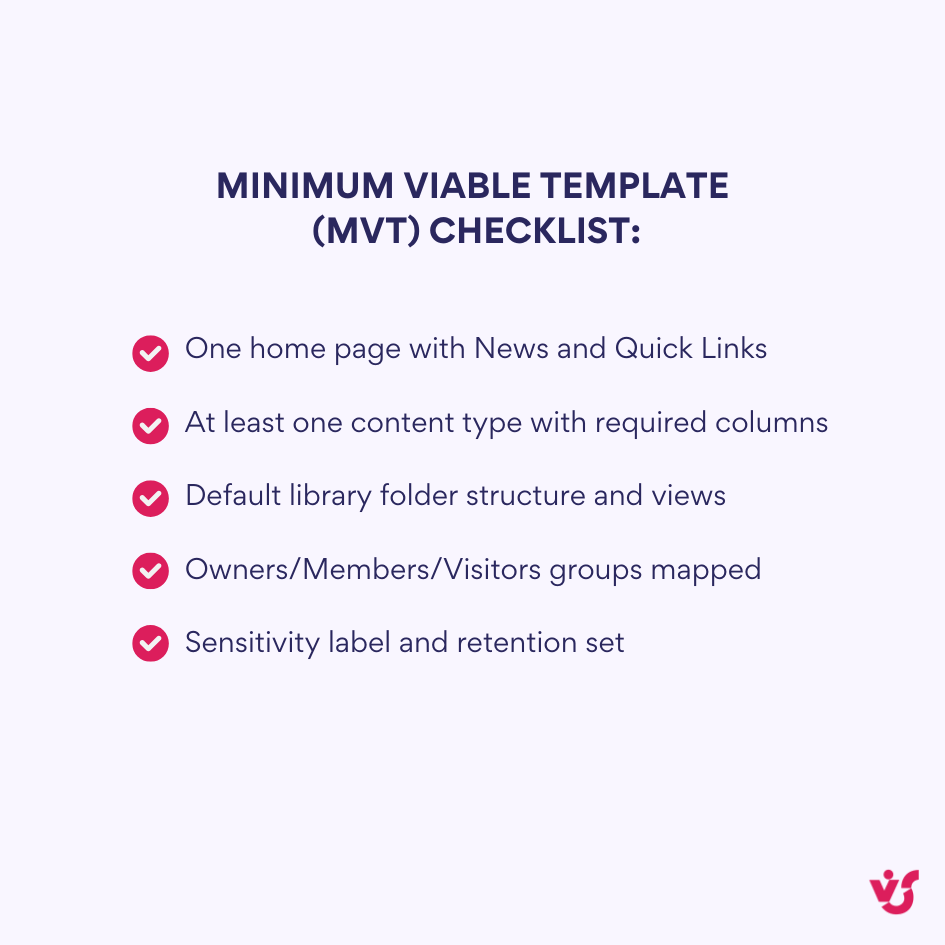
Include these essentials in every template:
- Information architecture. Content types, columns, views, folders, required metadata.
- Pages & layout. Home page, section navigation, news setup, standard web parts.
- Permissions. Owners/members/visitors groups, plus any role-based groups (e.g., PM, stakeholder).
- Compliance. Sensitivity label, sharing policy, retention.
- Hub & taxonomy. Hub association, site properties for search and governance.
Set up automation
Pick an orchestration path. Most organizations use one of three:
A. Power Automate (cloud orchestration)
- Triggers: Microsoft Forms/Power Apps request, a Service Desk ticket, or an Adaptive Card in Teams.
- Actions:
- Create the Microsoft 365 group and Team (Microsoft Graph).
- Create standard channels; when needed, create private/shared channels too. Remember: standard channels store files in the team’s existing SharePoint site; only private/shared channels get their own separate sites.
- Apply the SharePoint site template with PnP or site scripts.
- Seed libraries, lists, pages, and default content.
- Create a Planner plan and buckets; pin tabs in Teams (Files, Planner, SharePoint pages, Power BI).
- Assign owners/members, apply sensitivity and sharing settings, and post a welcome message.
B. PowerShell (admin/DevOps friendly)
- Use PnP.PowerShell and Graph/CSOM cmdlets in a script or CI/CD pipeline.
- Good for bulk rollouts, nightly jobs, or provisioning from HR events.
- Store templates and scripts in source control; parameterize inputs (name, owners, label, region).
C. REST/CSOM/Graph APIs (custom solutions)
- Build a service that provisions at scale or integrates with HR/ERP.
- Use Graph for Teams and group operations, and SharePoint REST/CSOM for site changes that PnP doesn’t cover.
| Option | Typical trigger | Key actions | Best use |
| Power Automate | Form/Power Apps/Service Desk | Approvals, create Group/Team, apply template, notify | Cloud-first provisioning with handoffs |
| PowerShell (PnP) | Script/CI pipeline | Apply PnP template, CSOM/REST updates | Bulk runs, admin/DevOps workflows |
| Custom API (Graph/REST) | Line-of-business event | Fine-grained control across M365 | Deep integrations (HRIS/ERP) |
Test the deployment
Treat testing as a checklist you run every time a template changes.
- Structure is correct. All lists, libraries, pages, and web parts are present with the right settings.
- Permissions behave as designed. Owners/members/visitors map to the right groups; guest access is scoped.
- Automations run end-to-end. Flows, notifications, and post-creation steps execute reliably and are idempotent if retried.
- Teams alignment. Standard channel files appear in the team’s main SharePoint site; private/shared channels have separate sites with tighter permissions. Tabs in Teams open the correct SharePoint pages, lists, and reports.
- Role views. Sign in as an owner, a member, and a read-only user to confirm navigation, views, and Power BI access.
- Performance & quotas. Creation time, storage quotas, and throttling are within expectations.
Provide monitoring and support
Once live, your provisioning needs guardrails just like any other service.
- Logging. Capture request metadata, run IDs, API responses, and timing. Store in a SharePoint list, Dataverse, or Log Analytics.
- Alerting. Notify owners/IT on failures or partial success. Include a quick “resume” link for transient errors.
- Rollback/reapply. Support safe cleanup for failed runs and the ability to reapply a template to fix drift.
- Template lifecycle. Version templates, document change notes, and deprecate old versions.
- Governance at scale. Consider SharePoint Advanced Management for oversharing reviews, site access policies, and lifecycle controls; use Entra ID access reviews for group membership.
Connecting provisioning with Microsoft Teams
When your workspace is Teams-connected, wire these steps into the flow:
- Create a Microsoft 365 group with owners and members.
- Create the Team from that group using Graph; optionally pick a Team template if you need a predefined channel set.
- Create channels.
- Standard channels: rely on the main SharePoint site’s Documents library; create folders and metadata per channel if your pattern requires it.
- Private/shared channels: each gets its own SharePoint site—apply a scoped PnP template to those sites and set membership carefully.
- Add tabs for key SharePoint pages, lists, the main document library, Planner, and Power BI reports.
- Apply compliance settings—sensitivity labels for the Team and its SharePoint site, sharing limits, and retention.
- Post a welcome message with links to “Start here”, key folders, and instructions.
Example pipeline
Here’s a practical, end-to-end flow you can copy and adapt. It shows how a request kicks off approvals, runs templated provisioning, applies permissions and compliance, and then notifies the team—using components you already have in Microsoft 365.
Goal: create a project workspace with approvals and role-based access.
- Request intake (Power Automate trigger).
- A manager submits a Microsoft Form with project name, region, sensitivity, owners, and start date.
- Approval (Power Automate).
- Send to a business approver; on approve, continue.
- Provisioning (Power Automate → SharePoint/Graph + PnP).
- Call an HTTP action to a PowerShell-based Azure Function or run a PnP script via an on-demand job.
- Create Microsoft 365 group and Team; add owners/members.
- Create standard channels; if requested, create private/shared channels.
- Apply PnP provisioning to the main site; for any private/shared channel sites, apply a lighter PnP template.
- Create Planner plan and buckets; pin Planner and SharePoint pages as Teams tabs.
- Seed libraries/lists/pages and set labels, sharing, and retention.
- Access rights logic (Power Automate).
- Map request data to role groups (Project Manager, Contributor, Stakeholder).
- Add users to the right SharePoint groups; restrict sensitive libraries if needed.
- Finish & notify.
- Write a run record to a “Provisioning Log” list.
- Post a Teams message to the new General channel with a “Start here” page link.
Follow this blueprint and you’ll produce consistent, ready-to-work sites in minutes—while keeping governance and security exactly where you want them.
Provisioning in On-Premises SharePoint
Not every organization can run everything in Microsoft 365. For environments that must stay on servers—SharePoint 2016, 2019, or Subscription Edition—provisioning still brings speed and consistency, just with a different toolkit. The next section explains why it matters on-prem and which tools (PowerShell/CSOM, REST, and purpose-built web parts) make it practical.
Relevance of provisioning in on-premises SharePoint
Many organizations still provision SharePoint on-premises—especially in regulated industries, government, defense, finance, energy, and anywhere strict data residency or isolation is required. In these environments the need to standardize and speed up workspace creation is just as real as in the cloud. Typical server versions you’ll encounter are SharePoint Server 2016 and 2019, and—importantly—SharePoint Server Subscription Edition (SE), which is the actively serviced on-prem release and should be part of any current planning.
What’s different on-prem:
- Automation layer. Power Automate runs in the cloud. It can reach on-prem data through the on-premises data gateway, but it doesn’t live inside SharePoint Server or create sites there. For server-side site provisioning you’ll rely on CSOM/REST/PowerShell (and, where helpful, ISV tooling).
- Teams files. Microsoft Teams stores channel files in SharePoint Online and doesn’t support SharePoint on-premises for file storage. If your collaboration model includes Teams, plan for hybrid or cloud-first files; don’t expect Teams to write to an on-prem farm.
- Security posture. On-prem farms require disciplined patching. 2025 saw active exploitation of SharePoint Server vulnerabilities; Microsoft and CISA urged immediate remediation. Keep SE/2019 fully patched and monitor MSRC/CISA advisories as part of your provisioning guidance.
💡 Workflow note: in SharePoint Online, SharePoint 2013 workflows are being retired and removed on April 2, 2026. For the cloud, modernize to Power Automate. On SharePoint Server, classic workflows remain features of the product you operate, but plan carefully—organizations moving workloads to Microsoft 365 should avoid creating new dependencies on legacy workflow engines.
Practical takeaway: treat on-prem provisioning as a scripted service (PowerShell + CSOM/REST) with strong governance: naming standards, URL patterns, group/role mapping, retention settings, and a runbook for patching and drift correction.
VirtoSoftware apps & features for SharePoint on-premises
Organizations running SharePoint Server can leverage VirtoSoftware’s on-premises web parts to enhance provisioning capabilities and post-provisioning functionality.
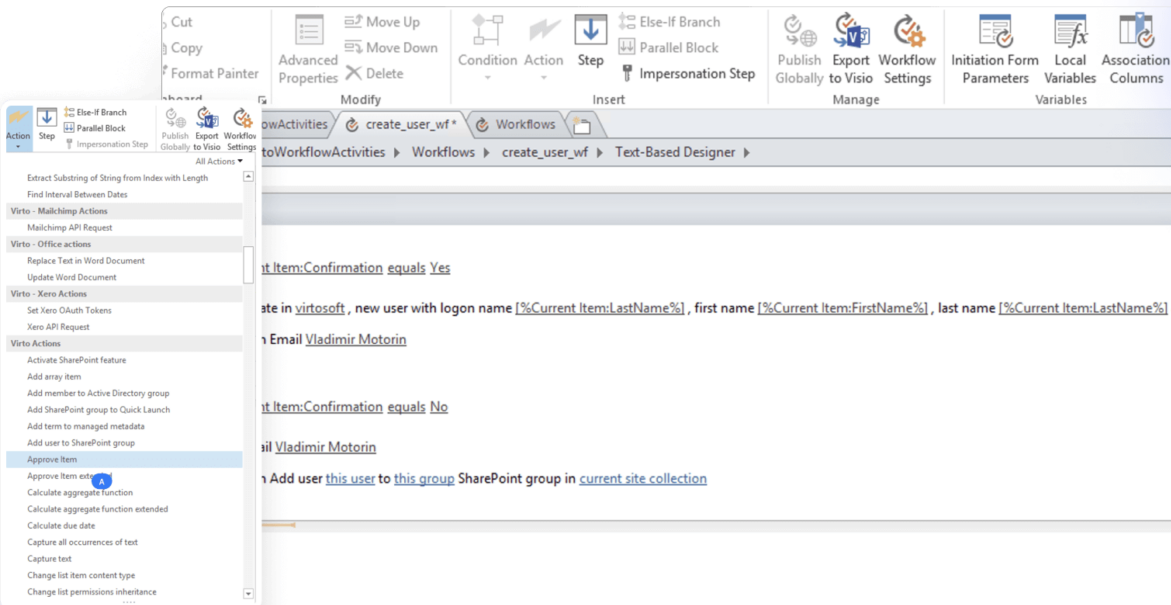
- Virto Workflow Automation Web Part addresses the workflow gap in on-premises environments. With over 270 no-code SharePoint activities, administrators can integrate business processes directly into provisioning templates. When a new project site is created, this web part can automatically trigger approval workflows for site access requests, initiate notification sequences to relevant stakeholders, create tasks assigned to project leads, and execute document management workflows for uploaded files.
Virto Workflow Status Monitor
- Virto Workflow Status Monitor Web Part provides visibility into workflow execution across provisioned sites. This monitoring capability shows real-time status for all active workflows, identifies crashes, delays, and failures automatically, generates performance reports across site collections, and enables administrators to manually restart cancelled workflows. When you’ve provisioned dozens of project sites with embedded workflows, this centralized monitoring becomes critical for operational oversight.
Virto Workflow Status Monitor
These tools work together in on-premises provisioning scenarios. Consider an organization provisioning client engagement workspaces: The base site structure is created through PowerShell scripts using CSOM. The Virto Workflow Automation Web Part gets installed and configured to handle client document approvals and change request processes. The Virto Workflow Status Monitor Web Part provides the engagement manager with a dashboard showing all active approval workflows across their client sites. Permissions are applied based on the client engagement template defining access for partners, internal teams, and client stakeholders.
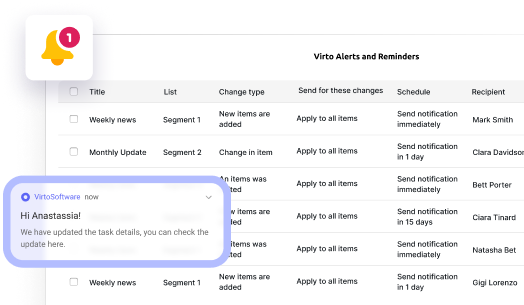
- Virto Notifications & Alerts Web Part extends native SharePoint notification capabilities in on-premises environments. Provisioning templates can include pre-configured alerts that trigger when specific conditions occur. A project site might auto-configure reminders that send notifications three days before milestone deadlines, alert the project manager when documents are uploaded to the client deliverables library, remind team members when their tasks are overdue, and send weekly summaries of site activity to stakeholders.
💡Note: Microsoft is retiring the classic SharePoint “Alert Me” feature in Microsoft 365—creation is being phased out across 2025, and all SharePoint Alerts will stop working by July 2026. For ongoing notifications, Microsoft points to Rules or Power Automate; as a fuller replacement, Virto Alerts & Reminders delivers advanced alerts and scheduled reminders across SharePoint and Teams. Classic Alerts in SharePoint Server (2016/2019/Subscription Edition) still exist and keep working on-prem as long as your farm is configured for outgoing email. You may still want to use Virto Alerts for richer functionality.
Virto Notifications & Alerts
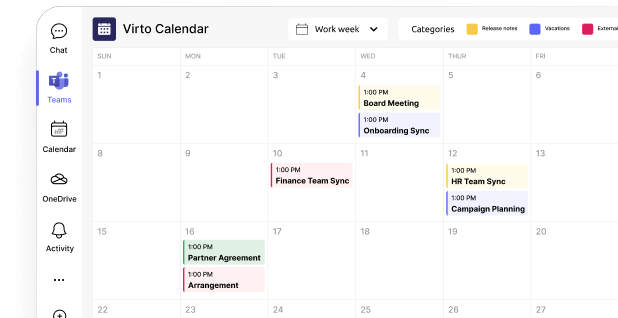
Try Virto Calendar to Sync all data
- Virto Calendar Web Part (and Virto Calendar App for M365/SharePoint/Microsoft Teams) automatically appears in provisioned sites requiring event management. HR sites provisioning candidate interview workspaces can include pre-configured calendars showing interview schedules. Project management sites can display milestone timelines and deadline calendars. Department sites can aggregate events from multiple sources into unified views.
Virto Calendar Web Part
Try Virto Calendar to Sync all data
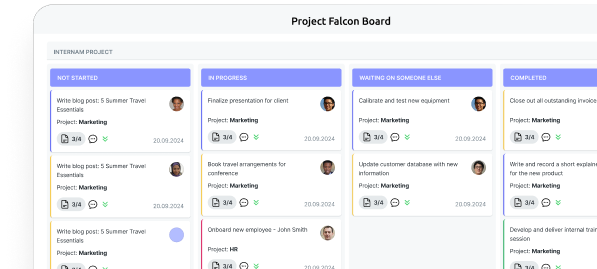
- Virto Kanban Board Web Part (and Virto Kanban Board App for M365/SharePoint/Microsoft Teams) can be included in provisioning templates when visual task management matters. DevOps teams provisioning project workspaces benefit from automatic Kanban board deployment showing backlog items, work in progress, testing, and completed stages. Marketing teams provisioning campaign sites get content production boards tracking ideation through publication.
Virto Kanban
Try Virto Calendar to Sync all data
These components enable fully automated, standardized provisioning in isolated or high-security on-premises infrastructures where cloud tools cannot reach. Organizations maintain control over data storage and processing while still gaining provisioning efficiency.
💡 Important considerations for on-premises provisioning: Keep SharePoint Server Subscription Edition and 2019 fully patched, review current security advisories from MSRC and CISA as part of provisioning guidance, and plan for eventual migration to cloud or hybrid configurations as Microsoft’s focus continues shifting toward Microsoft 365. For SharePoint Online environments, prefer Power Automate for all workflow automation needs. Keep VirtoSoftware workflow tooling scoped to on-premises SharePoint Server deployments where it remains fully supported.
Examples of SharePoint Provisioning Use Cases in Organizations
Provisioning shines when the same kind of workspace has to be created over and over. Below are three detailed patterns you can lift and adapt.
Devops teams: a workspace for each new project
In fast-moving DevOps environments, new services and repos appear constantly. Provisioning turns that churn into a standard playbook—each project gets the same structure for planning, code, docs, and status without rebuilding it by hand.
Goal: give every new repo or service its own governed space for docs, planning, and status—ready in minutes.
What the template creates
- Project site (team site, hub-connected). Name and URL follow a convention like dev-{product}-{service}.
- Documentation library with default folders (architecture, runbooks, APIs, ADRs) and metadata (service name, environment, owner, version).
- Backlog list with fields for priority, estimate, sprint, and status—plus saved views for “This sprint”, “Blocked”, and “Ready”.
- Kanban board.
- Microsoft 365/Teams: add the Virto Kanban Board App for Microsoft Teams as a tab in the project team, or use Planner for tasking.
- On-prem: add the Virto Kanban Web Part to the site home page bound to the backlog list.
- Pipelines page that embeds build status (e.g., from Azure DevOps/GitHub), a change log list, and a link to incident runbooks.
- Calendar for release cutovers and change windows (Virto Calendar Web Part on-prem; Calendar/Events web part in M365).
- Security and lifecycle. Owners/members groups, guest policy (off by default), sensitivity label, retention, and an archive flow.
How it’s provisioned
- Trigger: a Power Apps/Forms request tied to a service catalog, or a Git repo creation event.
- Orchestration: Power Automate calls PnP.PowerShell to apply the PnP template; Graph creates the Team and pins tabs (Files, Kanban/Planner, Backlog, Docs).
- Notes: Tasks in Teams are powered by Planner. If you also surface a board in SharePoint, keep a single system of record and mirror views, not data.
Why it helps
- New squads start with the same board, fields, and dashboards—no time lost inventing structure.
- Release and change governance is baked in from day one.
Sales department: centralized workspaces by deal type
Sales cycles differ by segment and stage, but the workspace shouldn’t. Provisioning stamps out a repeatable pursuit space based on deal type—new logo, renewal, upsell—so reps start with the right collateral, approvals, and data capture. It keeps quality high and motion fast without extra IT steps.
Goal: standardize pursuit work so every opportunity follows the same path, uses the same content, and is visible to leadership.
What the template creates
- Deal site (team site) named by region/segment. Auto-associate to the Sales hub.
- Collateral library with folders for presentations, proposals, SOWs, and case studies; metadata for segment, product line, and stage.
- Templates list that points to the latest proposal/SOW/price sheet and tracks owners and expiry.
- Client intake form (Power Apps/Forms) that writes to a Prospects list with fields for account, value, close date, next step, and assigned rep.
- Approvals flow for discount or legal review with status surfaced on the site’s “Deal dashboard” page.
- Meetings calendar for demos and reviews; optional Teams webinar link preconfigured.
- Role-based access: managers as owners, account execs as members; guest access limited to an external “Data Room” library with stricter sharing.
How it’s provisioned
- Trigger: SDR submits a form selecting deal type (new logo, renewal, upsell) and region.
- Orchestration: Power Automate routes for approval, creates the Team and channels, applies the PnP template, seeds folders, adds Planner buckets for stages, and posts a “Start here” card in Teams.
Why it helps
- Reps don’t rebuild structure or hunt for the right template.
- Leadership gets consistent stage/status reporting across all pursuits.
HR: a workspace for each opening
Hiring is a repeatable process with lots of handoffs and sensitive data. Provisioning gives HR a consistent workspace per requisition—resumes, stage tracking, scheduling, and approvals are prewired—so coordinators move faster while keeping privacy and compliance intact.
Goal: keep every hiring process consistent and auditable, from intake to offer to onboarding.
What the template creates
- Requisition site named by department and req ID.
- Candidates library with folders per candidate; metadata for stage, source, and decision.
- Hiring stages list (phone screen, interviews, assessment, offer) with SLA columns and automatic reminders (Virto Alerts & Reminders on-prem or Power Automate in M365).
- Onboarding checklist list with tasks for IT access, equipment, payroll, and training.
- Interview calendar and a “panel pack” page that assembles the job description, resume links, and scoring rubric.
- Privacy and retention. Tight default permissions, restricted external sharing, and a retention label that purges candidate data on schedule.
How it’s provisioned
- Trigger: recruiter opens a req in the HRIS; a connector/flow posts to a provisioning queue.
- Orchestration: Power Automate (cloud) or a PowerShell job (on-prem) creates the site, applies the template, maps hiring managers/recruiters to groups, and sends a welcome brief with links for scheduling.
Why it helps
- Recruiters follow one process across all openings; compliance and data minimization are enforced automatically.
What these scenarios have in common
Across DevOps, Sales, and HR, the pattern is the same: define the workspace once, apply it everywhere, and let automation handle the details. The benefits stack up quickly: fewer clicks, fewer mistakes, and faster starts for every team.
- No more manual setup. The structure appears instantly—libraries, lists, pages, and permissions are ready without click-throughs.
- Consistency baked in. The same naming, columns, views, and security every time, which makes training and reporting easier.
- Fast starts without IT bottlenecks. Business users request a workspace and get it within minutes.
- Fewer mistakes, better compliance. Guardrails handle sharing, labels, retention, and guest access from the start.
Adapting templates to your business
Provisioning isn’t one-size-fits-all. Tune each template for the role and process it serves:
- Roles: map owners/members/visitors and any specialized groups (project manager, stakeholder, recruiter).
- Departmental needs: DevOps gets boards and deployment status; Sales needs approvals and document control; HR emphasizes privacy and retention.
- Process type: a short-lived project might auto-archive after closure; a department portal may focus on news, policies, and training.
Design once, parameterize what varies (name, region, sensitivity, owners), and let automation handle the rest. That’s how SharePoint provisioning scales with your goals while keeping standards intact.
Explore VirtoSoftware use cases
Conclusion on Provisioning SharePoint
Provisioning automation in SharePoint turns repetitive setup into a reliable service. It simplifies routine tasks, improves accuracy, standardizes how sites are built, and gets teams working faster—whether you’re spinning up a single project site or hundreds of department workspaces.
There are multiple ways to do it. At one end, PnP provisioning (Patterns & Practices) gives you rich, versionable templates; Power Automate adds approvals and post-creation steps in Microsoft 365; and custom solutions using PowerShell plus REST/Graph APIs cover advanced or highly controlled scenarios. In on-prem environments, scripted provisioning with PowerShell/CSOM remains the backbone; in Microsoft 365, site templates+site scripts and PnP are the go-to building blocks.
If your collaboration hub is Microsoft Teams, it’s worth wiring provisioning to the Teams model so owners, channels, files, and tabs come online together. The same applies to your intranet or corporate portal—use templates so navigation, branding, metadata, and governance land consistently every time.
Practical advice: pick the approach that fits your scale, infrastructure, and security posture. Standardize your templates, parameterize what varies (name, owners, sensitivity, region), and run everything through light governance so you keep both speed and control.
Want a guided walkthrough of the apps mentioned and how they slot into your environment? Schedule a demo or start a free trial directly at virtosoftware.com.
Official Microsoft resources
- Site Provisioning | Microsoft Learn
- Provision the Custom Learning site
- Provision the SharePoint Success Site – SharePoint in Microsoft 365
- Understanding modern provisioning of artifacts in Microsoft 365
- Introducing the PnP provisioning engine
Relevant topics to explore