In order to differentiate various list items and highlight key items, there can be applied a method of SharePoint list color coding.
Let’s see how it works in adding colored status dots to a SharePoint report list - we’ll perform that through designating a certain color to each status value.
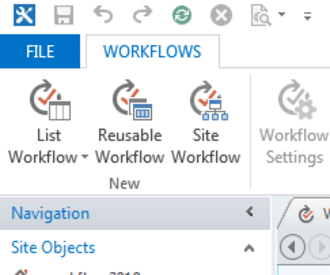
Using a Calculated SharePoint List Column
- Open or create a SharePoint list that you want to add color coded status to, and go to List > List settings and click the Add a new column option.
- In the column creation tab, type in the name - Status indicator and select the column type - Choice. In the Choice option box enter the status colors - green, yeallow, red, and press OK.
- Next, create another column to display the color-coded dots. Enter the field name - Status, and select the field type – Calculated. We need to enter the formula here:
="<DIV style='font-weight:bold; font-size:50px; margin-top: 30px; color:"&[Status Indicator]&";'>•</DIV>"
Copy and paste it into the corresponding field, and save the settings.
We have two new columns created for the report list. Next, we need to configure the list view to show the color coded status dots.
Adjusting SharePoint List View
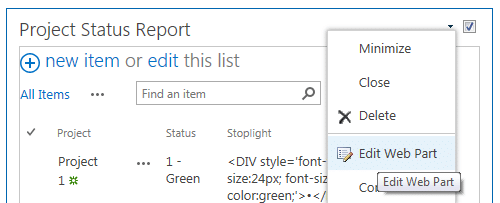
- Navigate to the SharePoint page that displays the report list and open the Edit tab. Click on the arrow next to your List and click Edit Web Part.
- On the Edit Web Part, find the List View options and click Edit the Current View.
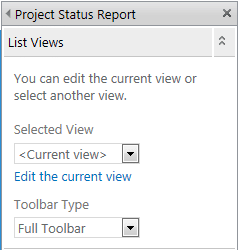
This opens up the Edit view options, where you need to add the newly created Status column to your SharePoint list by checking the corresponding box, and press OK. Also, you may rearrange the items to put the status column first.
- Find the Style options below and change the View Style from Default to Basic Table. Save the settings by pressing OK.

Now you can view the Status field on the page.
- Next, we are going to change the view for the Status color indicator. To perform that, we are going to add a Content editor to the bottom of the list.Paste in the following code into a .txt file with e.g. Notepad application. Upload the file to your SharePoint Site Contents into Site Assets, and copy the shortcut.
<script type="text/javascript">
/* Text to HTML - version 2.1.1 */
function TextToHTML(NodeSet, HTMLregexp) {
var CellContent = "";
var i=0;
while (i < NodeSet.length){
try {
CellContent = NodeSet[i].innerText || NodeSet[i].textContent;
if (HTMLregexp.test(CellContent)) {NodeSet[i].innerHTML = CellContent;}
}
catch(err){}
i=i+1;
}
}

// List views
var regexpTD = new RegExp("^\\s*<([a-zA-Z]*)(.|\\s)*/\\1?>\\s*$");
TextToHTML(document.getElementsByTagName("TD"),regexpTD);
</script>
Now we need to add this Content editor onto the list web part.
- Open the page Edit section and open the Insert tab. Select Media and Content > Content Editor and click Add. Now Content Editor is displayed on the page. Click on the right arrow next to Content Editor, and select Edit Web Part.
- Now we are going to connect the Content Editor with the txt file we created earlier. Paste in the file path into the box provided, and press OK.
Then save the edited page by clicking Save. Now you can see the status dots displayed in the page.
If you want to hide the Conten Editor from the page, go to Page > Edit > Edit Web Part > Appearance. Remove the title and enter a space symbol instead, then change the Column type to None, press OK. Save the page.
If you want to change the status of the report list item, click Edit Item in the drop-down menu, and change the Status Indicator color, press Save.
✓ USEFUL LINKS