SharePoint Workflow Creation Basics
SharePoint has emerged as a powerful platform to streamline workflows and enhance productivity. If you’re looking to harness this potential, understanding how to create workflow in SharePoint is an essential skill. This article will guide you through the fundamental steps to create workflow in SharePoint, regardless of whether you’re using SharePoint Online or an on-premise solution.
What is a SharePoint Workflow?
This overview of SharePoint workflow basics highlights the key aspects of how to create workflow in SharePoint, workflow usage and the ways to integrate workflows even if you are completely out of coding. SharePoint workflows are intended to automate business processes and reduce manual operations.
Actually, SharePoint workflows are a structured collection of activities, which can be compounded into several steps. Each activity represents a functional component of a mapped work process.
You can see on the picture below a sample of a vacations approval workflow. This operation can be automated easily with default SharePoint approval workflow.
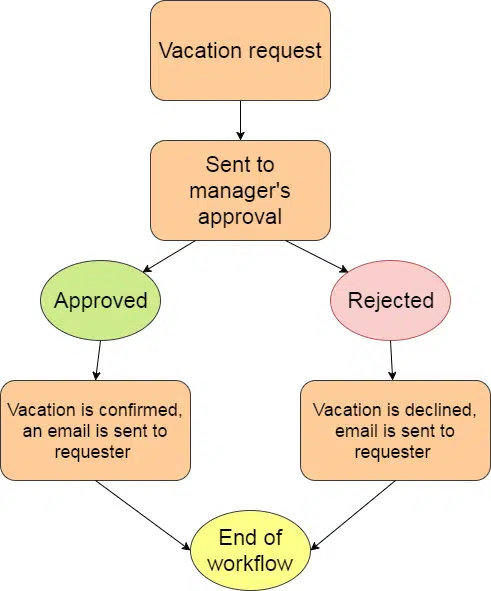
You can find more SharePoint workflow examples in this article.
Why Do You Need to Create SharePoint workflows?
Understanding the need to create SharePoint workflows is crucial for optimizing business processes and enhancing team collaboration. Learning how to create workflow in SharePoint allows organizations to automate repetitive tasks, streamline decision-making, and ensure that essential procedures are followed consistently.
When you create workflow in SharePoint, you establish a sequence of tasks and actions that must be completed by various team members. Additionally, SharePoint workflows can be customized to suit your organization’s unique needs, ensuring that the right people are involved at the right time, and that tasks are completed in the correct order.
In summary, mastering how to create workflow in SharePoint empowers businesses to automate and manage essential processes more effectively, driving productivity, and fostering a collaborative environment. By learning to create workflow in SharePoint, you can unlock the full potential of this powerful platform and contribute significantly to your organization’s success.
Key elements of creating SharePoint workflow
Before you create workflow in SharePoint, you must have an original understanding of key elements of this process. These questions can help you thoughtfully map out the whole process and create a structure before you start to create workflow in SharePoint.
- What are the permissions and privacy considerations throughout the process?
- Who are the users involved in the process?
- What are the existing documents used within the process?
- What are the pre-conditions and post conditions of this process?
- What are the related processes?
- What are the existing pain points in the process, such as tracking and reporting, forms to fill out, involved users notifications, exception handling?
Almost any business process can be organized this way. The complexity is limited only by your creativity and skills. The creativity involves the clean structure as well. You have to understand the whole process and should have all steps mapped out. And user-friendly SharePoint workflow tools may partially compensate the lack of skills and can allow you to create workflow in SharePoint seamlessly.
Tools to Create Workflow in SharePoint
Standard and Enterprise SharePoint Server versions include out-of-the-box workflows, such as collect feedback, approval workflow, etc. You can associate and create these default workflows in SharePoint Online or On-Premise with lists and libraries right in your SharePoint. More complex, custom workflows can be created with additional SharePoint workflow tools such as SharePoint Designer and Visual Studio.
The tools choice depends both on your skills and on the business process scheme. What complexity has SharePoint workflow? Workflows in SharePoint may be created with ootb templates, with the extended set of actions from SharePoint Designers (see the article How to create SharePoint Designer 2013 workflow), or with custom coding in Visual Studio.
Default SharePoint Workflow
There are 5 types of SharePoint workflows that can be used for the following business scenarios.

- SharePoint approval workflow. This workflow guides a proposed item or document among designated users who have to approve or reject it.
- SharePoint feedback workflow. This feature provides the way to collect users’ feedback for a document, compile it and sends to the workflow initiator.
- SharePoint signature workflow. Using this workflow, you can gather users’ digital signatures for documents. SharePoint signature workflow works only with Word and Excel documents, and InfoPath forms.
- SharePoint publishing approval workflow. The workflow is used for SharePoint sites with restricted permissions to publish content. With this feature, users from approvers group accept or decline the request to change or update a page.
- SharePoint three-state workflow. This workflow lets users track progress of a project or task through three phases (states). The workflow initiator assigns a task to the reviewer, which is notified with email alert. After the task review the workflow progresses to the next phase. Now it is assigned to the acceptor, who completes review and closes the task. SharePoint three-state workflow requires you to have on the document a choice column with at least 3 options. These choice options will be used as initial (active), middle (ready for review), and final (complete) state.
You can find more information what other cases a SharePoint workflow can be used for and how to create workflow in SharePoint for list, library, or site content types in this article: SharePoint 2013 reusable workflow.
Before you begin, pay attention to the following conditions:
- You must have permission to add SharePoint workflows to a document library or list.
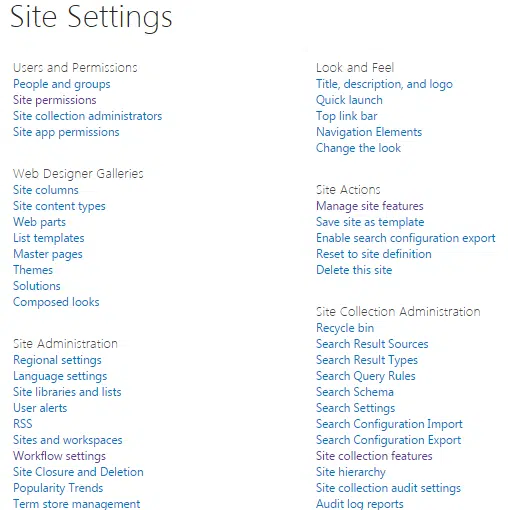
- SharePoint workflows should be activated in the Site collection features. Browse to Site Settings > Site collection features (under “Site Collection Administration” section) and find “Workflows” on the list bottom. Then click “Activate”.

How to Create Workflow in SharePoint for a Library?
Browse to a list or library where you want to create a SharePoint workflow.
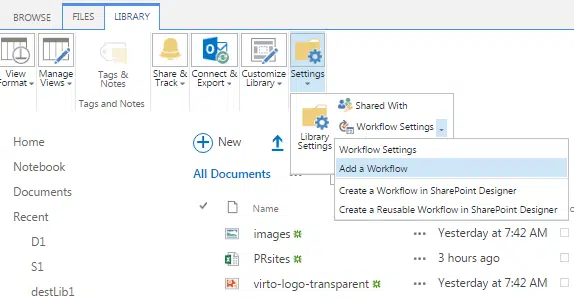
Select “Library” tab and click “Workflow Settings” on the ribbon. Then select “Add a workflow” from the dropdown menu.
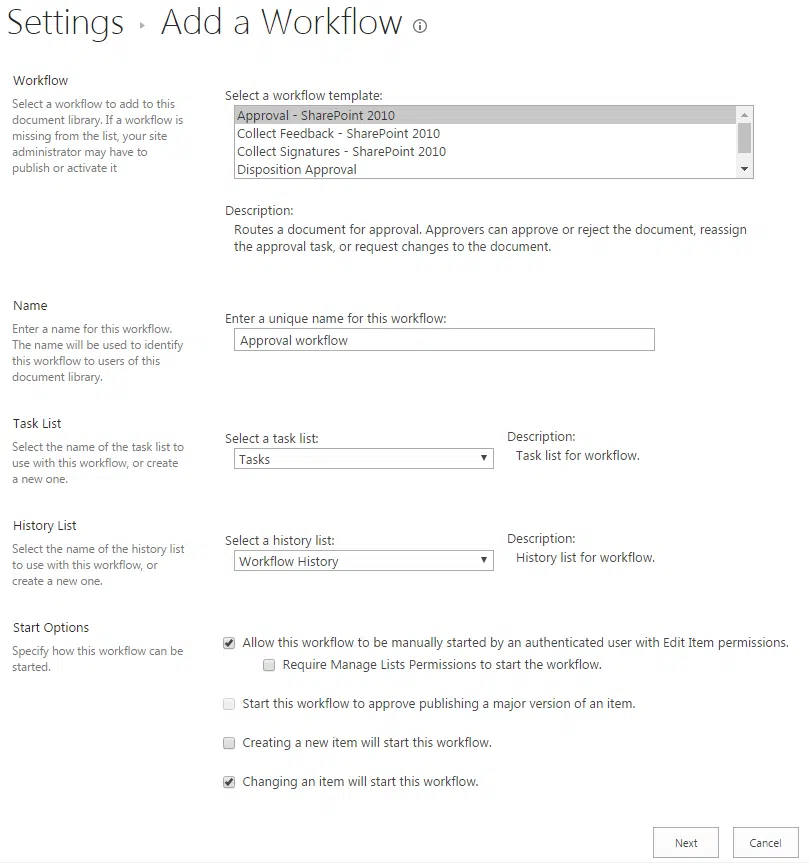
You will be redirected to the SharePoint workflow adjustment page. Here you have to define the workflow type, select a name, choose or create a task list to associate with this workflow and specify the History list. Then select the workflow triggers required to start it.
Click “Next” and define workflow behavior on the following page. You can specify the approvers list and carbon copy watchers, define the way how and when tasks are routed to participants, and set circumstances for workflow completion. Let’s name it “SharePoint workflow settings” page, because we have to deal with it after a few more steps.
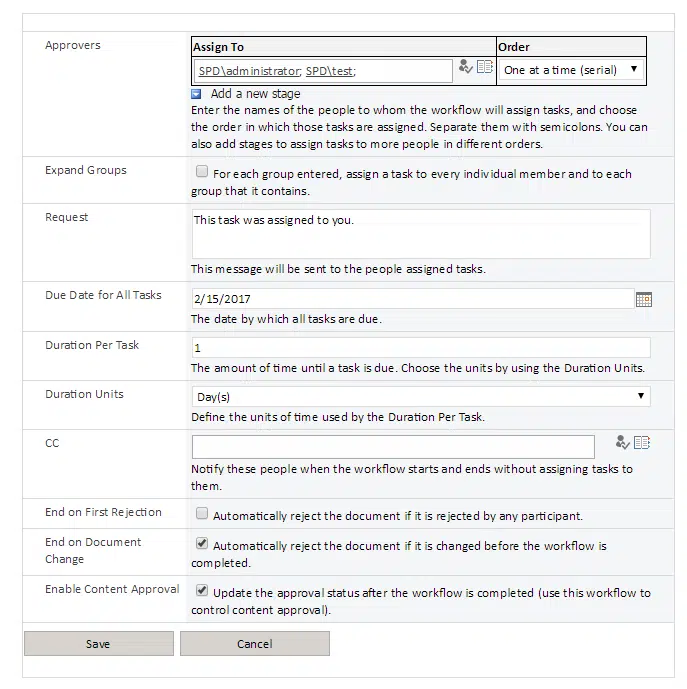
Click Save. Now, you have to start this SharePoint workflow.
The way to create a workflow in SharePoint and start it on an item or document is very similar for both SharePoint On-Premise and SharePoint Online platforms. Select an item, click on dots to expand the dropdown menu, and find “Workflows”.
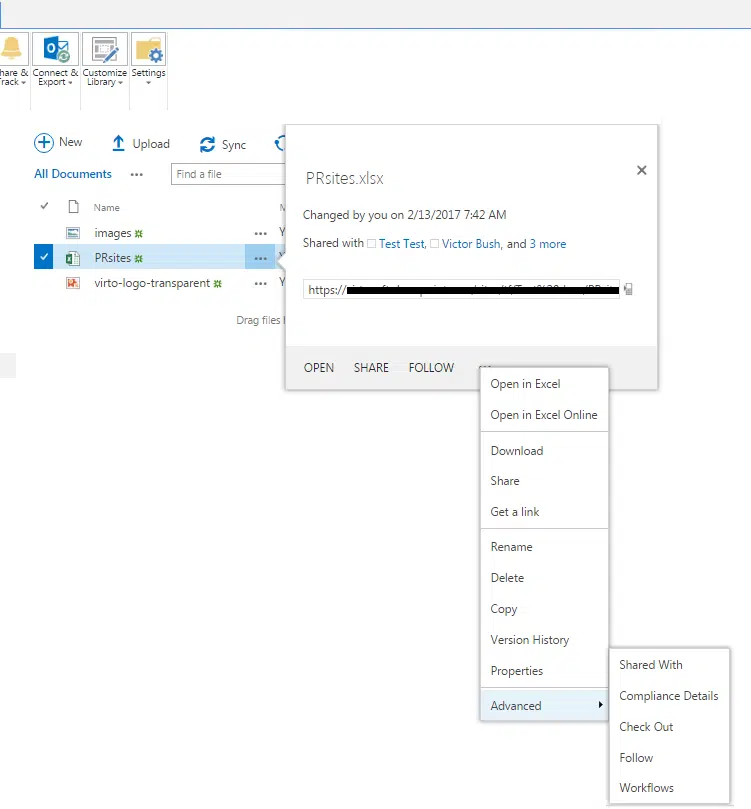
You will be redirected to the page with all created SharePoint workflows. Select the required workflow, and you will be redirected to the form with approvers, the “SharePoint workflow settings” page from the previous step, that I have asked you to keep in mind. As you can see, it is the same form, where you can make changes before you start this workflow.
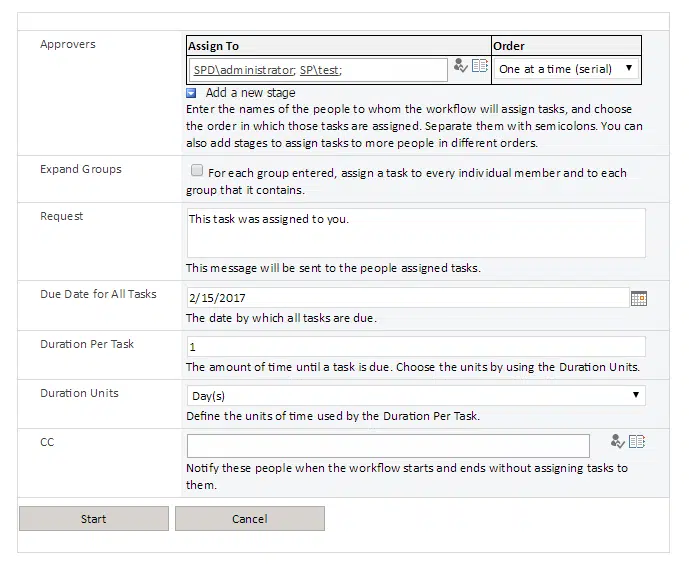
Now, click “Start” and run the process. The approvers receive emails after workflow conditions have been triggered.
Great news for you: if you are using Outlook email, everything works fine. But if you receive letters from an external email address, you will not see the link to approve the task right from the email.
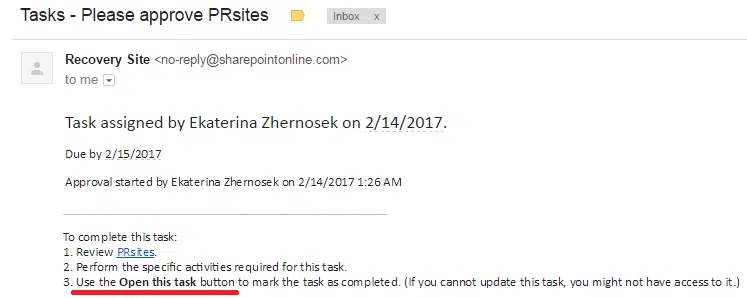
In this case, you must make your approval manually. In order to do this, open the library with items to approve. Click on the “In Progress” status of your SharePoint workflow.

On this page are displayed all workflow details. You can see the current tasks related to this workflow. Click on task title to approve the task and end this SharePoint workflow.

That’s all. Another email will be sent about the successful approval. End of workflow.
You can create a workflow in SharePoint to collect signatures or feedback in a similar way, using default SharePoint workflow templates.
What cases of SharePoint workflow’s usage can be implemented with other tools besides OOTB actions? The ready-to-use activities of Virto SharePoint Workflow Activities Kit allow you to configure workflows in SharePoint Designer as easily as in this example. 270+ actions for SharePoint On-Premise and 70+ actions for SharePoint Online help you implement and automate any business process in your SharePoint.


