SharePoint Designer workflows are a powerful tool for streamlining and automating various business processes. This comprehensive SharePoint workflow tutorial will guide you step-by-step on how to create a workflow in SharePoint 2013, ensuring that even beginners can understand it with ease. If you are new to the subject, this post will serve as an excellent starting point, demonstrating the basics on how to create workflow in SharePoint.
By following this tutorial, you will learn to harness the full potential of SharePoint workflows, enabling your team to collaborate effectively. Whether you’re looking to automate routine tasks, streamline decision-making, or enhance communication, this SharePoint workflow tutorial is the perfect resource for mastering the art and creating approval workflow in SharePoint Designer 2013.
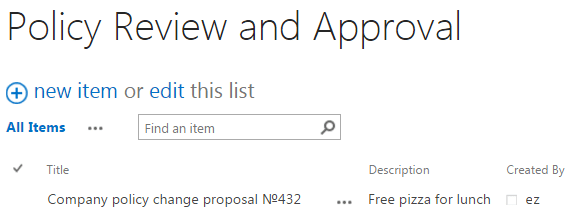
Let us consider the case of the SharePoint 2013 approval workflow example. Before starting, make sure that SharePoint Designer is installed and connected to a SharePoint site. Next, select a required SharePoint list or create a new one. We created a custom SharePoint list for the following use case:
- Step 1: Requester makes an improvement suggestion regarding a company policy and indicates it on the related SharePoint list.
- Step 2: His request goes to the CEO for approval via email.
- Step 3. CEO approves or rejects the request.
- Step 4: Requester is notified about the result via email. The end of the workflow.
The algorithm can be applied to similar use cases related to document approvals, expense claims, time-sheet approvals, vacation approvals, invoice payment approvals, etc. You can find a detailed guide on how to create a workflow in SharePoint below:
Creating of Workflow in SharePoint 2013
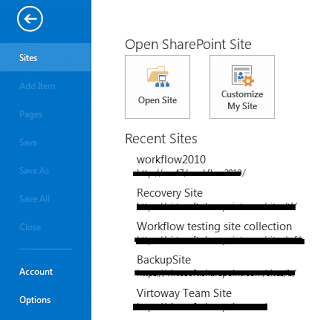
To create an approval workflow in SharePoint Designer 2013, go to the SharePoint Designer start page, select the site that has a list created before.
That’s the first step of creating the SharePoint 2013 approval workflow.
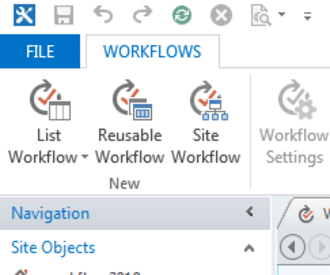
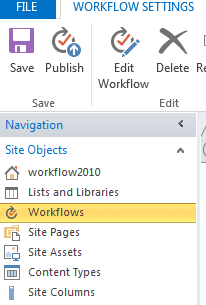
Select “Workflows” on the left navigation pane.
Then click on “List workflow” and select your list.

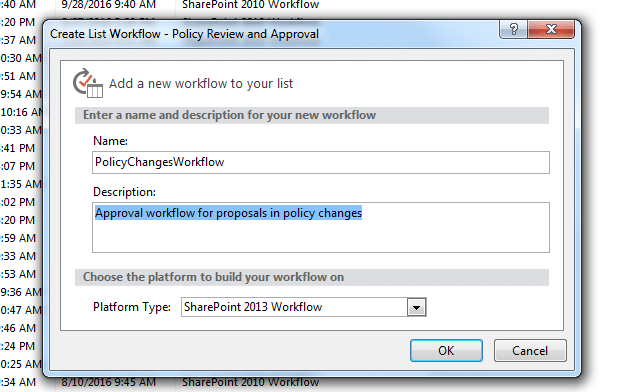
Here you should add a new SharePoint Designer 2013 workflow to the list, enter its name and add a description.
Now you can move on to building your SharePoint 2013 workflow.
SharePoint Workflow Tutorial
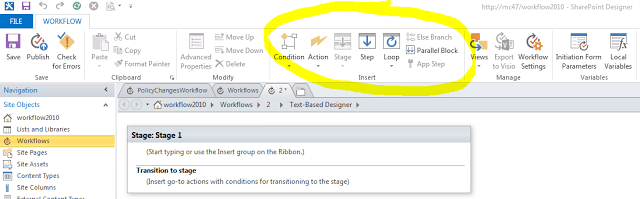
You can add Conditions, Actions, Stages, Steps, and Loops to this workflow from the SharePoint Designer ribbon.
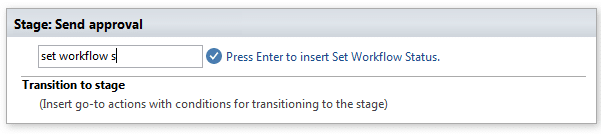
You can also build a SharePoint 2013 approval workflow without clicking on the ribbon. Say, you can rename “Stage 1” to “Send approval” stage. All you have to do is to click on “Stage 1” and… rename it!
Next click the “Start typing…” string and start typing, as it is expected, the Action name. We need to add the “Set workflow status” action, you can select it from the “Action” dropdown on the ribbon as well. That’s the easiest way to create SharePoint 2013 approval workflow.
SharePoint 2013 Workflow Actions
SharePoint workflow actions are individual functions (such as sending emails, updating items, etc.) that perform as a workflow’s part. For a notice: the available SharePoint workflow actions can be expanded with 270+ ready-to-use activities by Virto. These actions allow you to easily automate any business process in SharePoint without coding.
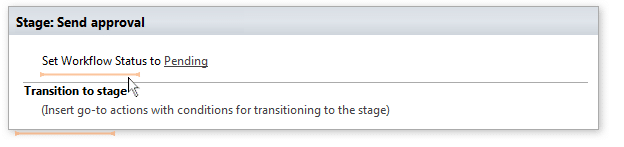
So, we have added the “Set workflow status” action to the workflow. Now we have to specify a value to track the changes in the request status. Just click on “This message” and type “Pending.”
The next step is to specify the request’s due date that will be sent from the list.
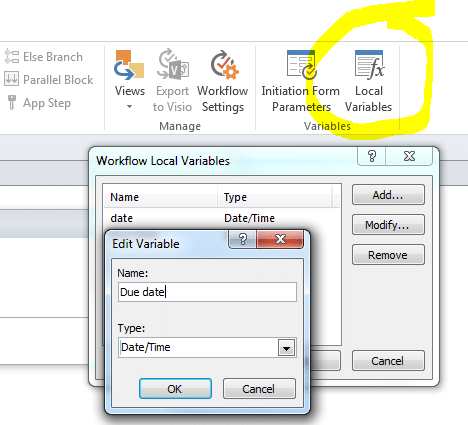
First, we have to add a new “Due date” variable. Click “Local variables” on the ribbon, select “Add”, type the name of the new variable, and select the “Date/Time” type. Save it.
Now let’s go back to our action. To call out a new action’s row, double-click on the orange line under the first action’s row.
Select the “Add time to date” action as shown above. Click on “date,” then click on the 3 dots. You are to specify the date value on the popup triggered by the click.
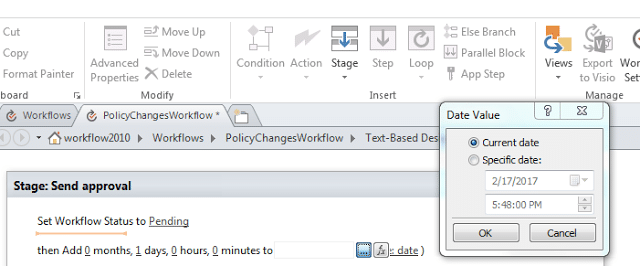
Select “current date” and change the value “0” to “1” in Days in the action string.
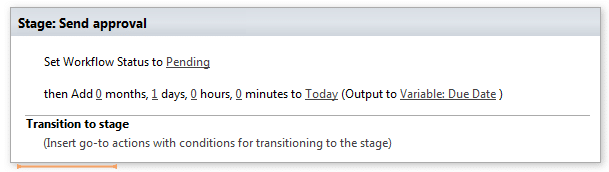
Next, we are going to use the “Due date” variable created before. Expand the Variables and select “Due date.”
As a result, each policy list’s request has a Due date value of one day after the request was created.
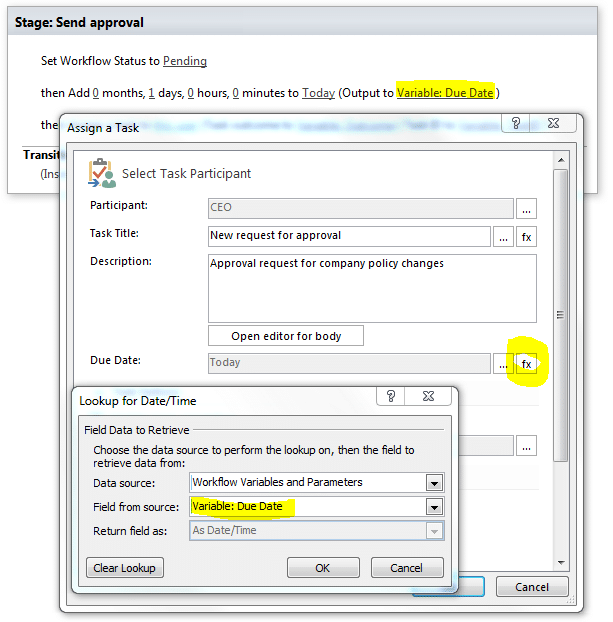
To indicate the task assignees, one should add the “Assign a task” action.

Click “This user” and define the values. Select a participant list that is expected to consider this request, and type in the task title. Then specify the Due date using still the same custom variable.
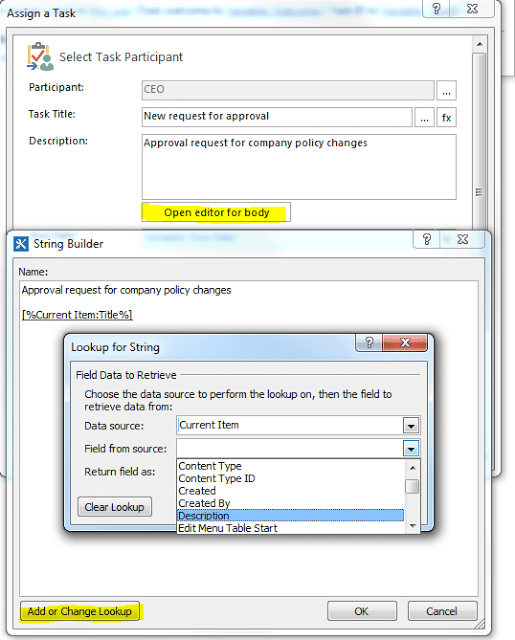
Next, I am going to make an alert email more informative. My approver might want to know the request details.
Open the message body editor by clicking the option under the Description field. Then add 2 strings: Title and Description. Actually, the two text fields are the only content of my list. Thus, the email alert will be displaying the request values.
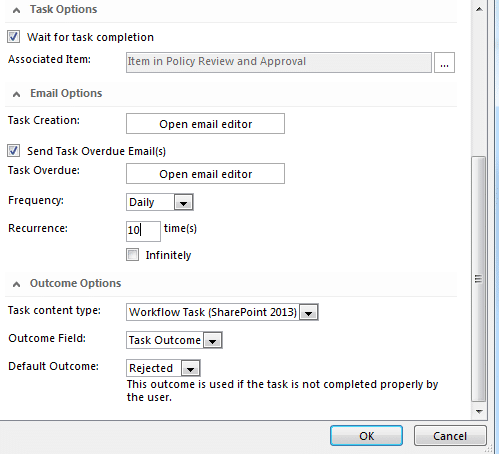
Let us take a look at some other options. The task email editor enables you to customize a message design. It is also possible to set the frequency value for overdue task notifications. Let’s say, daily, to make the request issue impossible to ignore.
SharePoint 2013 Workflow “if” Settings
At this step, we are going to set up a workflow algorithm depending on the CEO’s reaction to the request. Our way to create a workflow in SharePoint considers this aspect too.
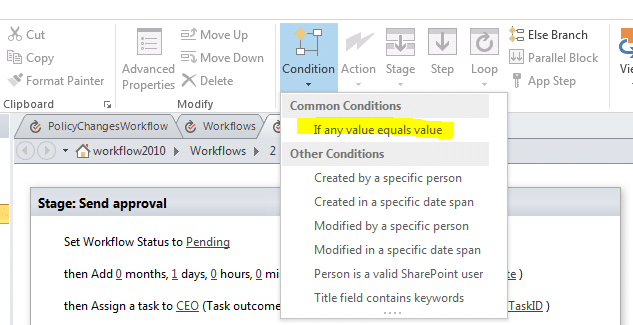
Our approval of SharePoint workflow could be resulting in 2 ways. That’s the right moment to add the “If” condition from the ribbon.
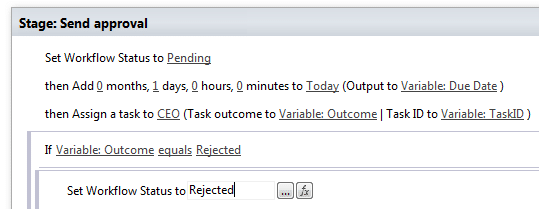
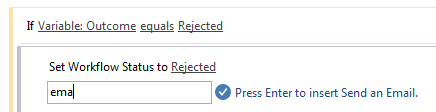
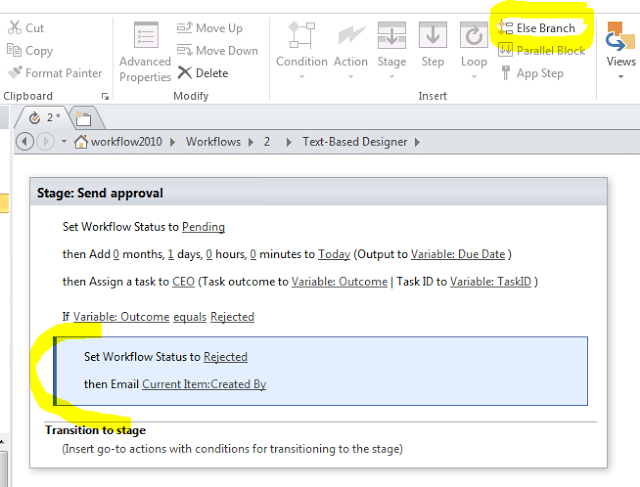
Select the “Outcome” variable, and pick the “Rejected” value. Then we should define a workflow action triggered on by the request rejection. First, we have to change the workflow status to “Rejected” the same way we performed to the “Pending” status action.
Creating SharePoint Workflow Email Notifications
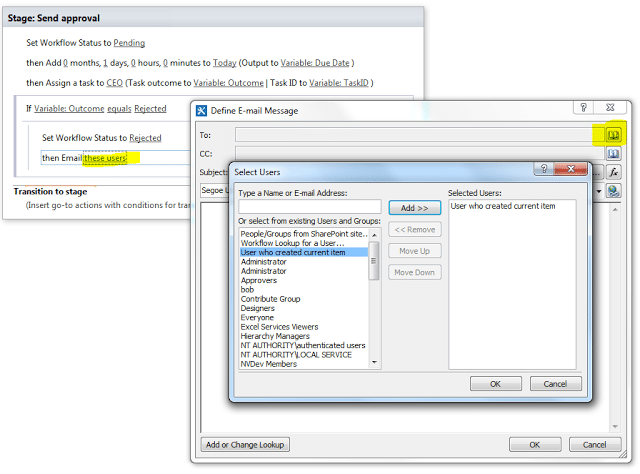
The next thing to do is to inform the request’s initiator about the rejection. Select the “Send an Email” action and assign the addressee. It’s a very useful feature for SharePoint 2013 workflow.
Click the “These users” action and specify the users in the email settings. The request notification email will be sent back to its initiator.
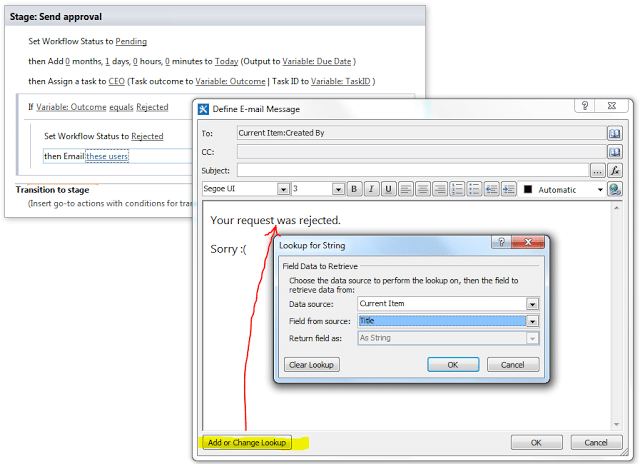
What if someone have sent over 20 requests? We need to determine which of the requests have expired. Add a lookup to the email body to display the request title.
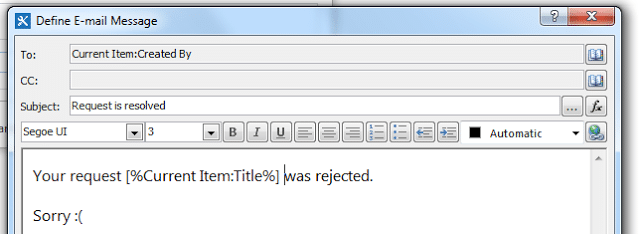
Here is the result we have got:
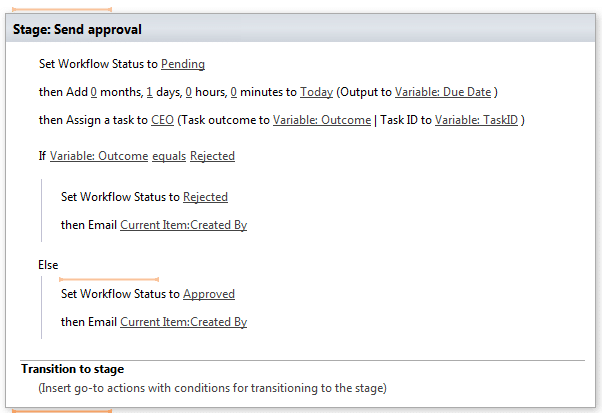
Now, let us set up an approved request notification email. Add the resolution text using the “Else Branch” option. The option is grayed out on the ribbon, until one clicks the existing conditional block.
Add the same two SharePoint workflow actions we have used above for the Rejected request. The email notification should contain a positive message about the request approval.
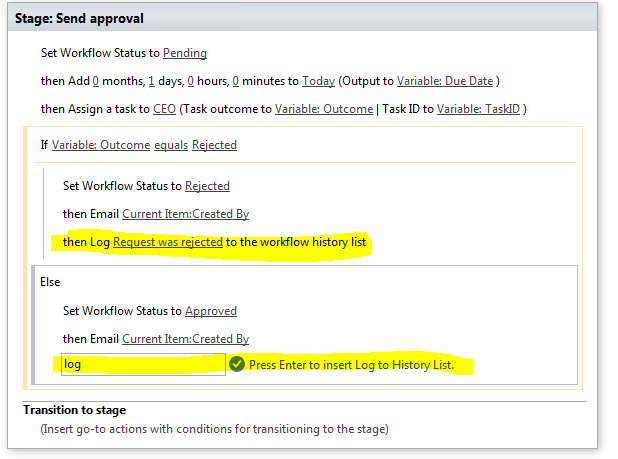
Creating SharePoint Workflow History
Our tutorial on how to create a workflow in SharePoint is almost completed. And finally, let us supply our SharePoint Designer workflow with log reports.
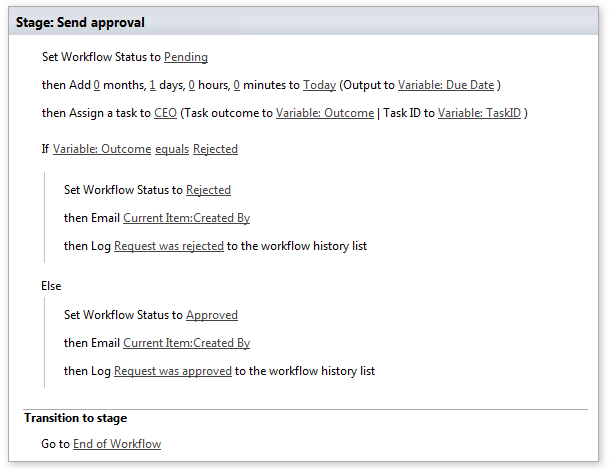
Add the Log action after each block and type in its status.
Next, add the final stage below, select the “Go to a stage” action, and change its value to “End of workflow”.
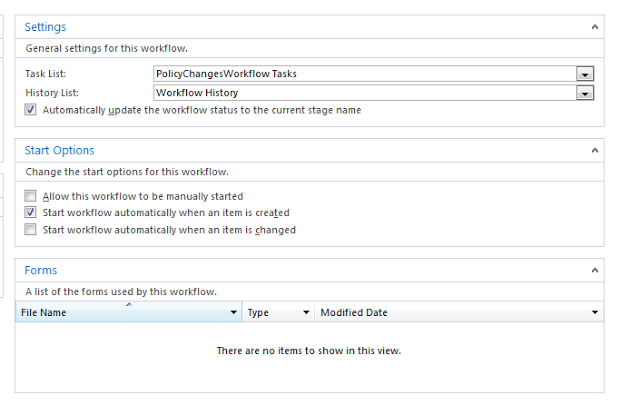
Done. And the finishing touch. Define start settings for the created workflow. Our workflow is to start every time a new request has been added to the list.
Make sure to save and publish your workflow using the options on the SharePoint Designer ribbon.
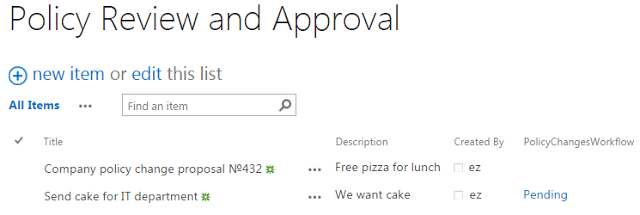
It is recommended to run your freshly created workflow through a test. Go back to the request list, and add a new request. Say, let it be a reward claim for producing this blog post. Once a new request has been added, it gets displayed with “Pending” status, as our SharePoint workflow has started.
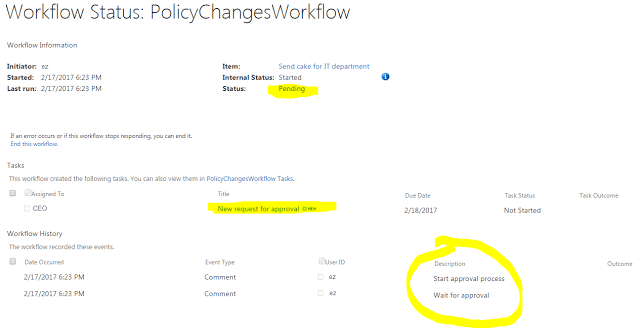
Click on “Pending” status to see the workflow details. As you can see, the approval task is assigned to CEO, and you can track all your request changes. Again, a result notification message will be inboxed to you. This is one more reason to create a workflow in SharePoint.
We have proceeded with a SharePoint 2013 workflow creation step by step. Now you know how to create a workflow in SharePoint 2013: the same way you can build your own SharePoint Designer workflows to automate your corporate business processes. The trick is to have a wide range of workflow actions to avoid custom coding.
The Virto SharePoint workflow activities kit allows you to use over 270+ actions to increase your team productivity. Learn more about the kit on our site and view the full list of the SharePoint Designer workflows extended by Virto.