The method described below can be used to start a workflow for SharePoint 2007 or SharePoint 2010 at a specific time and then repeat periodically (every day).
You can start workflow for multiple items at the same time.
Also it is not required to use Microsoft Visual Studio.
Periodic Workflow Processing
A useful implementation of this technique allows you to configure workflows to run as background tasks at a specific time instead of being triggered by a user manually, or after creating or modifying a list item. This allows you to process SharePoint data when the SharePoint environment is not being used as long as tasks need to complete.
For example, this method can be used to configure a looping timer workflow that supposed to run every day (18:00) to perform calculations and processing on a list item before emailing a reminder, or details to a user associated with the list item or document.
Run workflow for multiple items
Another useful implementation of this technique allows you to start workflow for multiple items automatically instead of being triggered by a user manually. This allows processing multiple list items at the same time. You can use SharePoint View or custom CAML query to execute workflow.
For example, this method can be used to check and move all expired list items periodically.
Looping Timer Workflow
When a workflow takes time to process but doesn’t require manual input or a user to work on it, it is possible to configure the workflow to run as a background process without involving users to initiate the workflow every time it is required, as well as allowing complex and timely processing to be completed “behind the scenes”.
Solution
Step 1. Create SPD Workflow for SharePoint
Just run SharePoint Designer and create SPD Workflow for single list item. Check errors and Publish new workflow.
For example, create and send email alert workflow, remove expired item and etc.
Step 2. Download and install Virto Workflow Scheduler for Microsoft SharePoint 2007 and 2010
You can download Virto Workflow Scheduler for Microsoft SharePoint from the component page https://www.virtosoftware.com/sharepoint/workflow-scheduler-web-part/
Step 3. Go
You do not need any more lines of code or Microsoft Visual Studio to create SharePoint job.
When Virto Workflow Scheduler is installed, go to core SharePoint site and find “Site Actions – Site Settings – Modify All Site Settings” page.
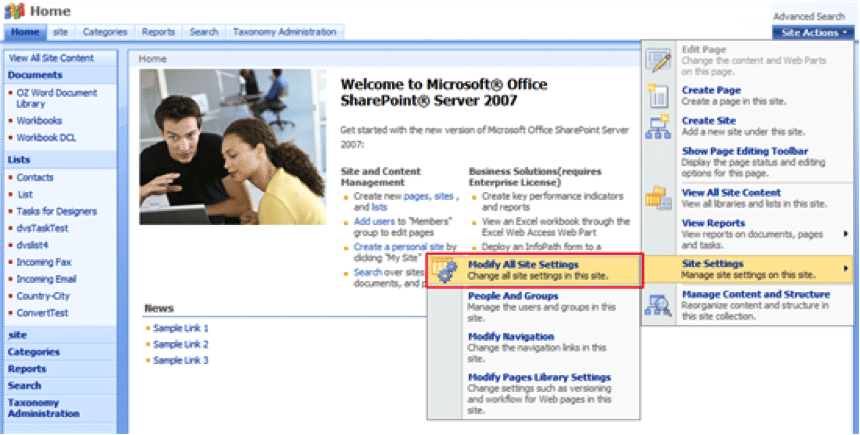
Then find “Virto Workflow Scheduler” link and follow it.
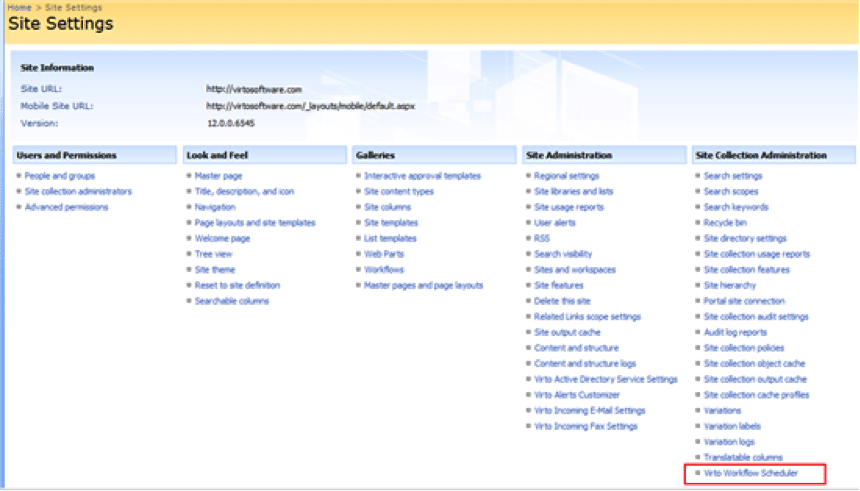
You will go to Virto Workflow Scheduler page.

To create a workflow schedule, click “Create”.

Now you need to define new schedule settings.
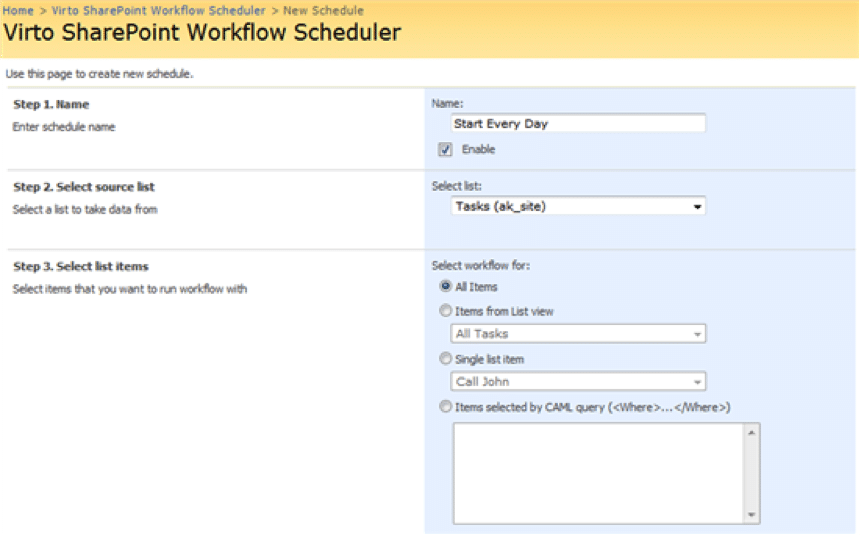
First of all enter schedule name and check the box “Enable”.

Now select a source list with workflow (all lists containing workflows will be displayed in the dropdown).

Then you need to define items which the workflow will work for. You can select all items:
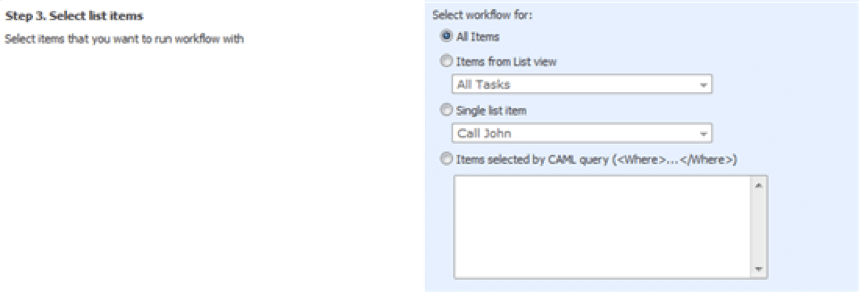
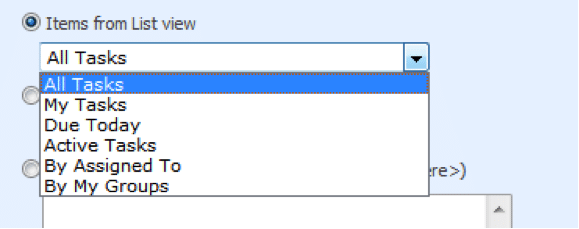
Or items from a certain list view:
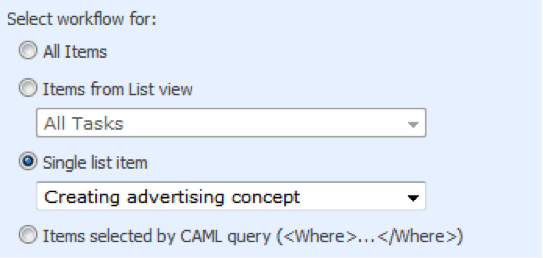
Or a single list item:
It is also possible to define items selected by CAML query.
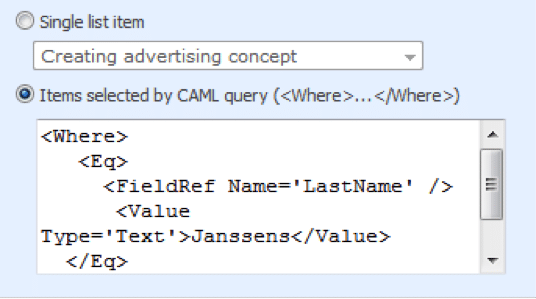
Note: We offer use U2U CAML Query Builder to create correct CAML Query.
Then select a workflow that will be run for selected items.

If you want to change event data defined for selected workflow, you can edit it (optional field).

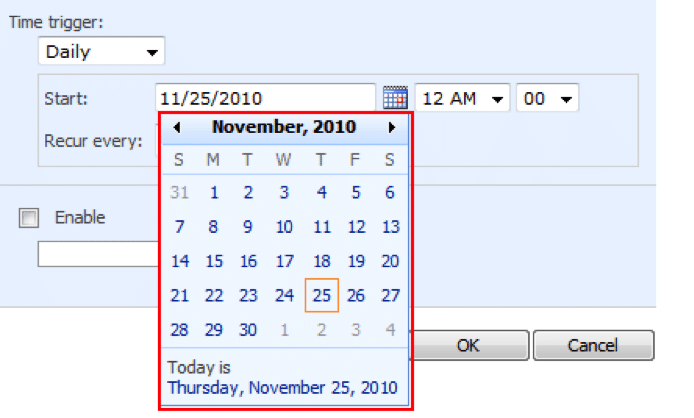
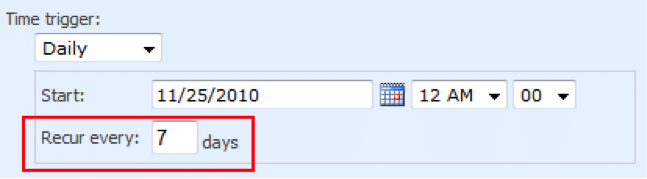
Then set time trigger and define what date and time workflow should start.

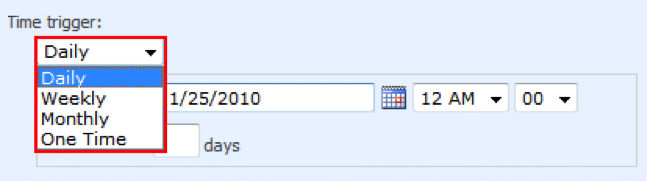
In case you need to set recurring, just define required settings.
Moreover you can start workflow under specific account (workflow are run under system account by default). Enter initials of SharePoint user, first and last bane will be displayed in the field form.

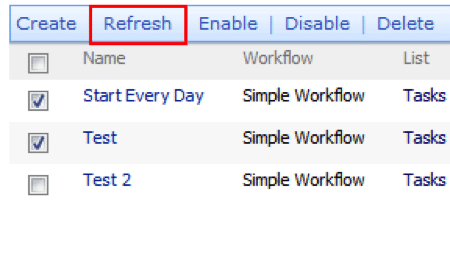
When the schedule is created, you will see it in the list of schedules on Workflow Scheduler page.
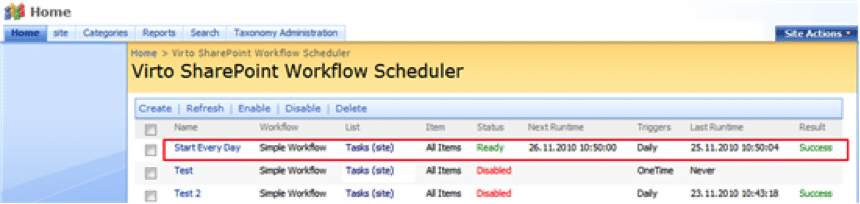
The following workflow details will be shown:
• Name (workflow schedule name);
• Workflow (selected from the list);
• List (source list and site);
• Item (items workflow will run for);
• Status (current state of the workflow);
• **Next runtime (**time when the workflow will be run);
• Triggers (type of schedule);
• Last Runtime (time of previous running);
• Result (the result of workflow).
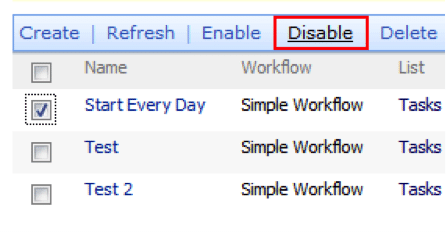
If you want to disable a workflow schedule, check the box of it and click “Disable”.
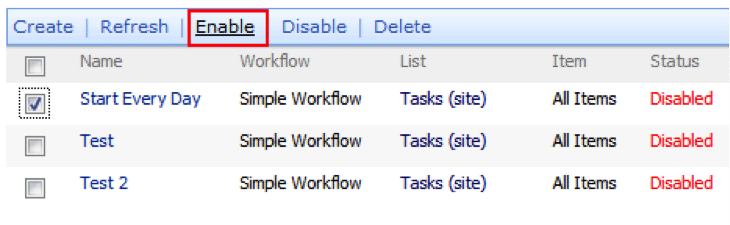
To enable a workflow schedule, check the box of required one and click “Enable”.
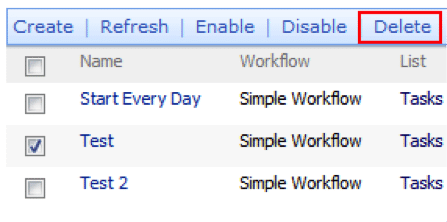
To delete a workflow, check the box of required one and click “Delete”.
To refresh data, use “Refresh” button.