With this example you can create unique identifiers of any complexity in any SharePoint objects. You don’t need any special programming skills or code writing.

class=“big-image” Custom Document Identifier provides you with the ability to tag documents with a unique identification number.

For this task, you need to download and install Virto Custom Mask and Unique Field Validation. This multi-purpose component allows you to create custom fields in design mode and check fields for unique criteria within the current list, site or site collection framework. To start, create a new list where you will be creating the new text field or go to an existing list. Then go to Settings > Create Columns.

Title the name of your new field as “Document ID”. If you have Virto Custom Mask and Unique Field Validation installed, a list of column types will be available. Select “Virto Custom Mask”.
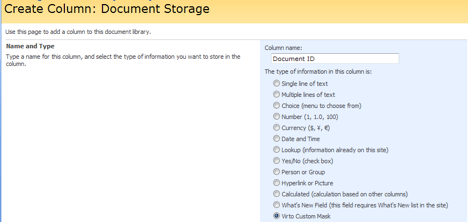
Once column type is selected, visual field editor will be available. It consists of several blocks.
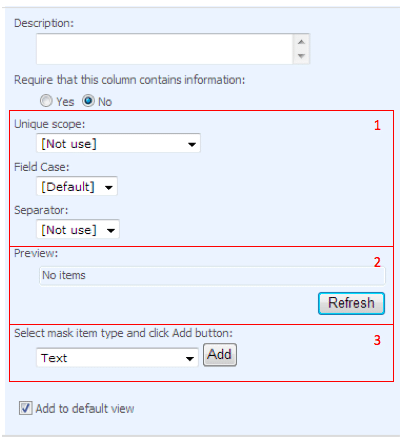
Block 1 defines unique scope, automatic field case and separator between elements. You can define the unique scope. The following options are available:
- [Not use] – fields are not validated whether or not they are unique;
- Current List – field value must be unique within the current list;
- Current Site – field value must be unique within the site and all columns with the same name;
- Must Have Matching Field Name and Type – field value must be unique within the current site collection and in all lists and all columns with the same name.
Block 2 contains mask preview which is refreshed automatically, but you can also refresh it manually by clicking the “Refresh” button. Block 3 allows adding, deleting and adjusting mask elements. You can add elements with the following types:
- Text – any text value;
- Date/Time – current date/time in free form;
- Existing Column Value – value from existing field;
- Site Name – name of site;
- List Name – name of list;
- Number – numeric value, auto increment is also supported (depending on unique scope type).
Let’s now create a unique identifier which will contain prefix, current date, unique number and custom string code.

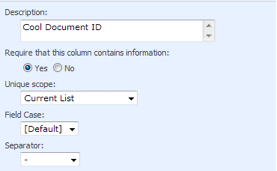
First of all, define the basic settings as follows: Unique Scope to be “Current List”; Field Case to be “Default”; and Separator to be “-“. It should look as below.
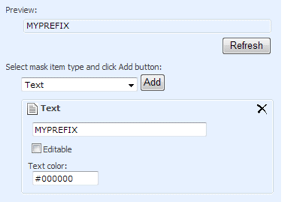
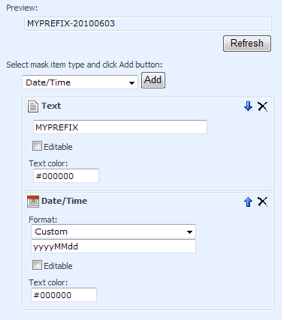
Now define the text prefix. Select “Text” in the mask item type field and click “Add”. Then enter “MYPREFIX” as the prefix and click “Refresh”. Here’s how it should look like:
You will then need to add current date. In order to do this, select “Date/Time" in the mask item type and click “Add”. Then define the required data format. Note: you can select predefined date/time formats or use custom ones. Please use the following links for reference on date and time formats: http://msdn.microsoft.com/en-us/library/az4se3k1%28v=VS.90%29.aspx http://msdn.microsoft.com/en-us/library/8kb3ddd4%28v=VS.90%29.aspx You will get the fields structure as shown on the picture below:
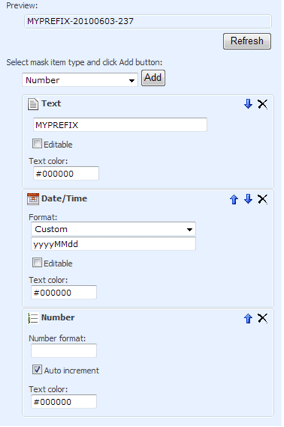
You can now define the auto increment number. Select “Number” in the mask item type and click Add. Check the box “Auto increment” in the new block. Then click “Refresh” to show all the changes in preview.
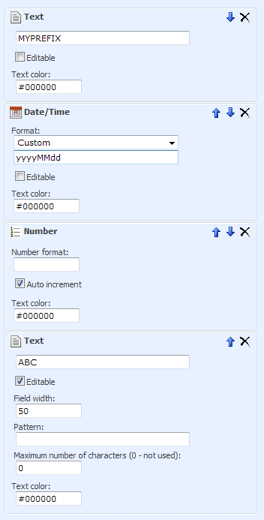
The final step is for you to add one more text block. But leave this block as editable and define the width to “50”. This text block will allow users to add a code. Field structure will look as follows:

And full scheme of adjustment is below:
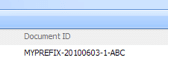
“Document ID” field is ready to use. Click “OK” to create it. When a new document is being created, Document ID field will now be available. Please note, once the field is created, you will not be able to change its structure, but you will be allowed to change the styles and unique values.

The system will automatically validate if the values in the current list are unique, while adding the auto increment number, and users will also be able to add their own suffix.
We have now described how to create a custom Document ID field that generates custom Document ID’s based on a certain algorithm, without the need for codes.
| Related Products: |
|---|
 |
| SharePoint Custom Mask and Unique Field Validation |