Do you tend to get everything done in time? If yes, congratulations! You have perfect planning and discipline skills. In today’s fast-paced world, time management and effective communication are two concepts that everyone has heard of but only few have seen. These two elements play a crucial role in productivity, teamwork, and, of course, in getting things done.
With the ever-growing need for efficient collaboration, we seek help from modern techniques and applications. Many have already tried and appreciated shared calendars-an easy-to-use solution that enhances transparency and improves organization of your team’s daily activities.
In this article, we’ll explore how shared calendars can transform the way you collaborate within the Microsoft 365 and SharePoint ecosystems. Whether you’re a non-technical professional or an IT expert, you’ll find that these tools are user-friendly, scalable, and offer infinite possibilities for customization. Solet’s dive in and see how shared calendars can make your team’s daily grind a breeze.
What Is a Shared Calendar?
A shared calendar is an online calendar that can be accessed, viewed, and edited by multiple users. It lets users view, create, or modify events, meetings, and deadlines, making it an efficient tool for managing resources and coordinating schedules. Most shared calendars can be used in real time by several users across different devices, ensuring allteam members have access to the calendar’s latest version.
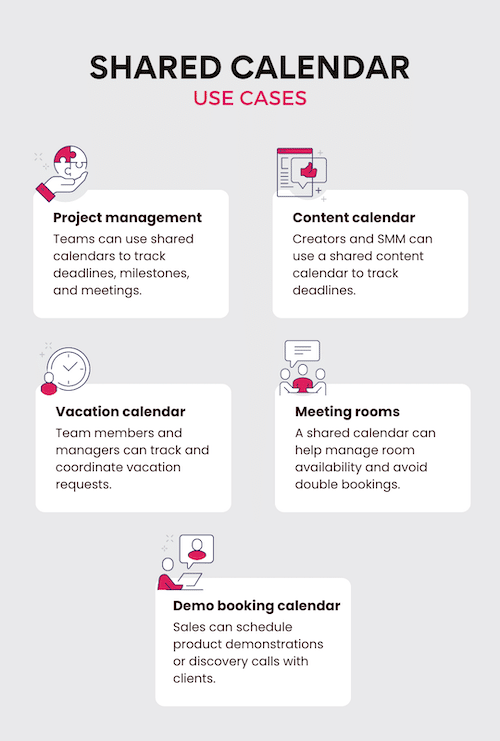
Here are some examples of shared calendar use cases:
Project management calendar: Project teams can use shared calendars to track deadlines, milestones, and meetings. By overlaying multiple calendars, team members can visualize the overall progress and spot bottlenecks, enabling them to allocate resources effectively.
Team vacation calendar: This shared calendar can help team members and managers track and coordinate vacation requests, so you can anticipate if awhole department is going on holiday at the same time, leaving the office cactus in charge. By visualizing everyone’s availability, managers can make informed decisions when approving time off requests.
**Content calendar:**Content creators and social media managers can usea shared content calendar to track deadlines. However, planning, scheduling, and preparing content across platforms is more convenient in agile boards. Try Kanban Board Pro toeasily keep track ofall the steps that need to be completed in a project.
Demo booking calendar: In a sales or customer support department, a shared calendar can be used to schedule and manage product demonstrations or discovery calls with clients. Team members can allocate time slots for demos, ensuring that they don’t overlap with other work plans.
**Meeting rooms:**You might argue,“meeting rooms in a remote-first world?”but for organizations with offline offices and multiple meeting rooms, a shared calendar can help manage room availability and avoid double bookings.
Overlaid calendars are shared calendars that can be combined to display events from multiple resources in a single view. This feature helps to visualize and compare events from different calendars, making it easier to discover opportunities for collaboration or spot scheduling conflicts. For example, overlaying a team vacation calendar with a project management calendar can help managers identify periods when certain team members are unavailable, thus contributing to adequate project planning. No more work on holidays, yay!
Have a question? Talk to our sales team
We’re here to help guide your journey!
Benefits of Shared Calendars
Shared calendars, for example, a Microsoft Teams shared calendar, bring enormous advantages for business processes, making collaboration and communication much more efficient and outcomes more predictable. Let’s take a closer look at some of the benefits:
Boost teamwork and collaboration
When using shared calendars within the Microsoft 365 (previously Office 365) suite, it is easier for team members to track progress, reach out to one another, and organize meetings without everyone double–checking schedules in multiple chats. This saves a huge amount of time.
Smooth scheduling and planning across apps and devices
This ensures that your team can easily create, edit, and view events and tasks, regardless of the app and device they’re using, leading to better coordination for remote teams and those who work on the go.
Master time management and stay focused
With a clear view of everyone’s schedules, deadlines, and appointments, users can prioritize their work and allocate time more effectively, which helps them to meet important deadlines.
Increase transparency and accountability
By introducing a shared calendar, everyone can easily see who is responsible forwhich task and event when deadlines are looming. It also helps to avoid scheduling conflicts. Although, if your meetings do not require a camera, ChatGPT may be able to discreetly fill in for you…
Creating & Managing Shared Calendars in Microsoft 365
Now that we’ve explored the benefits of shared calendars, let’s look at how to create and manage them within the Microsoft 365 environment. Our step-by-step guide will describe how to create a shared calendar in Office 365 (currently Microsoft 365)in a couple of minutes:
Step-by-Step Guide to Creating a Shared Calendar in Office 365 (Currently Microsoft 365)
Open Outlook (either the web app or the desktop app) and navigate to the calendar view by clicking the calendar icon in the top left of the screen (web app) or bottom left (desktop app).
In the left sidebar, click on “Add Calendar”and then “Create blank calendar.” In case you are using desktop app, right-click on any existing calendar in the list, and then “New Folder”.
Give your new calendar a name and click “Save” or press enter. Close the window. Your calendar is created!
To share this new calendar with your team, hover over the calendar name in the list of calendars in the left-hand pane. Click the three dotsright next to it, andselect “Sharing and permissions” or “Sharing Permissions**.**”
In the window that appears, enter the emails or names of the users you want to share the calendar with.
Select the desired users and assign appropriate permissions (such as “can view when I’m busy,”“can view event titles and locations,”“can view all details,” or “can edit”).
Click “Share” or “Done” to save your changes and share the calendar with your team members.
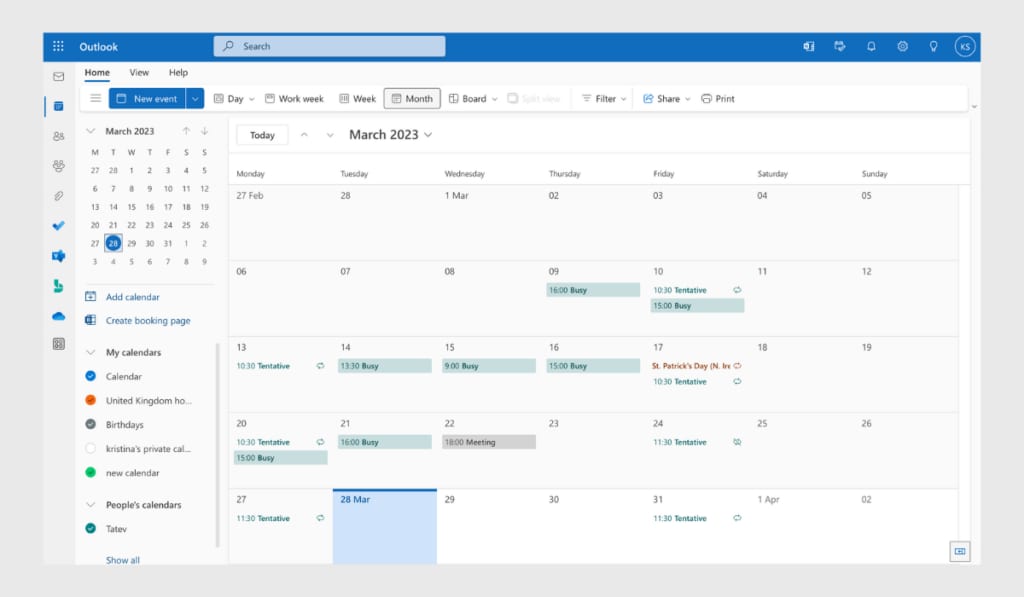
Here’s how the shared calendar with the “can view when I’m busy” permission looks in Outlook:
Best Practices for Managing Access Permissions
Managing access permissions is a must to ensure the security of your shared calendar. Here are thebest practices to follow:
Grant permissions based on roles: When assigning permissions, think of it like giving out the keys to your office. You wouldn’t give a copy to everyone in the neighborhood, right? Be thoughtful and grant editing rights only to those who genuinely need them. This approach helps maintain the calendar’s integrity and reduces the risk of unexpected “visitors.”
**Keep permissions up to date:**Make sure to regularly review and refresh your shared calendar’s access permissions. As team members change roles or leave the organization, it’s crucial to adjust their access accordingly.
Use user groups for easier management: Groups simplify the management of access permissions, letting you add or remove members from the group without needing to update calendar settings. Talk about a time saver!
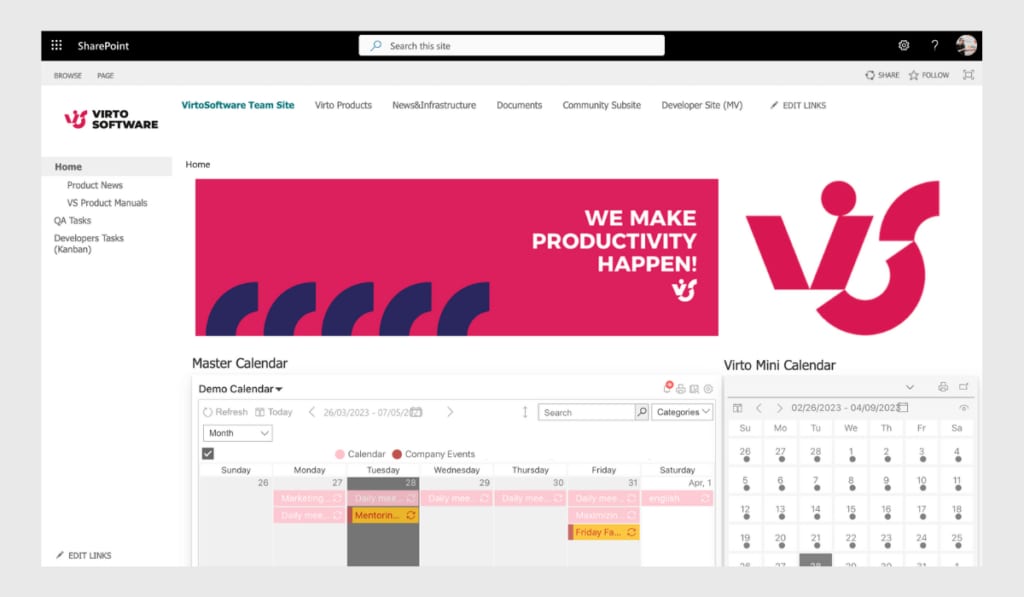
Exploring Shared Calendars in SharePoint
Think of SharePoint as the ultimate treehouse where your team gathers to collaborate and share their best ideas. This platform provides a space for storing, organizing, and accessing all kinds of information, making it the go-to spot for teamwork. And one of itscoolest features—yes, the shared calendars.
Shared calendars in SharePoint let your team stay in sync. All you need is a basic understanding of SharePoint and a pinch of curiosity. Once you master how to create a calendar in SharePointand tailor it to your needs, you’ll unlock a world of possibilities for streamlining your team’s planning and scheduling. Did you know that you can use your SharePoint calendar inOutlook? Read our article and learnhow to do it in a few steps.
Why is it essential to know how to overlay and share calendars in SharePoint.Well, just like a smartphone that you use on a daily basis, to fully unlockMicrosoft 365’s potential, it’s crucial to have a grasp of the ins and outs of SharePoint.After all, wedon’t buy iPhones to keep using only Nokia 3310 features.
Make sure to check out our ultimate guide to SharePoint Online to learn about its strengths and limitations and how to address the latter.
Integrating with Microsoft Teams and Other Applications
The Microsoft 365 universe is like an orchestra, with each application playing its part to create a harmonious sound. By integrating shared calendars with Microsoft Teams and other apps, you can achieve a synchronized collaboration experience, turning your team’s tasks into a perfectly orchestrated performance.
How Microsoft Teams Incorporates Shared Calendars for Seamless Collaboration
Microsoft Teams acts as a virtual hub for teamwork, bringing people together to chat, call, and collaborate. One of the key ingredients that makes this collaboration even more effective is… *drum roll*… shared calendars!
By incorporating shared calendars within Microsoft Teams, team members can easily access and manage their schedules without juggling multiple apps and tabs. You can sync your Outlook calendar, SharePoint calendar and any other Exchange calendar with Microsoft Teams, as they are all located within a single Microsoft 365 ecosystem.
Conveniently, you can create separate shared calendars for each of your channels in Microsoft Teams. Check out our article on Microsoft Teams shared calendar appsfor detailed information.
Exploring Additional Integrations
Microsoft loves to integrate both their native and third-party apps, so you’ll find additional integrations to make your shared calendar experience even more delightful:
Exchange Online: Think of Exchange Online as the helpful mail carrier, delivering and synchronizing your calendar events between Outlook and SharePoint. With this integration, you can seamlessly manage your shared calendar from either platform.
Microsoft Planner: Planner is like the master choreographer, keeping your team’s tasks and projects perfectly synchronized. By integrating it with shared calendars, you can visualize and track deadlines, ensuring that everyone knows when the next big performance is due.
Microsoft Lists: Lists are like a trusty clipboard, helping you keep track of important information. By connecting Lists to shared calendars, you can create custom calendar views with all the necessary data, adding an extra layer of organization to your team’s planning and scheduling.
iCal Data Sources: Want to incorporate external calendar data into your shared calendar? It’s easier than you think—iCal allows you to import calendars from other sources and view them safely in your ecosystem.
With these integrations, shared calendars in Microsoft 365 and SharePoint become the ultimate collaboration hub, empowering your team to work together. And we haven’t even discussed third-party apps yet!
Implementing Shared Calendars in Microsoft 365 & SharePoint: Tips
In this section, we will share some tricks for implementing shared calendars and optimizing them for your needs and those of your team.
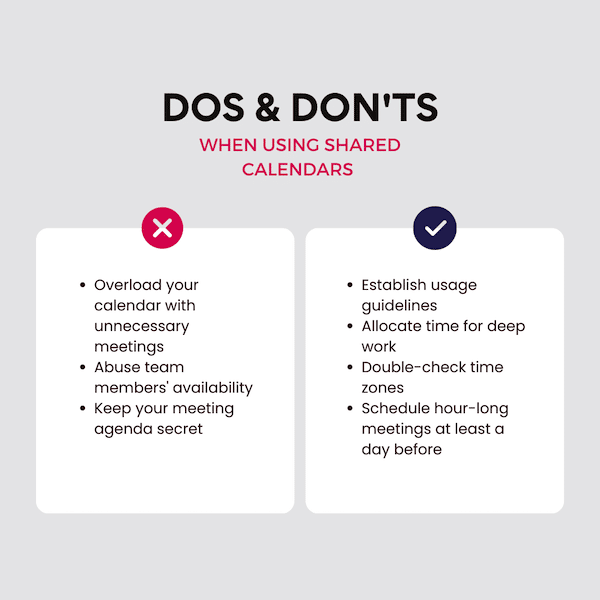
Establishing calendar etiquette and usage guidelines
Consider discussing the rules for using the calendar with your team beforehand to avoid awkward situations and abuse of team members’ availability. Seven meetings per day may be quite tiring, and this numberof discussions can chip away at productive hours.
Set clear guidelines for calendar usage
Navigating a shared calendar without guidelines is like assembling Ikea furniture without instructions—it may lookokay, butcan be scary to use. Establish clear guidelines for your team on how to use the shared calendar, such as what types of events should be added, how to label and color-code them, and other relevant rules.
Allocate the time slot for deep work
It would be handy if all your team members set busy hours so that no one is distractedby unexpected meetings and productivity is not sacrificed. If your Outlook calendar is packed to the brim with calls, we suggest using apps, like MakeSomeBreak by Virto, to secure breaks between meetings.
Be clear and motivating about the meeting agenda
Be sure to include not only the participants and the topic of the meeting but also what subtopics you need to discuss and what the intended outcome is. Try to phrase the meeting agenda in a way that sounds motivating and sets out the result for everyone involved.
Make sure your time zones match
If you add a calendar to SharePoint but you and your colleagues are in different time zones, the times will usually adjust to everyone’s local time automatically, but it’sa good idea to ask your administrator to double-check just in case. If you and your team are spread across, for example, Asia, the USA, and Europe, ideally put a “busy time” slot in your calendar for the hours when you are unavailable. This will help to avoid confusion and prevent colleagues scheduling meetings at midnight.
Is it worth meeting?
There are more and more things to do and less and less free time,so make sure that all your meetingsare necessary ones. Otherwise, don’t be surprised when your colleague likes some “I survived another meeting that should have been an email” post on LinkedIn.
Customizing and Organizing Calendars to Suit Your Needs
Let’s look at some real-world tips on how to organize your calendars. To use the handiest of these features, you will definitely need Virto Calendar App.
Create multiple calendars: Set up different calendars for various purposes, such as team projects, company-wide events, or personal tasks. This helps declutter your schedule. And when you need a full picture, simply overlay the calendars.
Color-code events: Color-coding enhances visual clarity and helps you toidentify events at a glance. You may want to use this to assign different colors to event categories, departments, or even team members.
Use relevant calendar views: Don’t try looking for events in the quarterly calendar, when you can switch to the working week with a single click. Choose the view that best suits your current needs.
Subscribe to important calendars: Stay informed about other team members’ schedules by subscribing to their calendars. And if the calendar is located outside the Microsoft 365 ecosystem, you can display it using iCal.
Install your calendar’s apps to other devices: The apps are easy to work with because your calendars automatically sync across all your devices,so you can access up-to-date calendars anytime, anywhere, without fear of missing out on an urgent meeting.
Introducing Virto Shared Calendar: Effortless Event Sharing for Teams
While advanced solutions like Virto Calendar App allow you to combine and visualize multiple calendars from SharePoint, Outlook, and other sources, sometimes teams just need a simple, user-friendly shared calendar—without the complexity of overlays or integrations.
Virto Shared Calendar is designed for exactly that:
- Quickly create and share events with your team or external stakeholders
- No Microsoft account required for sharing—perfect for inviting guests or clients
- Color-code and tag events for easy organization
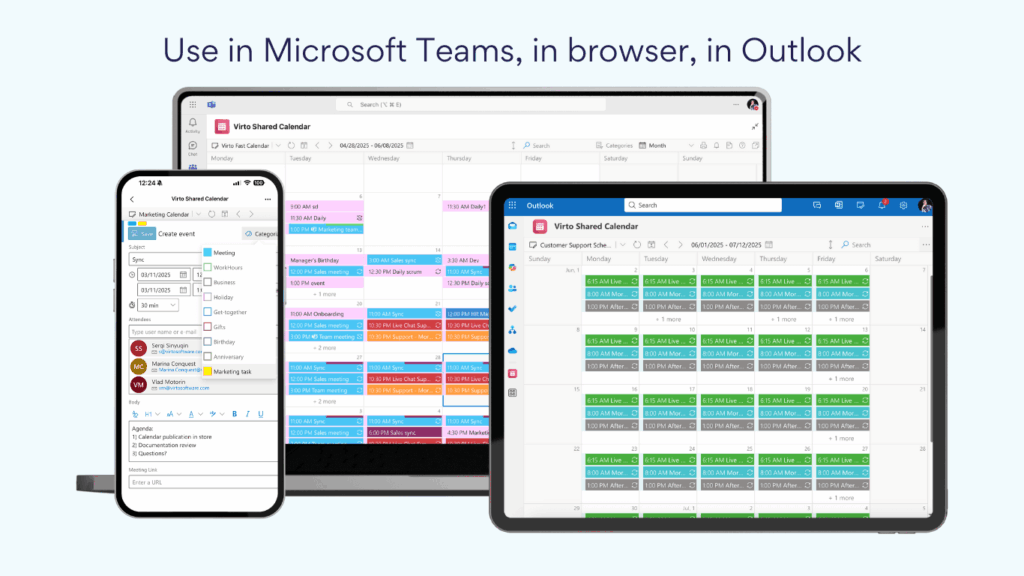
- Access from Microsoft Teams or any browser
- Minimal setup, maximum convenience
When should you choose Virto Shared Calendar?
| Use Case/Need | Virto Shared Calendar | Virto Calendar App |
|---|---|---|
| Simple event scheduling & sharing | ✓ | ✓ |
| No Microsoft account required to view | ✓ | ✗ |
| Overlay multiple calendars | ✗ | ✓ |
| Integrate with Planner/Outlook/SharePoint | ✗ | ✓ |
| Anonymous sharing | ✓ | ✗ |
| Color-coding and tagging | ✓ | ✓ |
| Best for | Quick, easy event sharing | Unified, advanced calendar views |
Tip:
If your team needs a straightforward way to coordinate events, share schedules with external users, or simply avoid the complexity of multi-calendar overlays, Virto Shared Calendar is a perfect fit. For more advanced scenarios—like aggregating multiple Microsoft 365 calendars into a unified view—Virto Calendar App remains the go-to solution.
Ensuring Data Privacy and Security within the Microsoft 365 Environment
DevOps and administrators in your organization are good people to talk to about this topic, but here’s a quick overview of the most important things:
Permission management: Manage user permissions carefully to protect sensitive information. Assign appropriate access levels for each team member to ensure they can only view or edit the events relevant to their role.
Audit logs and monitoring: Regularly review audit logs to detect any unauthorized access or changes to shared calendars. Consider implementing alert systems to notify admins of any suspicious activity in real–time.
Secure connections: Ensure all users connect to your Microsoft 365 environment through a secure network. Encourage the use of VPNs, especially when accessing calendars from public networks or personal devices.
Train your team: Educate your team members about data privacy and security best practices. Don’t assume that everyone understands everything—it’s better to set clear instructions on all the security aspects across all teams.
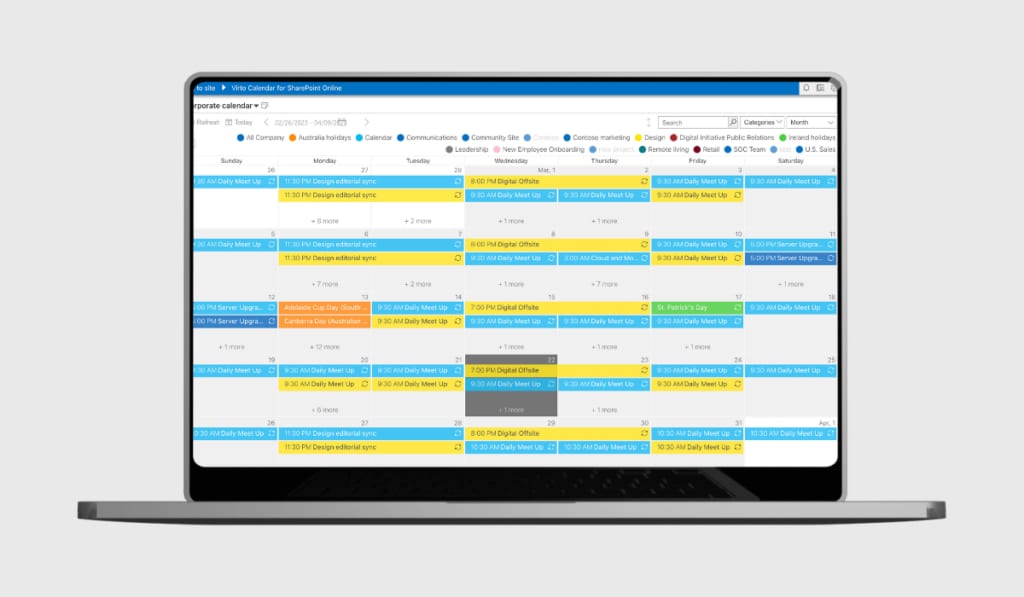
Introducing Virto Calendar App
Virto Calendar App is a solution designed to amplify the efficiency and productivity of your Microsoft 365 experience. With its advanced features and seamless integration, Virto Calendar App enables businesses to prioritize return on investment while ensuring a secure and collaborative environment for users, whether in technical, marketing, sales, or any other teams.
Features of Virto Calendar App:
- Sharing and overlaying calendars from different sources
- Color-coding and customization
- Advanced filtering and search
- Secure data access and permissions
- Quick integration with Microsoft Outlook, Teams, and SharePoint
Virto Calendar App’s advanced features, infinite customization possibilities, and secure environment make it the ultimate solution for businesses looking to optimize their daily workflow and planning.
Don’t miss the opportunity to revolutionize your calendar management experience. Start your free trial today and unlock the full potential of your Microsoft 365 calendar!
Overlay all your calendars in one place
Try Virto Calendar to have all your Microsoft 365 calendars in a unified view.
FAQs
- How to share an Outlook calendar?
Here are detailed instructions on how to share an Outlook calendar using the Outlook desktop application or the web app:
Open the Outlook app or go to outlook.live.com.
Navigate to the calendar view by clicking the calendar icon in the upperleft corner.In the left-hand paneunder “My Calendars” or “Shared Calendars,”find the calendar you’d like to share.
Hover over the calendar you want to share and select “Sharing and Permissions” or “Share Calendar” from the context menu.
In the sharing invitation window, enter the email address or name of the recipient(s) you want to share the calendar with.
Choose the level of access you want to grant the recipient(s).
Click “Send” or “Share” to send the sharing invitation. The recipient(s) will receive an email with a link to access the shared calendar.
Please note that these instructions may vary slightly depending on the version of Outlook you are using. If you encounter any issues, we advise you to refer to Microsoft’s documentation.
- How to create ashared calendar in Outlook?
A shared calendar in Outlook is a convenient way to coordinate schedules with your colleagues. Creating a shared calendar in Outlook takes no more than five minutes. Here’s how to do it using the Outlook desktop application or the Outlook web app.
Outlook desktop application:
Open Outlook and navigate to the calendar view by clicking the calendar icon in the bottomleft corner.
In the left-hand pane, under “My Calendars,” right-click on “My Calendars” or “Calendar” (depending on your version) and choose “New Folder.”
Name your new calendarand click “Save” or press enter.
The new calendar will be created and displayed in the left-hand pane.
To share the calendar with others, right-click onthe new calendar and select “Sharing Permissions” or “Share Calendar” from the context menu.
In the sharing invitation window, enter the email address or nameof the recipient(s) you want to share the calendar with. Choose the level of access you want to grant the recipient(s).
Click “Share” or “Done” to send the sharing invitation. The recipient(s) will receive an email with a link to access the shared calendar.
Outlook web app:
Go to outlook.com, log in to your account, and click on the “Calendar” tab or the calendar icon in the upperleft corner of the screen.
In the left-hand pane, click “Add Calendar.”
Select “Create a new calendar” or “Blank calendar” from the options.
Enter a name for your new calendar and click “Save.” The new calendar will be created and displayed in the left-hand pane under “My Calendars.”
To share the calendar with others, right-click on the new calendar and select “Sharing and permissions” or “Share Calendar” from the context menu.
In the sharing invitation window, enter the email address or nameof the recipient(s) you want to share the calendar with. Choose the level of access you want to grant the recipient(s).
Click “Send” or “Share” to send the sharing invitation. The recipient(s) will receive an email with a link to access the shared calendar.
After completing these steps, you will have successfully created and shared a calendar in Outlook. The recipients can open the shared calendar in the Outlook web app or desktopand edit events ifyou’ve granted them permission to do so.
- How to add ashared calendar in Outlook?
If someone has shared an Outlook shared calendar with you, adding it to your Outlook is easy. Here are the instructions on how to add a shared calendar in Outlook:
Open the email from the person who shared their calendar with you.
Click the “Add this calendar” button,and you’re done!
The button in the emailwill change to “View calendar.” Click it to view the calendar you just added.
The shared calendar will now appear under “Other Calendars” or “People’s Calendars” in the left-hand pane.
Now that you’ve added the shared calendar, you can view it alongside your calendar. Depending on the Outlook shared calendar permissionsyou’ve been granted, you may be able to edit the events.